


In February 2014, Apple banned all Bitcoin wallets from its App Store. But since it has reversed its decision and now there are a number of awesome Bitcoin wallets available for iPhone, iOS, and iPad.
breadwallet
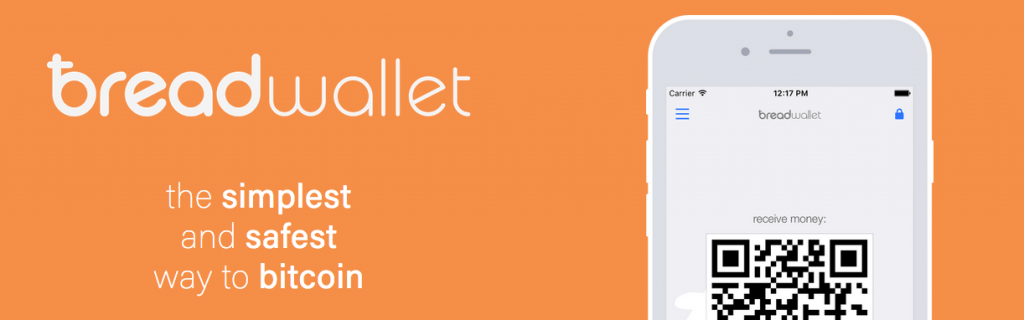
breadwallet is perhaps the most popular Bitcoin wallet for iPhone. It’s super easy to use and gives users complete control over their funds.
The interface is clean and makes using the wallet easy even for new Bitcoin users. The recovery process is also explained well which helps prevent new users from losing their bitcoins due to rookie mistakes.
Airbitz
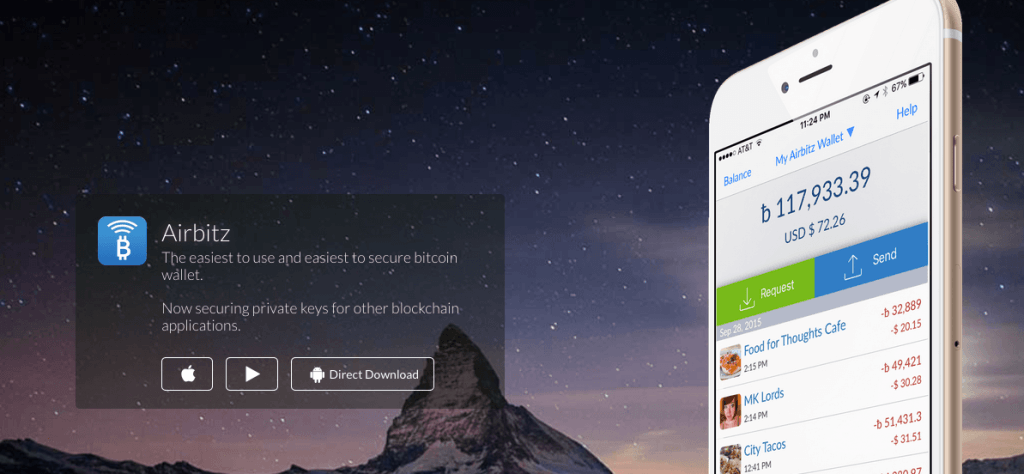
Airbitz is a feature packed Bitcoin wallet for iOS. It aims to make spending bitcoins a breeze, since it offers a Bitcoin merchant directory and the ability to buy gift cards from within the app!
A unique features of Airbitz is that it automatically backs up your wallet. So there is no confusing recovery process if you lost your phone!
Frequently Asked Questions
This section will aim to answer some of the most common questions related to iOS and iPhone Bitcoin wallets.
Why can’t I store large amounts of bitcoins on my iPhone?
iOS wallets are hot wallets. Any wallet that is on an internet connected device like an iPhone is a hot wallet. Hot wallets are more vulnerable to hackers because hackers access and infect devices through the internet.
For secure storage, you need a cold storage wallet which means the wallet is stored and use only on an offline device. An example of this type of wallet are hardware wallets like the Ledger Nano S or a paper wallet.
How do I know the wallet I am using isn’t a scam wallet?
All of the wallets listed above are open source, which means the code is public and can be checked by other developers. For most people this won’t matter, since most people do not understand how to check software.
But you should know that most of the wallets have been looked over by other developers.
Any risks to be aware of if I have a jailbroken iPhone?
If you have a jailbroken iOS device you should be very careful about storing any amount of bitcoins on the device.
Jailbroken devices are more vulnerable to being hacked.
Do hardware wallets work with iOS devices?
iOS has a limitation in that unlike Android devices it cannot connect with hardware wallets. If you have a hardware wallet you will have to use it with your computer.
Are iOS wallets free or paid apps?
All iOS wallets listed on this page are 100% free apps. Hardware wallets are the only Bitcoin wallets that cost money.
If someone has access to my phone, can they take my bitcoins?
It depends on what wallet you’re using. Some wallets allow you to set a PIN code so that only you can access the coins. Most of the wallets listed above also encrypt your wallet so that it would be very hard for the average person to access should they have your phone.
Still, you should always keep backups and if you do lose your phone, restore the wallet backup onto your new phone or send them to a different wallet.
How do I create a backup of my wallet?
Each wallet will walk you through backing up your wallet when you set it up. There are different methods. Most have you write down a 24 word seed that is a backup of your wallet.
Can I use more than one wallet at a time?
Of course. There are no limitations on how many or which wallets you can use. We recommend you download a few wallets, test them out and decide which one you like best!
Are there any wallets that work both on my iPhone and desktop computer?
Yes, but there are not a ton of options. Copay is one of the few wallets that works cross-platform, meaning you could use it on your iPhone, iPad, Android and desktop all at the same time. All of your transactions would be the same across all of the devices.
What’s better about using an iOS wallet over a web wallet?
Web wallets like blockchain.info have a long history of bugs. Web wallets are also accessed in your browser, so it is much easier to fall for simple phishing attempts and lose your coins.
I personally receive a few phishing emails a week in my inbox targeting blockchain.info users. These end up in my spam folder, but it’s still a risk that less technical people may accidentally mess up with, which is why apps installed on your device can provide a bit more security.
I only need secure storage, so do I have any use for an iOS wallet?
If you use a hardware or paper wallet for secure storage of bitcoins, nice job! Having an iOS wallet installed on your device still might be helpful.
Once you buy bitcoins, it’s always best to get them off the exchange and into your own wallet. So if you can’t access your hardware wallet, you can at least send coins from the exchange to your iOS wallet before you get on your desktop computer and send the bitcoins to your paper or hardware wallet.
Also:
You can always keep a little bit on your wallet to show your friends how Bitcoin works by sending them a small amount!
Any risks to be aware of?
Yes! Apple does not check every wallet that it allows into the app store. There have been many apps that were approved by Apple that were simply malware and stole any bitcoins that were deposited.
Do research on any wallet you download especially if you’re going to use it with significant amounts of money. We do not like to see people have bad experiences with bitcoins, especially since the transactions are irreversible.
Also, make sure you are download the correct wallet from the right developer. Not only have there been scam wallets that stole bitcoins, but many of these had the same logo and looked exactly like legitimate wallets. You should go to the website of the provider follow the download link from there.
Is Coinbase iOS wallet a good choice?
Here is one of the biggest misconceptions about Coinbase:
It is not a Bitcoin wallet!
Coinbase has even said this themselves !
Coinbase is a fine place to buy your first bitcoins, but not a good place to store them. Once you buy bitcoins, move them into a wallet you control!
There is a long history of hacks where users lost bitcoins. Coinbase stores over $1 billion worth of digital currency and is a huge target for hackers. If Coinbase gets hacked, they will likely spread the losses evenly across all customers. This is what other exchanges have done in the past, like Bitfinex and Mt. Gox.
What about the blockchain.info iOS app?
Even though blockchain.info has an app, it’s still a web wallet. If you’re using it for very small amounts it’s probably fine, but we really recommend against using web/online wallets unless you have a very specific need.
AirBitz for iPhone User Guide and Review
Airbitz is a powerful and easy to use bitcoin wallet that allows users to easily control their own bitcoin private keys with the familiarity and ease of mobile banking.
Secure
Automatic client-side encryption ensures bitcoin keys are always encrypted and protected from malware.
Private
HD address rotation, decentralized access, & zero-knowledge encryption make Airbitz the #1 most private cross platform wallet.
Decentralized
Connectivity to multiple public bitcoin nodes ensures wallets function even if Airbitz servers are down.
Powerful
Bluetooth & NFC payments, transaction tagging, multiple wallets per account make the power users happy.
Intuitive
The familiarity of a username & password hides the complexity of cryptography and synchronization.
Expandable
Edge Login, plugin’s, and the Airbitz SDK connect the mobile wallet to a suite of other blockchain applications including, buying and selling bitcoins.
How to use AirBitz
First, download Airbitz from the Apple App Store.
Once installed, open the app.
After you open the app, you will be taken to the Sign In, Sign Up Page
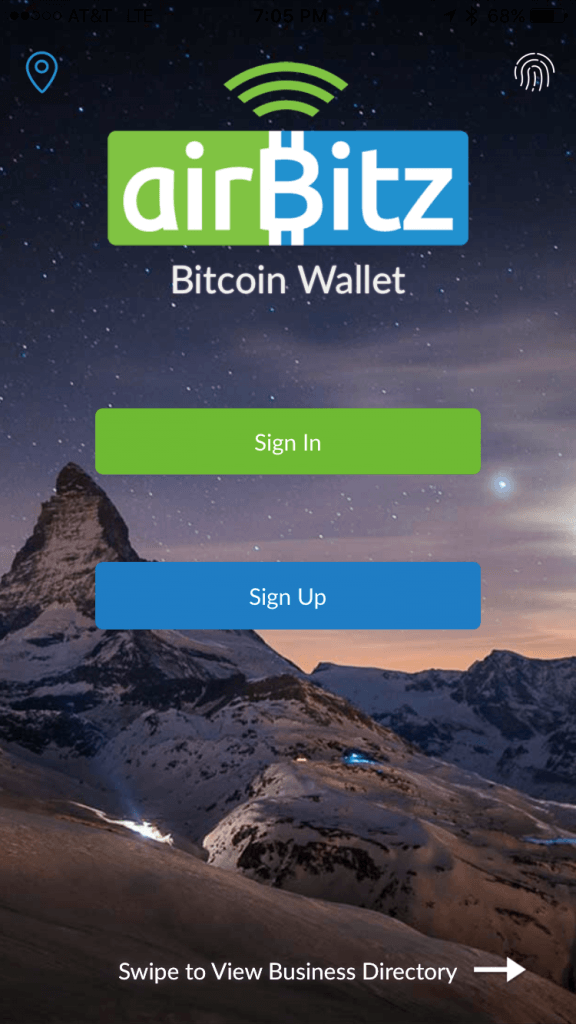
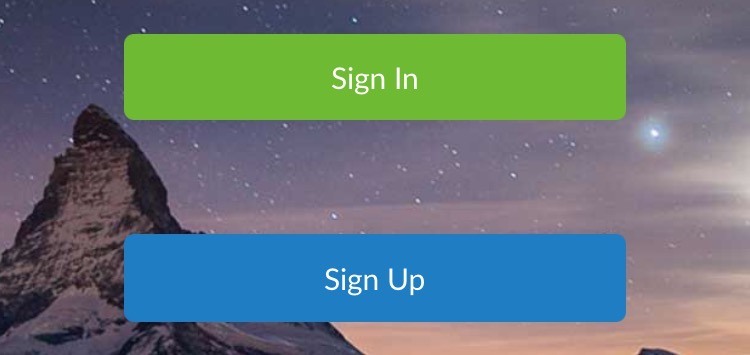
Airbitz provides users with multiple options on this page including signing up for Airbitz, sign into an existing account:
Airbitz conveniently allows quick login via Touch ID using your iPhone thumbprint as an extra layer of security; this can be found in the upper right hand corner. Access to Airbitz’s local Business Directory is available in the upper left hand corner.
You can view this Business Directory by swiping right or left.
To open a new wallet with Airbitz, select “Sign Up”.
On the next screen, Airbitz will ask you to “Choose a Username”.
This is not your email or real name. This is the username to login into your Airbitz account on this and other devices.

Your username and password are known only to you and never stored unencrypted.
Enter your chosen Username into the “Choose a Username field”.
After, select “NEXT”.
On the next screen, Airbitz asks you to set a 4 digit PIN. Your PIN is a 4 digit code used to do quick re-logins into your account.
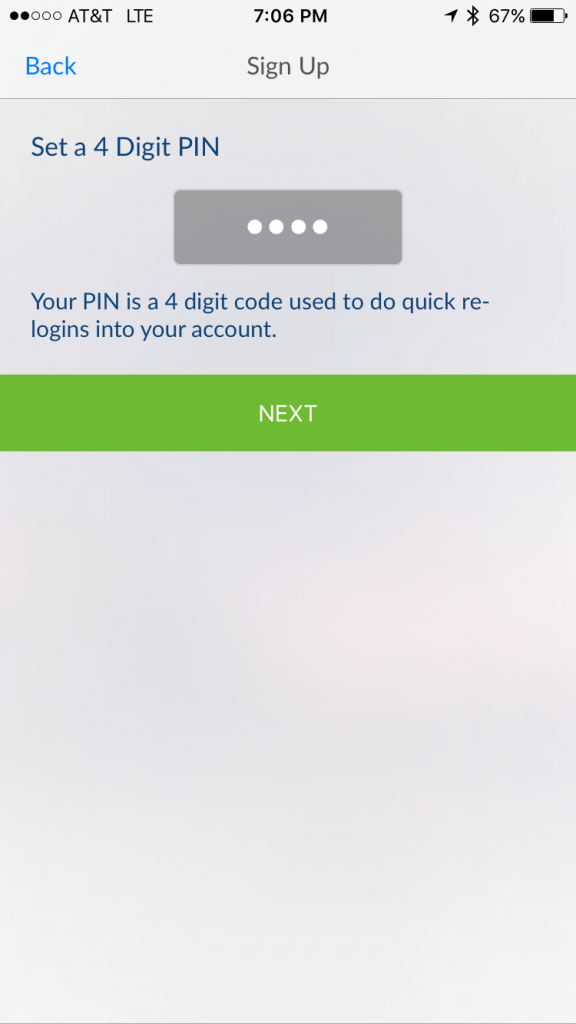
Enter your desired 4 digit PIN into the “Create PIN” field.
When you are done, select “NEXT”.
Next Airbitz asks new users to set a password. The password is used to authenticate your account and to change sensitive settings.
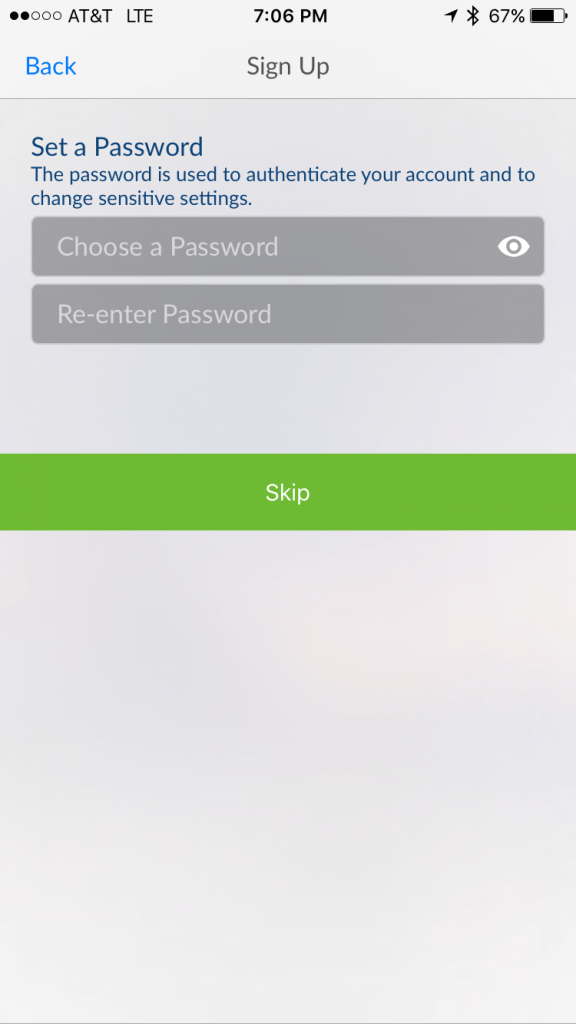
NOTE: You may choose to skip this step, however, we strongly recommend you complete this step upon download of the wallet.
Airbitz doesn’t allow users to choose whatever password they want. They don’t do this because they don’t like you, they include certain password requirements as an extra layer of protection for your wallet.
This helps familiarize users with bitcoin’s sometimes complex, and often times overwhelming feeling of being completely in charge of their funds with no 3rd party intermediaries.
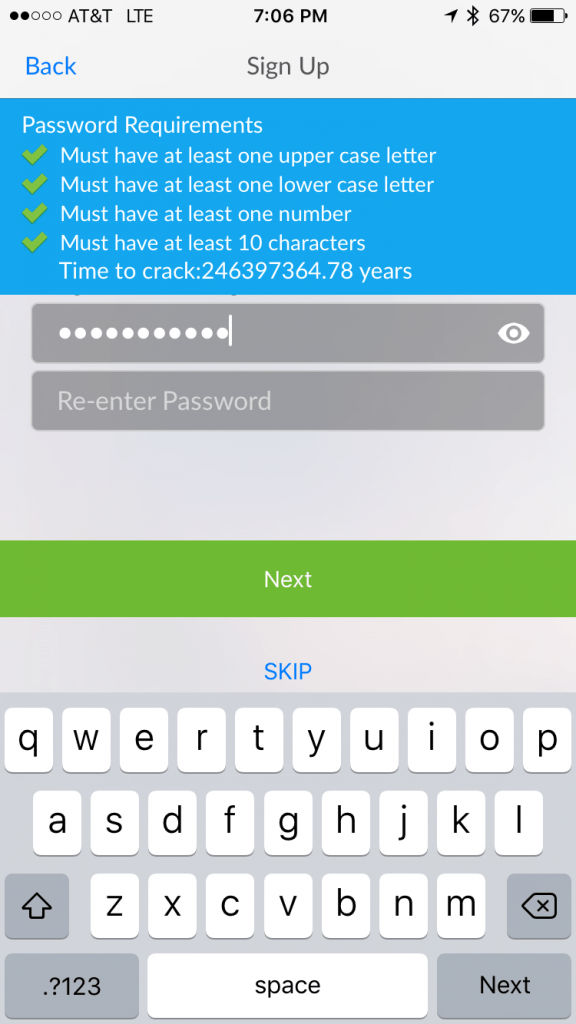
Clear instructions about these requirements are included on the page, and Airbitz won’t allow you to set a password that doesn’t fit into these parameters.
As a bonus, the team at Airbitz gives you an estimate how long it would hypothetically take a hacker to crack this password using traditional methods.
In my case, time to crack: 246397364.78 years
Enter your desired password into the “Password”, then Re-enter that password into the “Re-enter Password” field.
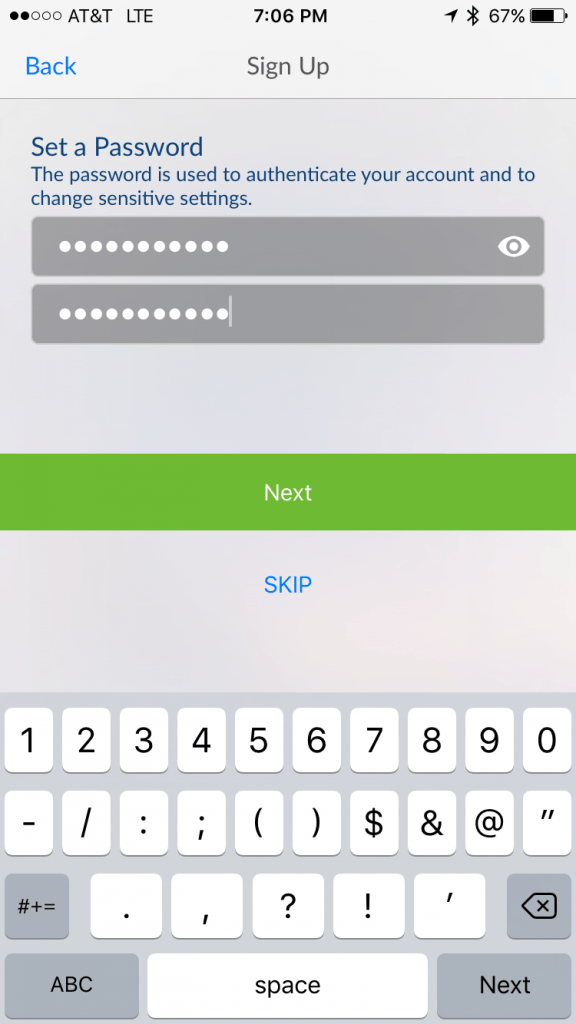
After you decide on an acceptable password, select “NEXT”.
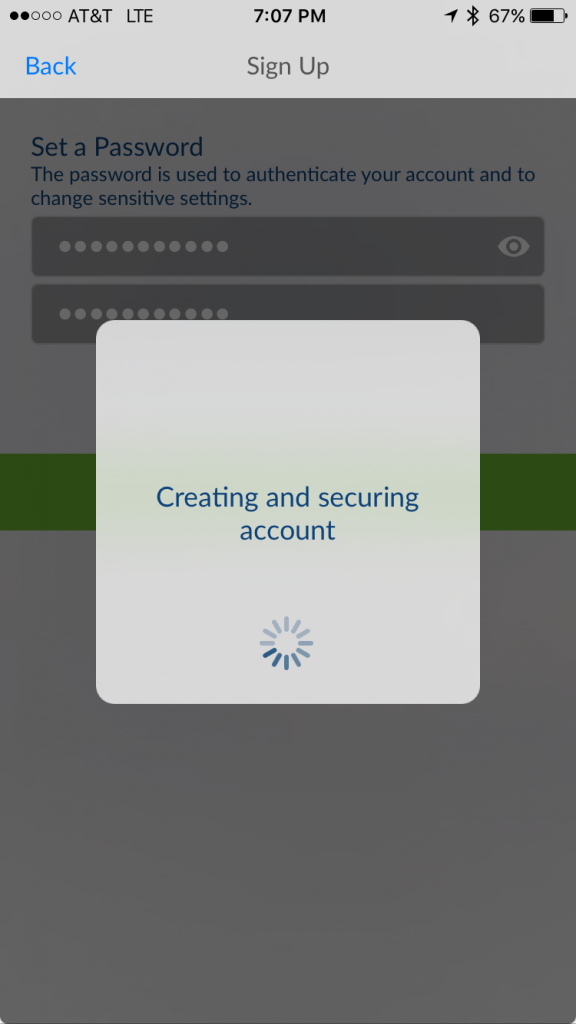
Congratulations, your Airbitz wallet and account have been created.
The step of the Sign Up process is enabling camera access for you Airbitz app.
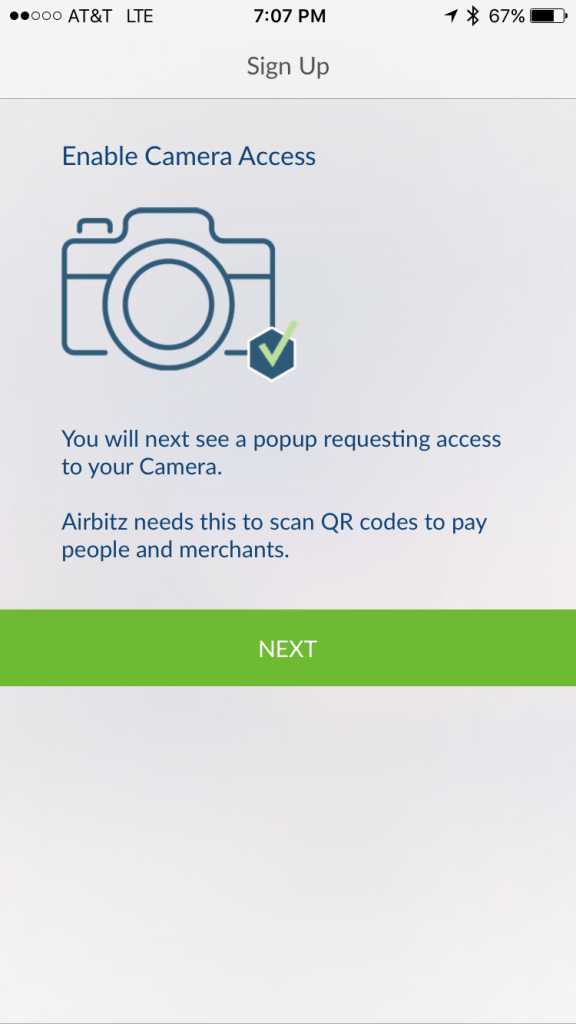
Next, you are presented with a pop up window requesting access to your Camera. Airbitz needs this to scan QR codes to pay people and merchants.

Go ahead and select, “OK”, and then “NEXT”.
Airbitz uses contacts to help tag information regarding your transactions. All tagged information is kept 100% private and encrypted by your password.
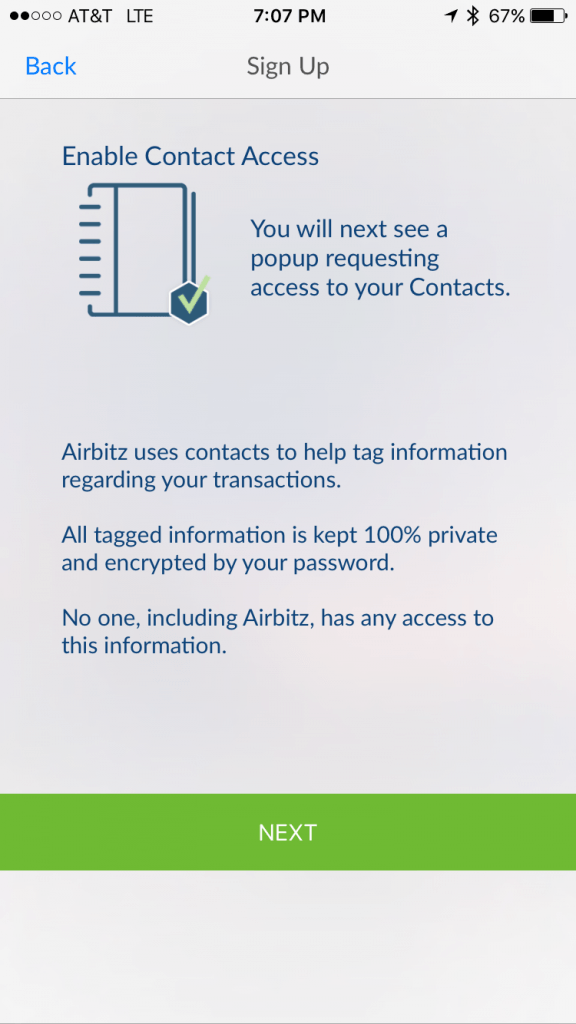
No one, including Airbitz, has any access to this information.
“Airbitz” would like to access your Contacts.
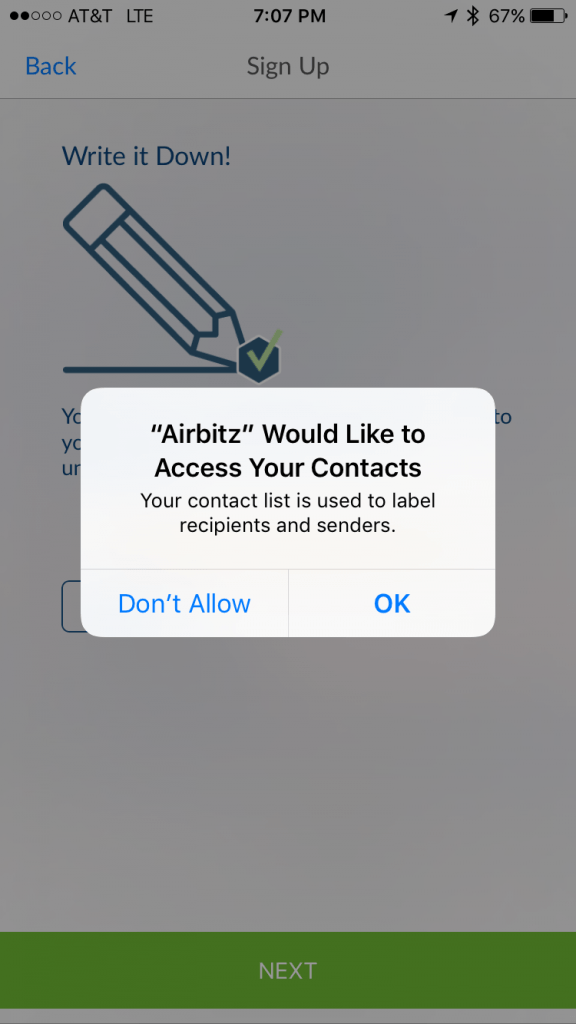
Another pop up window will appear requesting access to your Contacts. Your contact list is used to label recipients and senders.
Select, “OK”.
Write it Down!
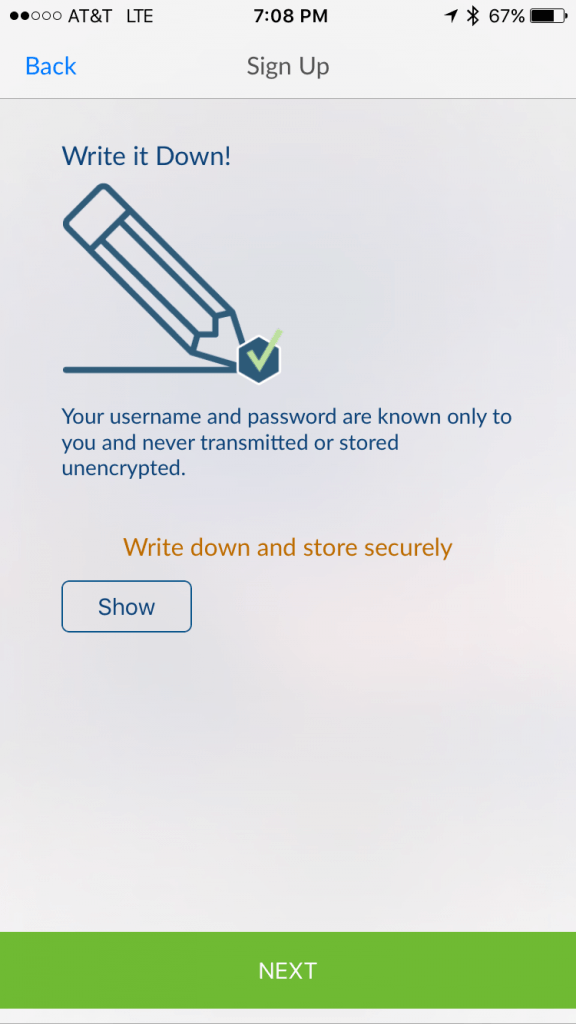
Your username and password are known only to you and never transmitted or stored unencrypted.
Write down and store securely
You may choose “Show”, and Airbitz will display you Username, Password and PIN.
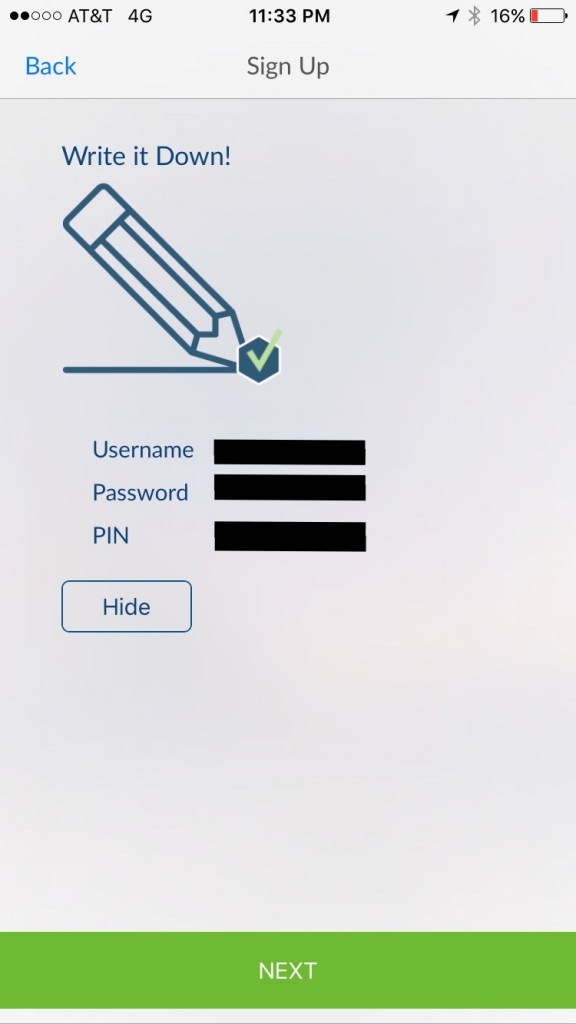
Select, “NEXT” to proceed to your wallet homepage.
Congratulations, your Airbitz wallet is ready for use. Below is what your Homepage looks like.
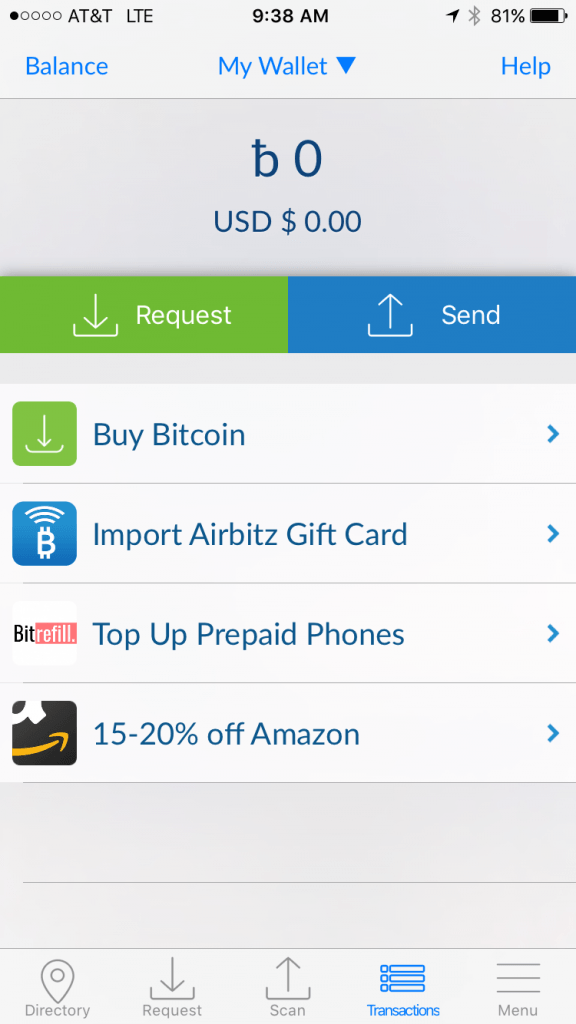
Along the bottom of your homepage, you will find access to the Directory, Recieve, Send, Transactions and Menu options.

Along the top of your homepage, you will find ‘Balance’, ‘My Wallet’, and ‘Help’ options.

Tapping ‘Balance’ changes the icon from ‘Balance’ to ‘USD’.
The ‘My Wallet’ option has an downward pointing arrow next to it for a reason. Tapping it bring you your ‘Wallets’ screen.
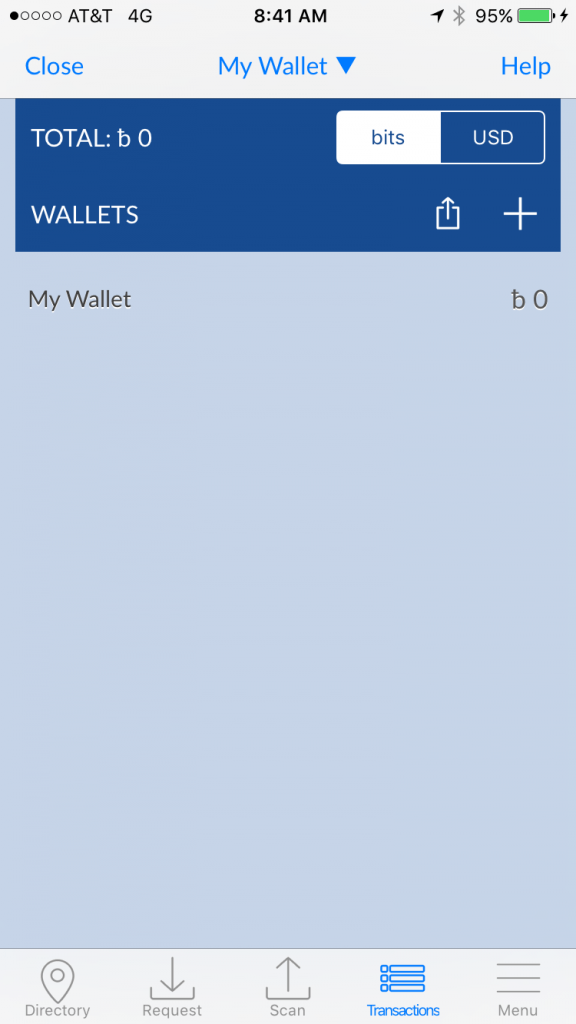
This screen will display your total amount of bits by default, however you change this to show amounts in USD’s. To see your total displayed in USD, just tap the USD box.
In this top blue section you have the ability to share (export) from your wallet.
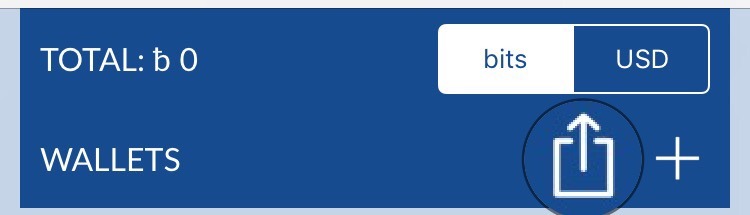
Next to the share icon is a (➕).
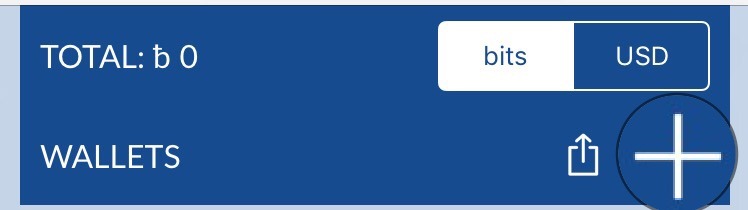
We’ll go through how to export and add additional wallets later in this review.
Below the My Wallet top line of the homepage, is your wallet balance, and your Request and Send options.
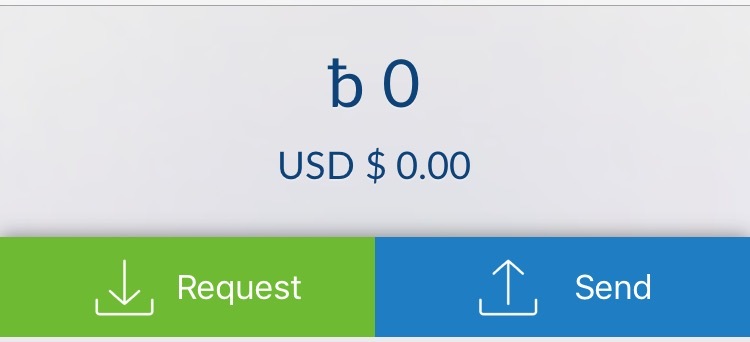
The grey section displays your current wallet balance, both in bits, and USD.
NOTE: By tapping the balance section, you can hide your current wallet balance.
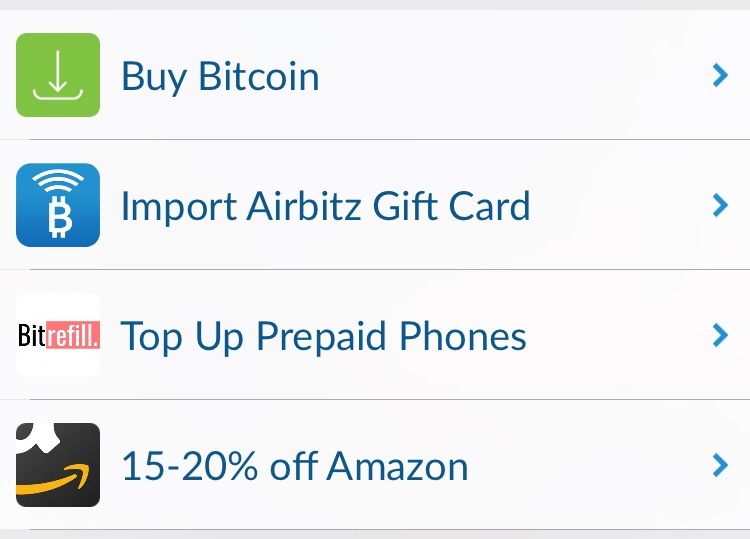
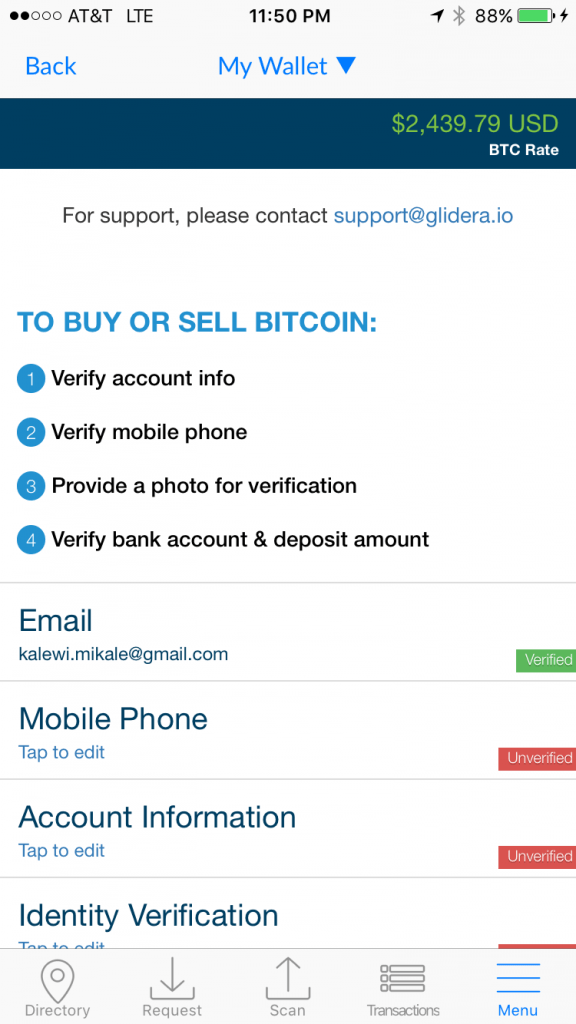
Buy Bitcoin options:
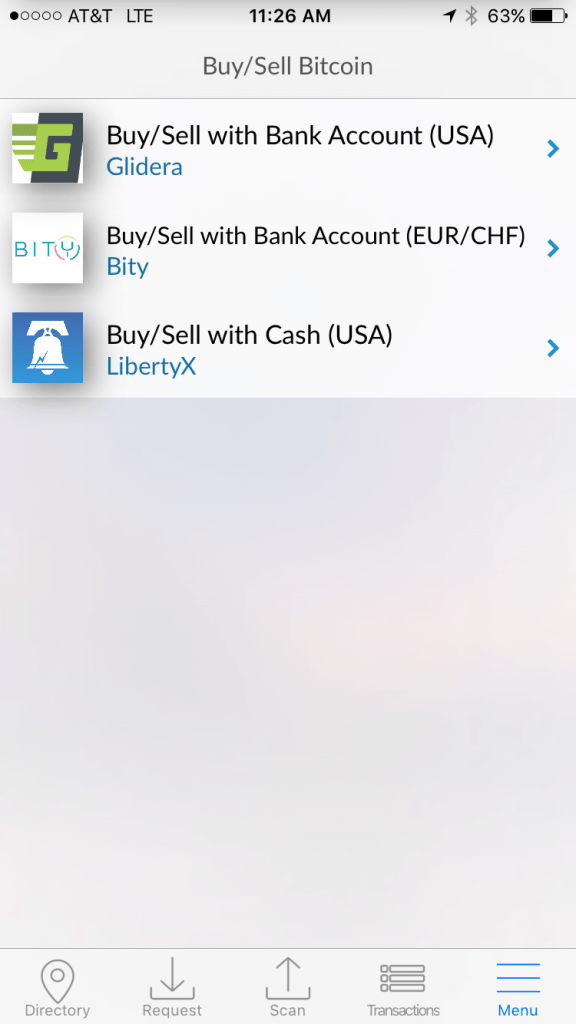
Buy/Sell with Bank Account (USA) via Glidera.
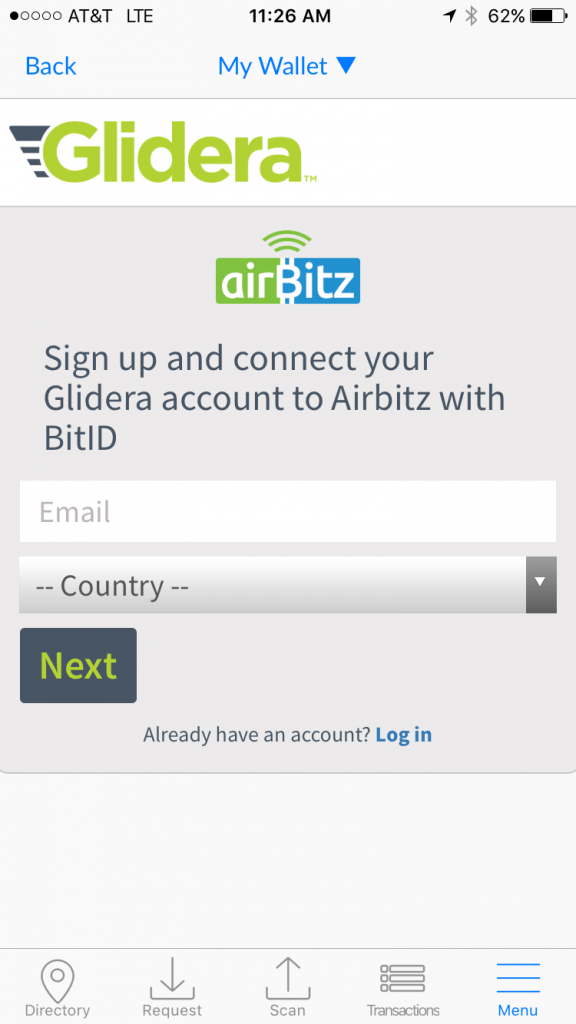
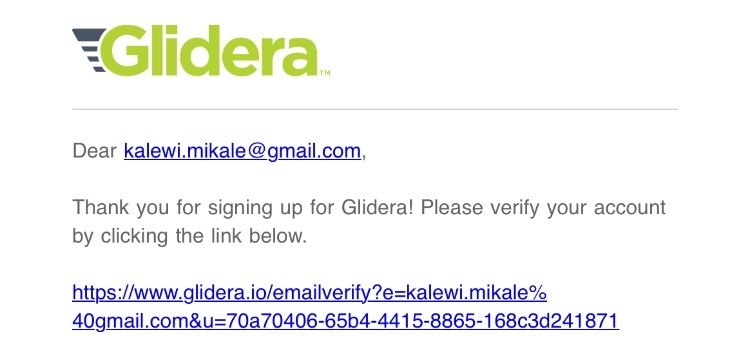
Sign up and connect your Glidera account to Airbitz with BitiD.
To Sign up, enter your email in the white “Email ” field and select your — Country –.
Next, a new option box will pop up asking you to select your — State –.
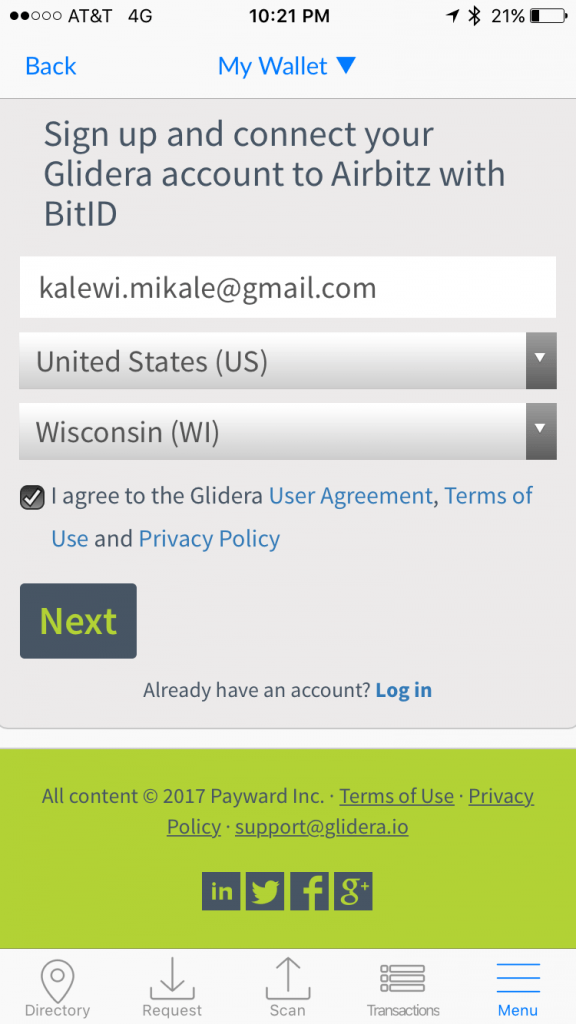
✔️ the Terms of Use and Privacy Policy box.
Then select “Next”.
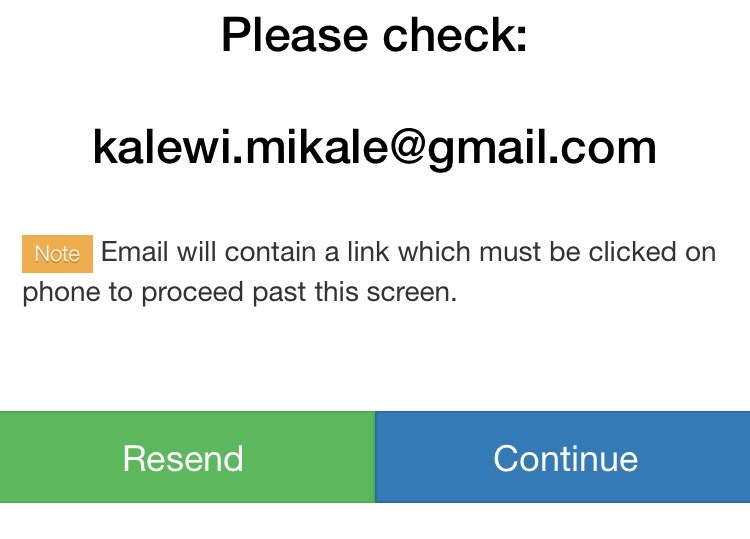
You will be taken to the following Please check: email verification screen.
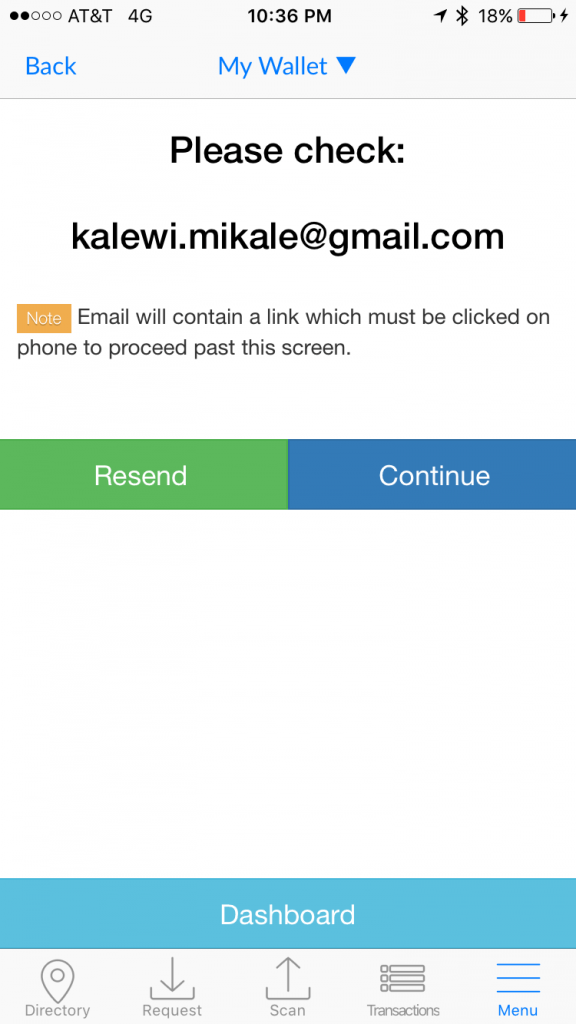
Here Airbitz asks if you received an email from Glidera containing a link which must be clicked on to proceed past this screen.
NOTE: If you select continue without clicking the link inside your email firs, you will receive the following the message.

Please verify your email address before proceeding!
Upon clicking this link, you will be taken to the Email Verification Complete screen as shown below.
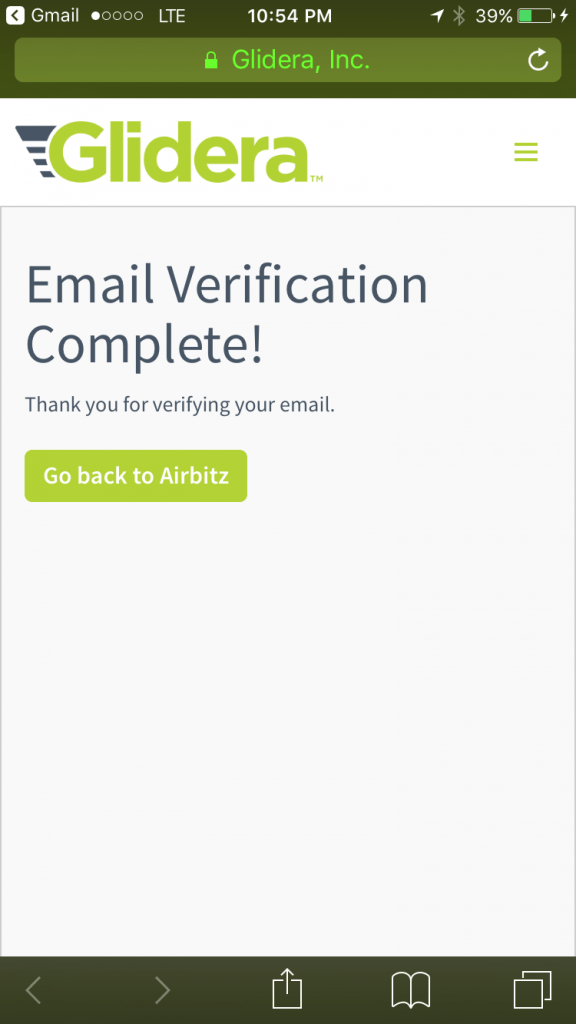
Next, select the “Go back to Airbitz”.
A white pop up box will appear in the middle of your screen.
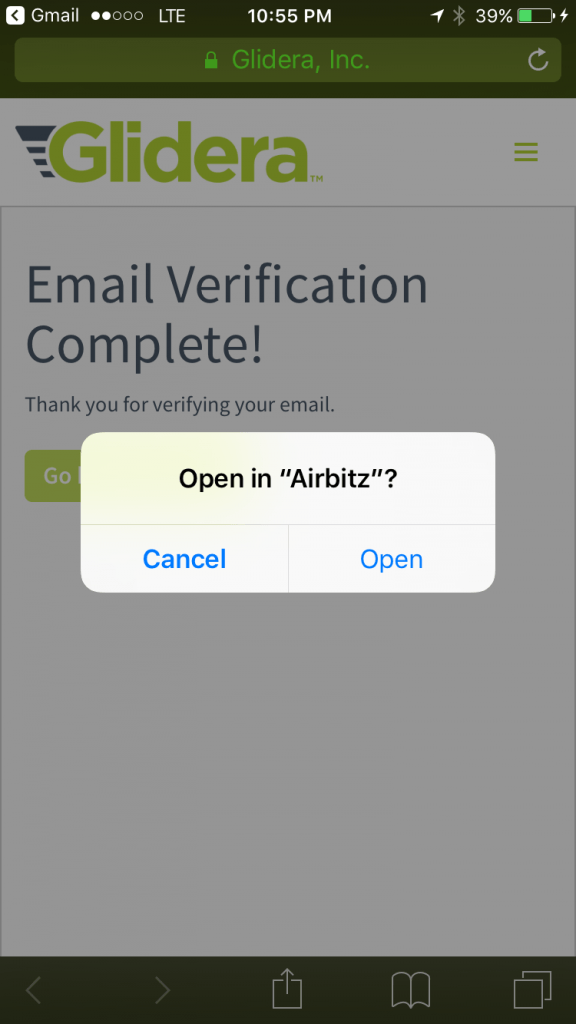
Select, “Open”.
You will be returned to the same, Please check: email verification screen as before.
Select, “Continue” to complete this step.
Upon completion, you will be taken to the Glidera homepage as shown below.
Sign up and connect your Bity.
Copay Review and User Guide
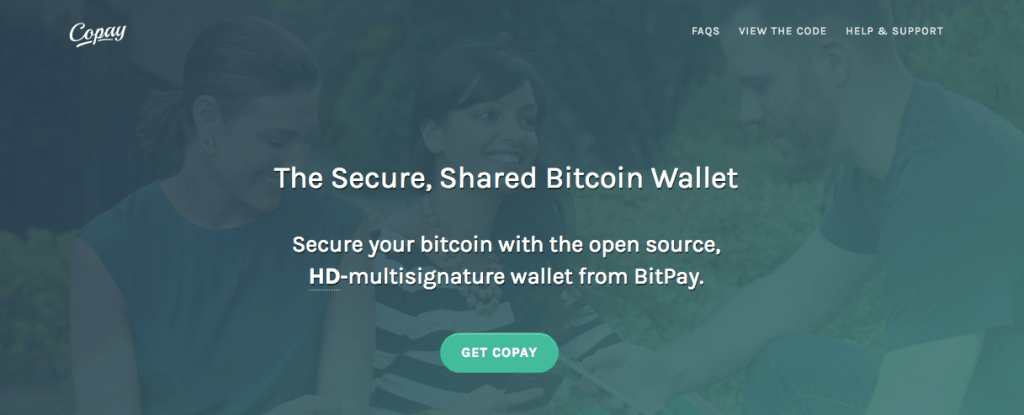
Copay – A secure, open source, HD‑multisignature wallet from BitPay.
Copay is a true bitcoin wallet, not an account service.
Take security into your own hands and avoid trusting third parties with your savings. Like a joint-checking account, your Copay wallet can have multiple users.
To send money, the group approves each transaction.
Manage shared funds with friends and coworkers. Share a wallet with your child and introduce them to bitcoin. Copay makes sharing a wallet simple and secure.
Multiple Wallets, One App
The Copay app securely stores multiple, distinct bitcoin wallets, allowing both business and privacy-conscious users to keep funds carefully separated.
Manage personal, business, and testnet wallets easily, all without leaving the app.
Copay uses hierarchical-deterministic (HD) wallets, allowing for secure in-app wallet generation and backup.
With Secure Payment Verification (SPV) you can press the SEND button with confidence.
Copay is one of the first bitcoin wallets to support the full Bitcoin Payment Protocol (BIP 0070-0073).
When you send money to a Payment Protocol-enabled merchant, Copay securely verifies that your payment will go to the right place.
Testnet Support for Developers
Copay was first bitcoin wallet to bring testnet support to both iOS and Windows Phone.
Copay includes native support for the Bitcoin Testnet, perfect for testing new bitcoin applications across multiple platforms.
With multisignature (P2SH) and multiple wallet support, Copay makes it simple for developers to test and demo bitcoin applications without fumbling between other mobile apps.
Open Source, No Exceptions
The Copay app is completely open source.
Enterprise and power users can take full control of their finances by deploying their own version of the Copay apps and Bitcore Wallet Service.
Dozens of bitcoin developers have already contributed to Copay, even though it wasn’t launched until October 2016.
Every part of Copay, wallet and server, is available to be reviewed, improved, and developed by the community.
You can follow along, discuss improvements, and join in on GitHub at BitPay/Copay and bitpay/bitcore-wallet-service.
How to use Copay
First, download Copay from the Apple App Store.
Once installed, open the app.
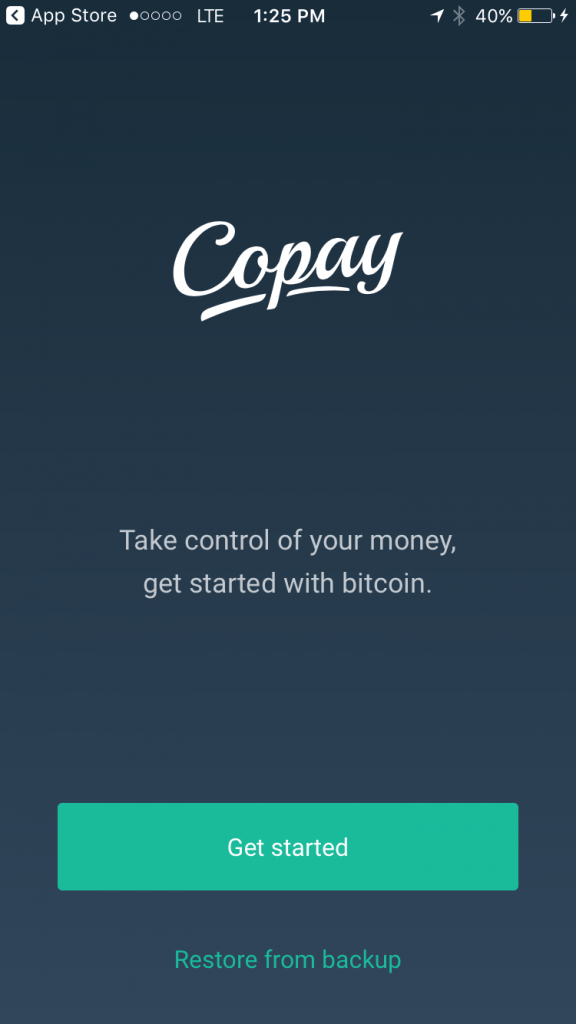
After you open the app, you will be taken to the Get Started page.
To open a wallet with Copay, select “Get started”.

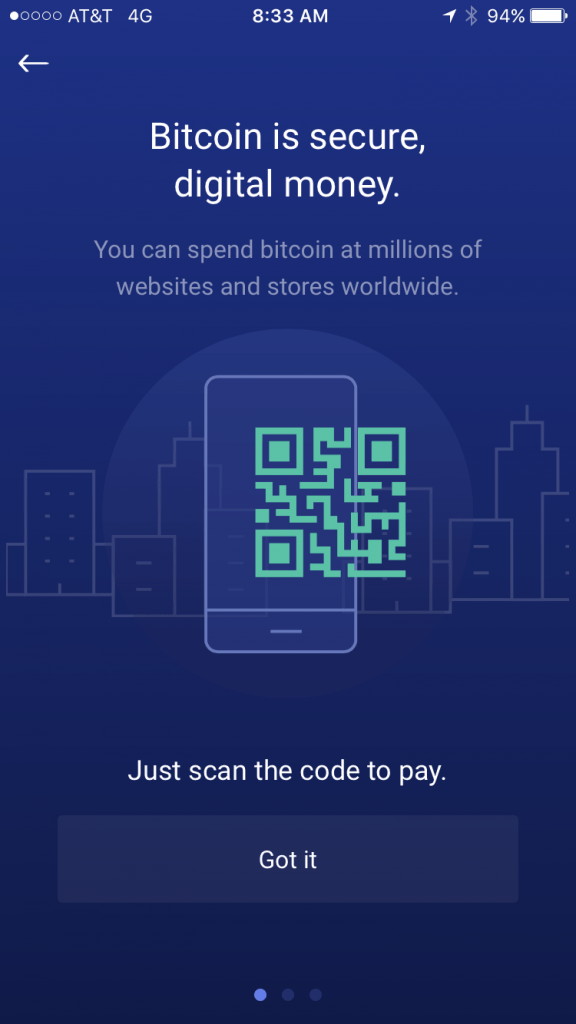
Copay provides users with three short inforgraphic pages. The first page is about bitcoin as secure, digital money and how easy it is to make payments.
Select “Got it”.
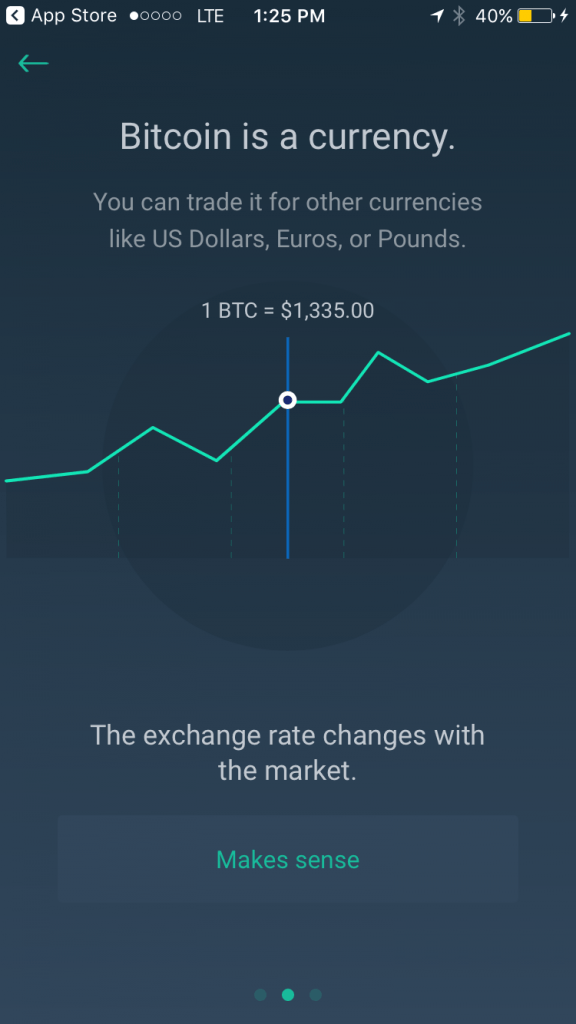
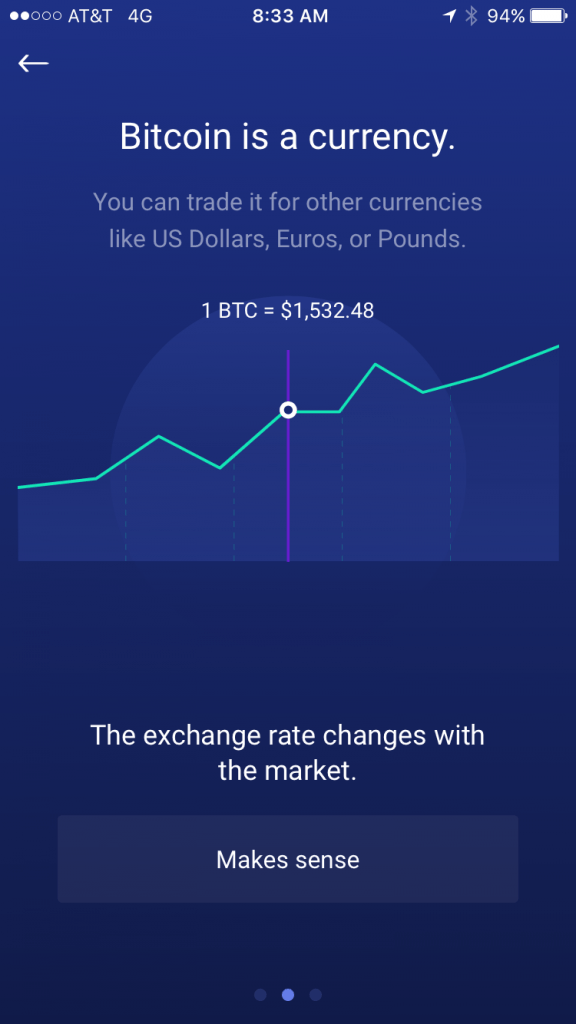
The second page is about bitcoin as currency. You can trade it for other currencies like US Dollars, Euros, or Pounds.
Select “Makes sense”.
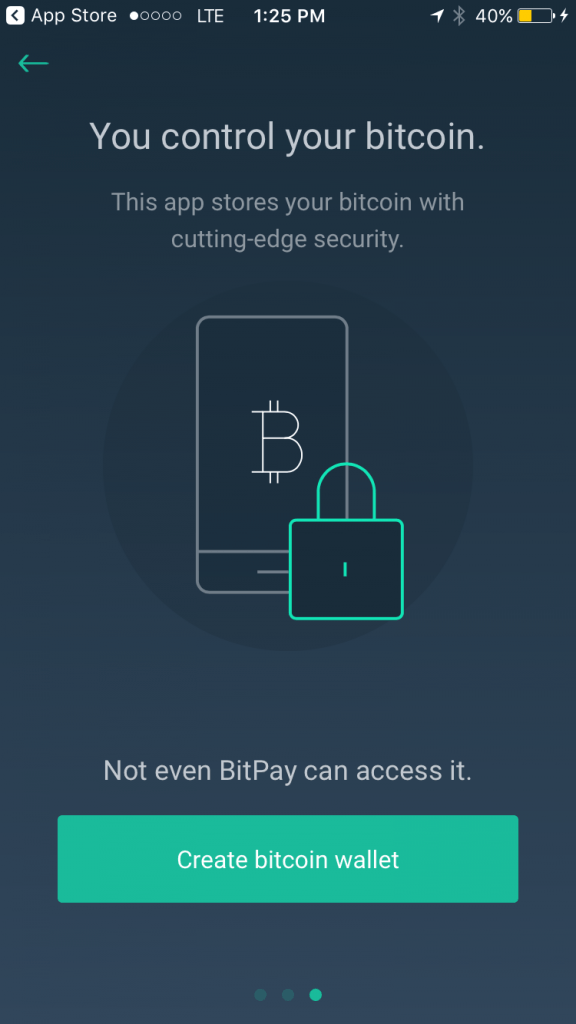
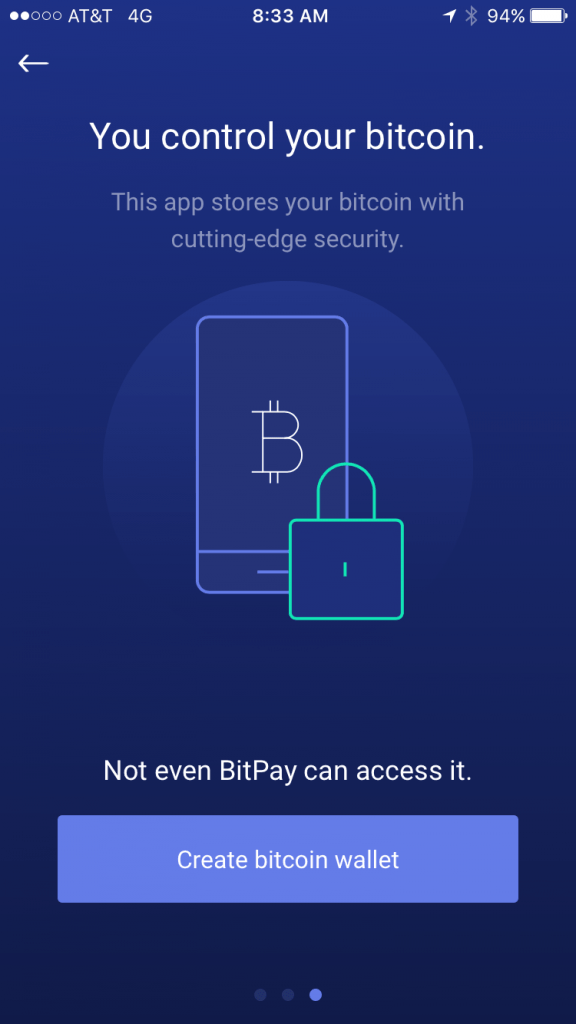
The third page is about user control of their bitcoin. Copay, stores your bitcoin with cutting-edge security. Not even BitPay can access it.
Select, “Create bitcoin wallet”.
That’s it, your bitcoin wallet is ready!
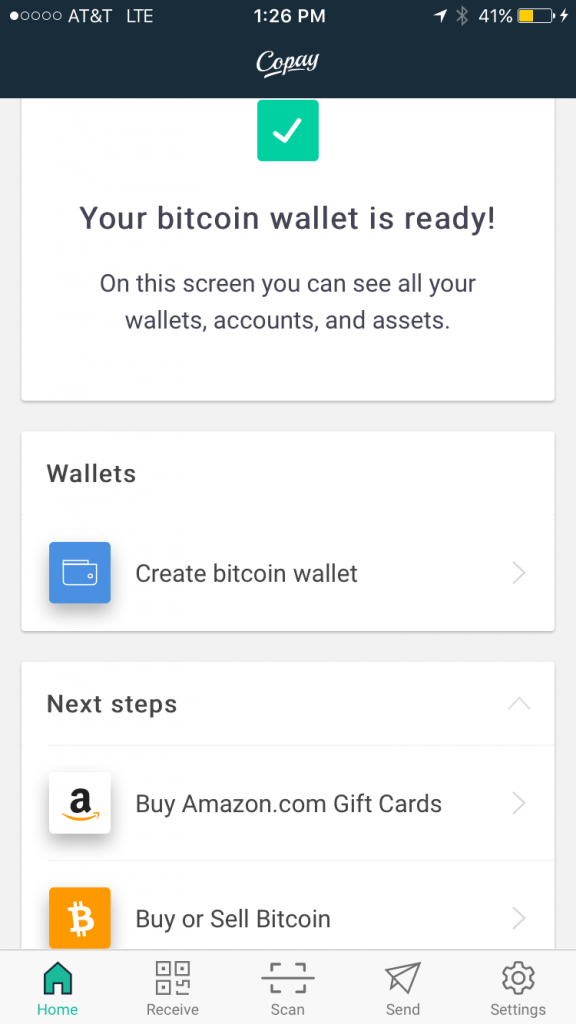
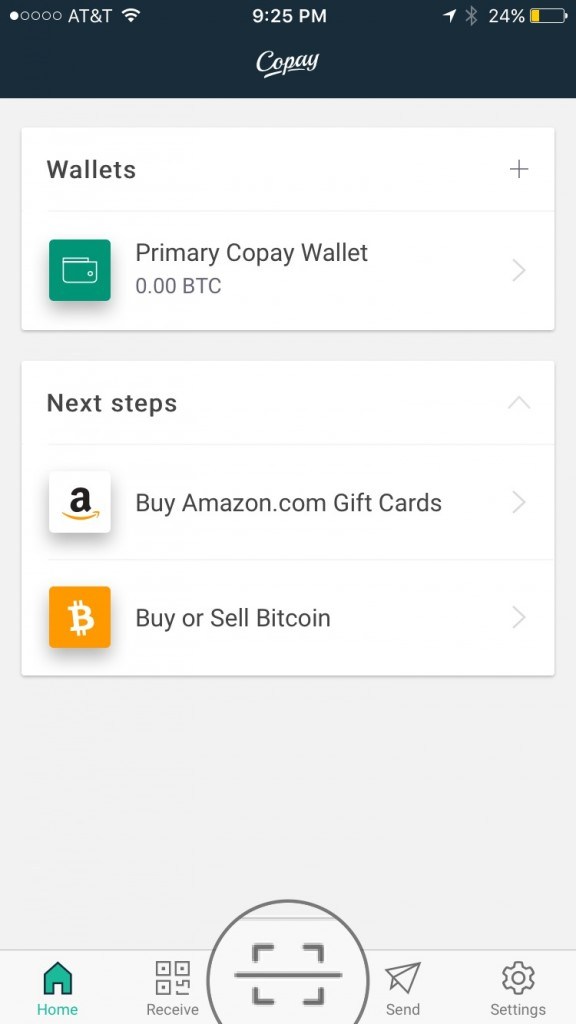
On this screen you can access all of your wallets, accounts, and assists. You can also create new wallets, buy Amazon.com Gift Cards, and Buy or Sell Bitcoin.
Go ahead and select, “Create bitcoin wallet”.
This will take you to the Add wallet page.
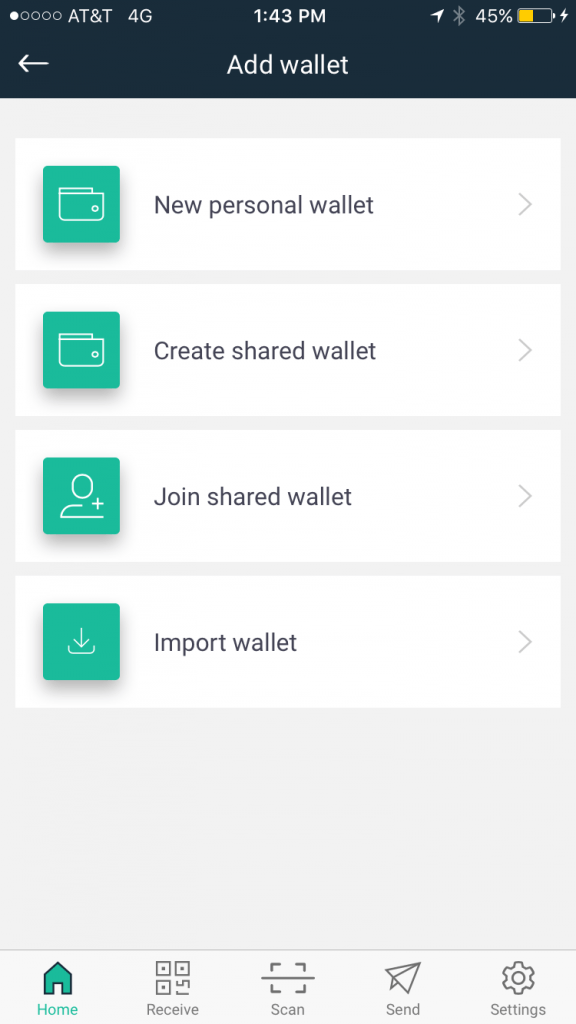
On this page you will be able to create a new personal wallet, create a shared wallet, join a shared wallet, or import an exisiting wallet.
Since we want to create a new personal wallet, select “ New personal wallet”.
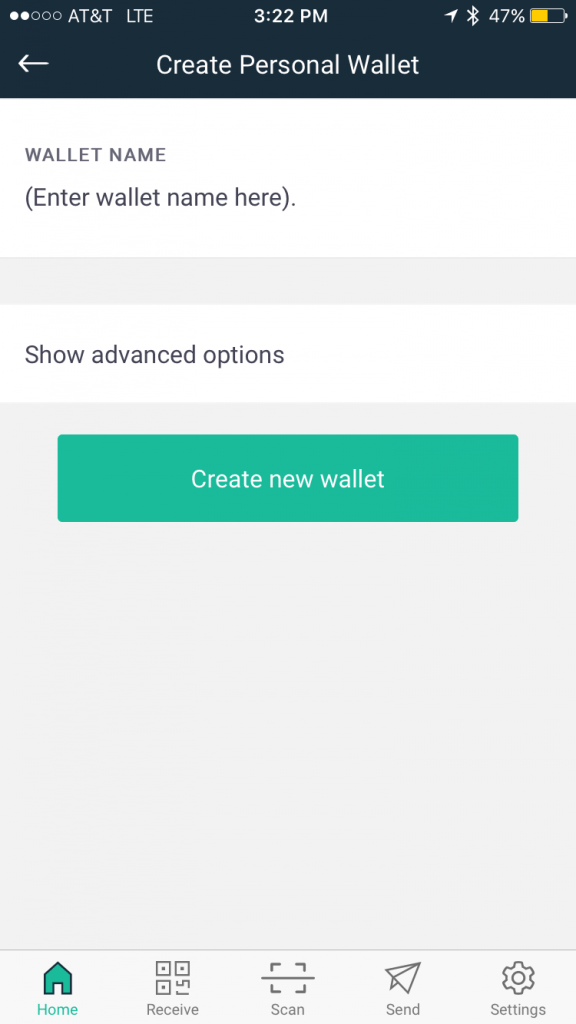
On the Create Personal Wallet, you’ll be asked to create a wallet name before starting. After you decide a wallet name, select “ Create new wallet”.

This wallet will show up under the Wallets section on your Copay homepage.
To enter your wallet, just tap on the wallet name. In my case, “Primary Copay Wallet”.
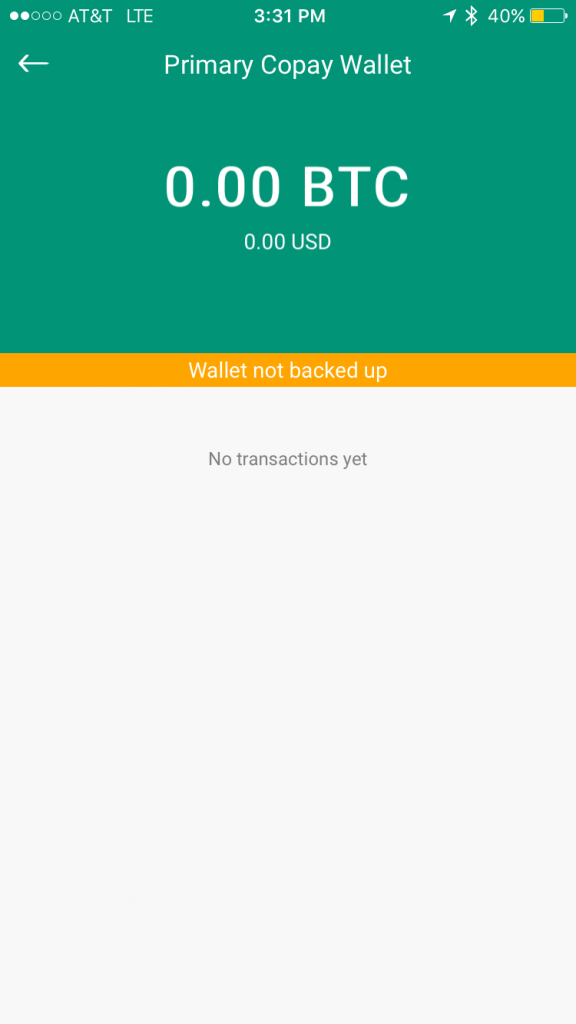
Displayed in the green of your wallet is your bitcoin amount in total BTC, and below it, in USD.
They grey area of your wallet will display all of you most recent transactions.
The orange colored line running across the middle of the screen is notifying us that we haven’t yet backed up our wallet.
TRANSITION INFO ABOUT BACKING WALLET UP
To back up your wallet, tap the orange line along the “ Wallet not backed up” message, this will take you to the first step of the backup phrase section.
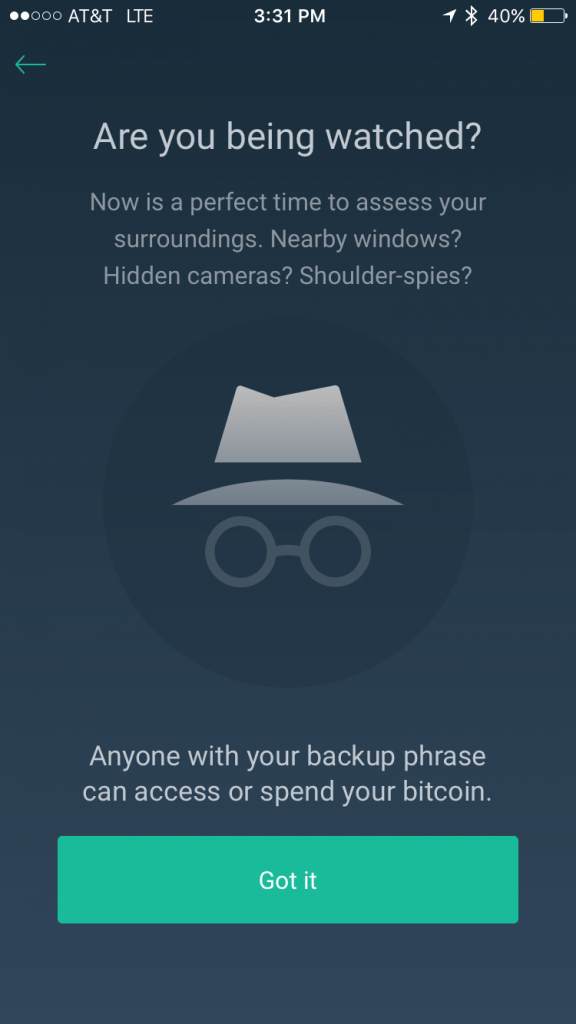
Copay reminds you that anyone with your backup phrase can access or spend your bitcoin. Make sure you store this phrase in a safe and secure location, preferably a fireproof safe.
Go ahead and select “Got it”.
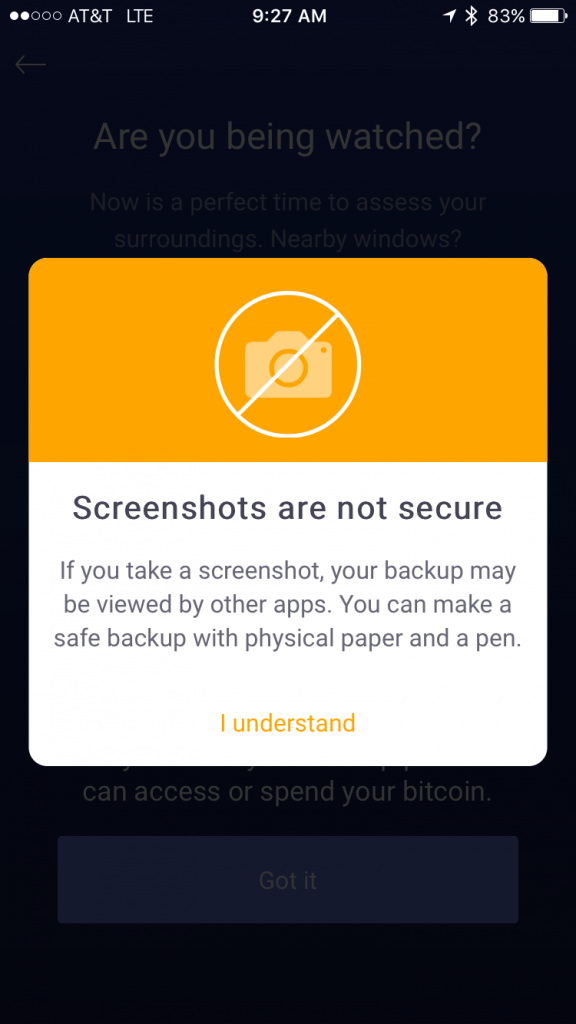
On the next page, the team at Copay kindly reminds that screenshots are not secure.
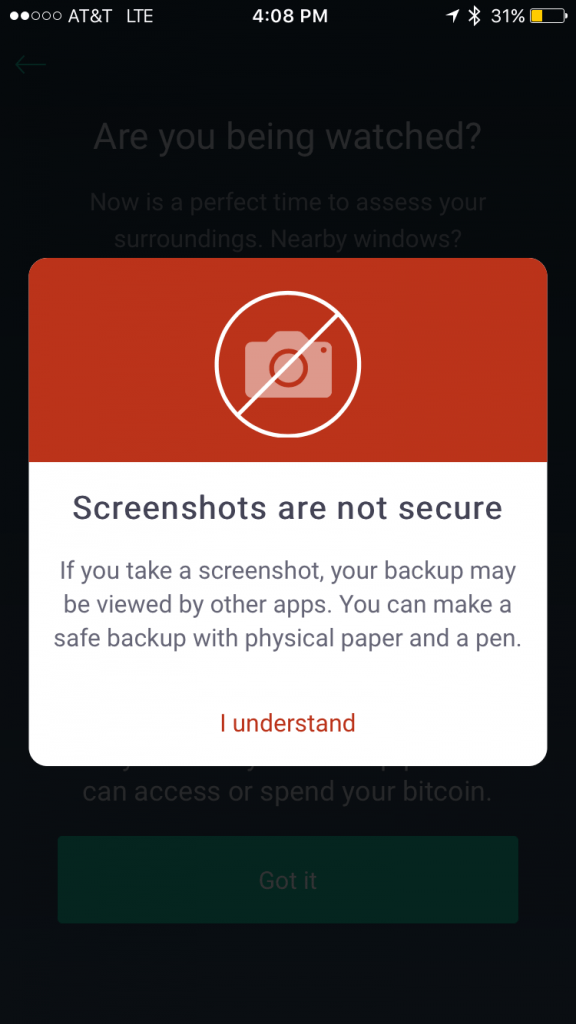
If you take a screenshot, your backup may be viewed by other apps. You can make a safe backup with physical paper and a pen.
Tap, “I understand to continue”.
NOTE: DO NOT enter it into a password manager field or software, (i.e. a browser, or word document). This information can be accessed via malware such as CoinThief, and other Trojan viruses .
Here is a link to a SecureMac OSX/CoinThief Identification Manual and Removal Instructions that was released as a result.
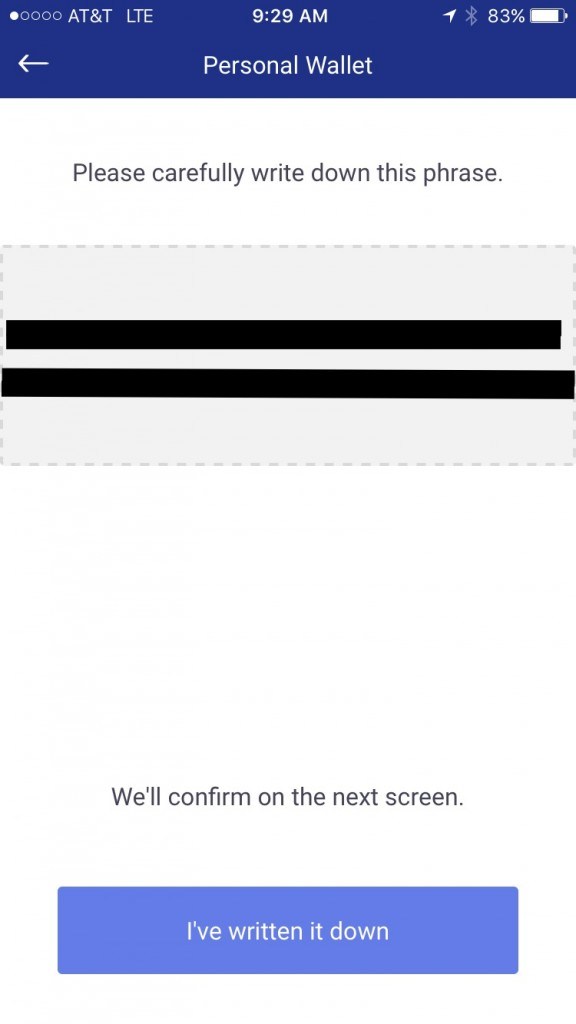
Please carefully write down this 12 word phrase on the next screen.
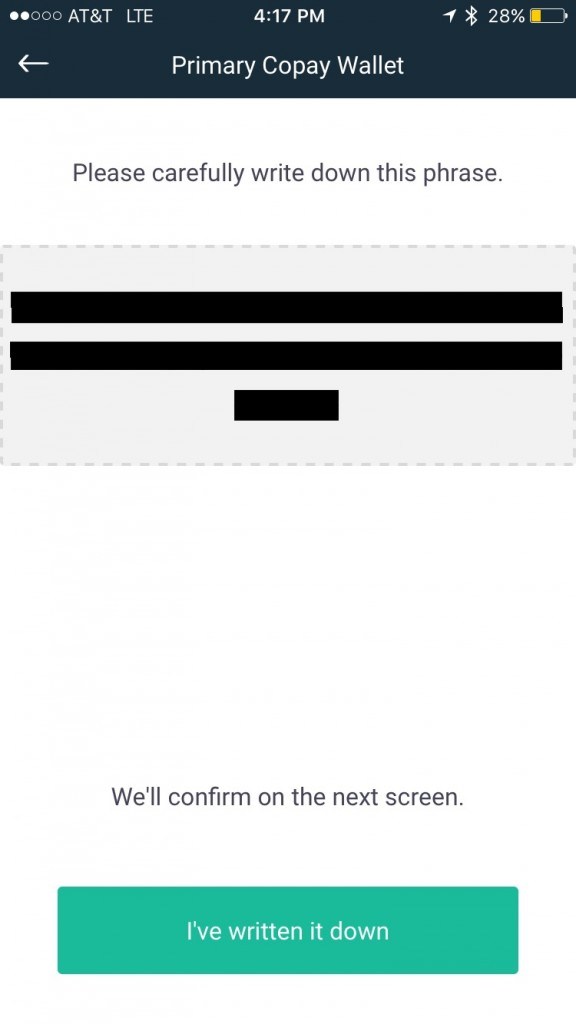
Copay will confirm you did this on the next screen.
_
NOTE: I took screenshots just for this wallet review. I will not be storing any personal funds or using this wallet for anything, otherwise I take Copay’s advice and write my phrases on physical paper and a pen._
Select, “I’ve written it down”.
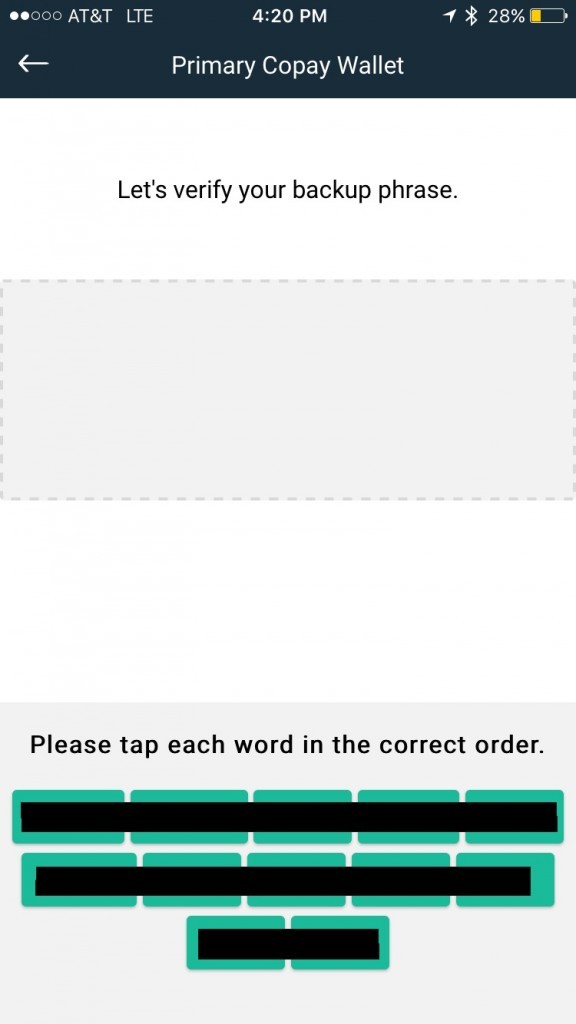
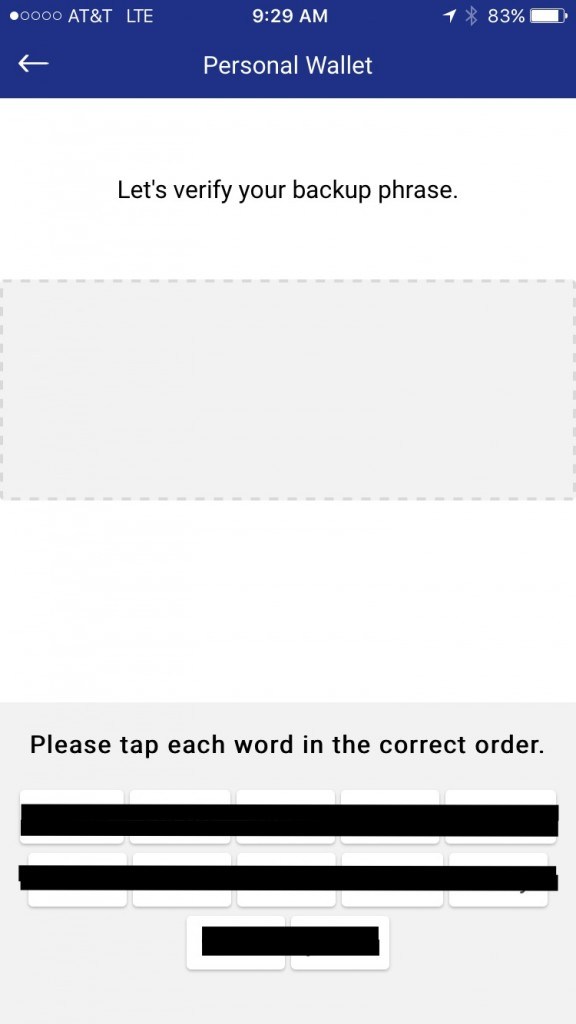
Next, Copay will ask you to please tap each word in the correct order.
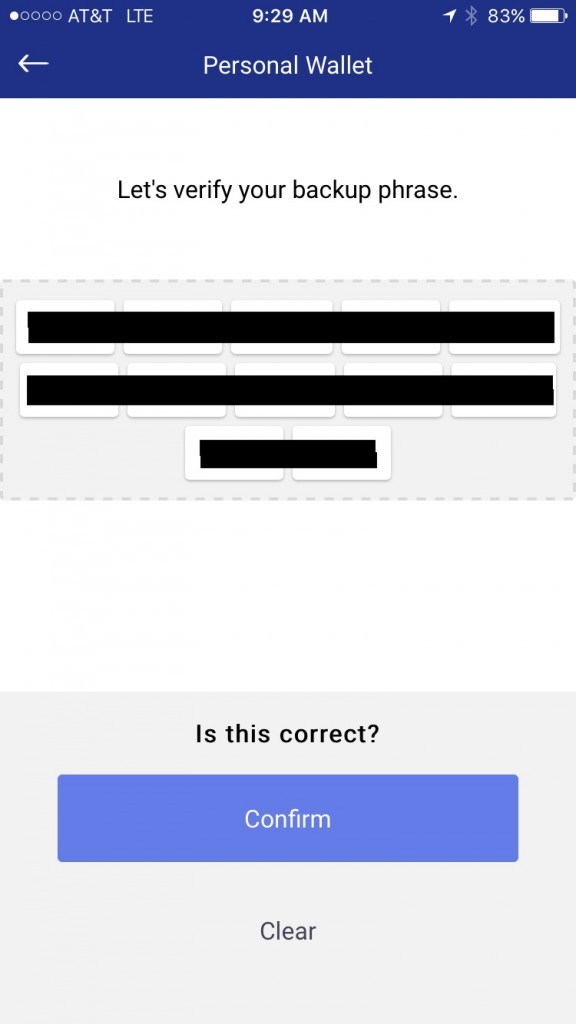
After you do this, an “Is this correct?” message box will pop up asking you to confirm this is correct.
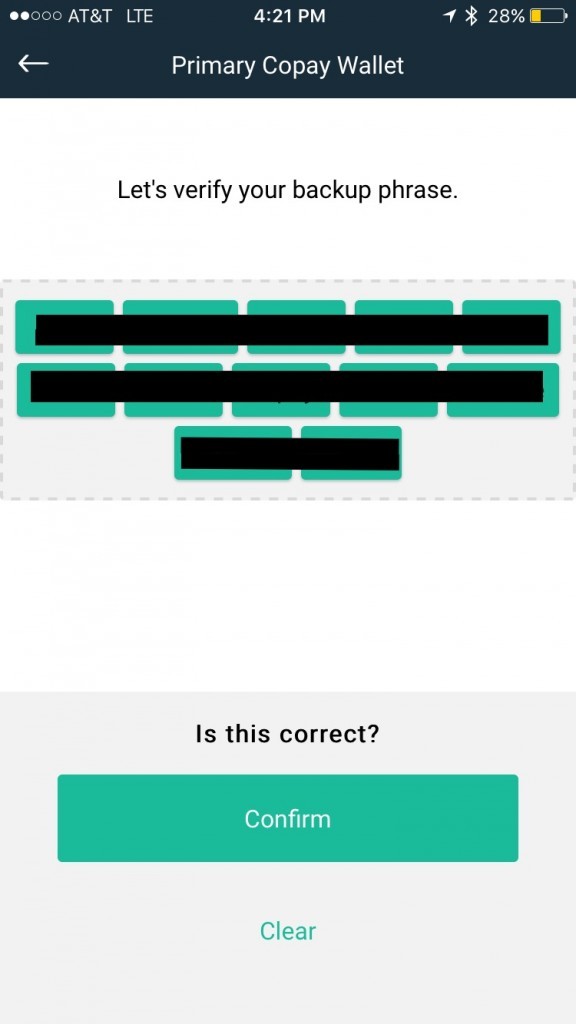
Select, “Confirm”.
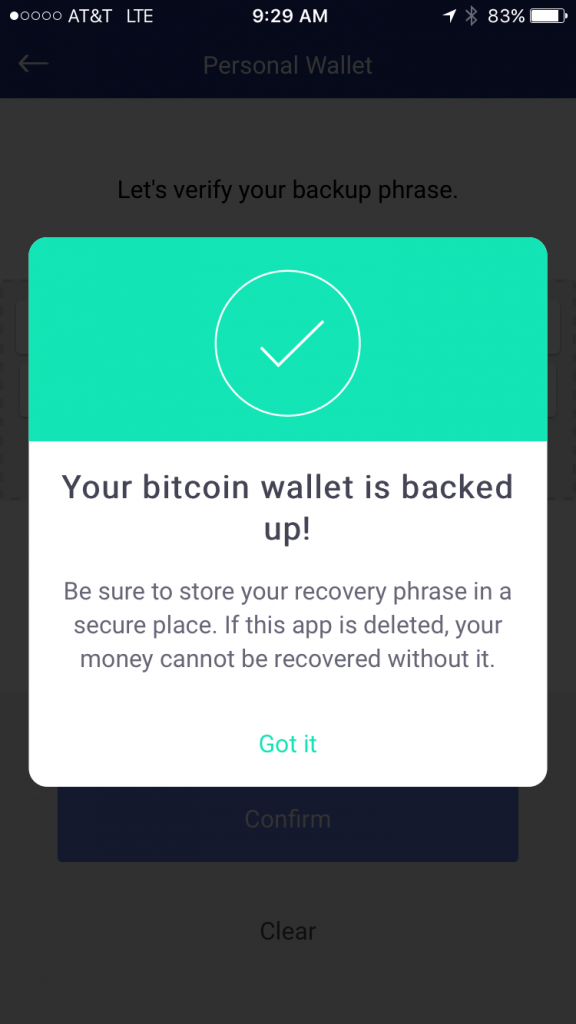
Congratulations, your bitcoin wallet is now backed up!

Be sure to store your recovery phrase in a secure place. If this app is deleted, your money cannot be recovered without it.
Select “Got it”.
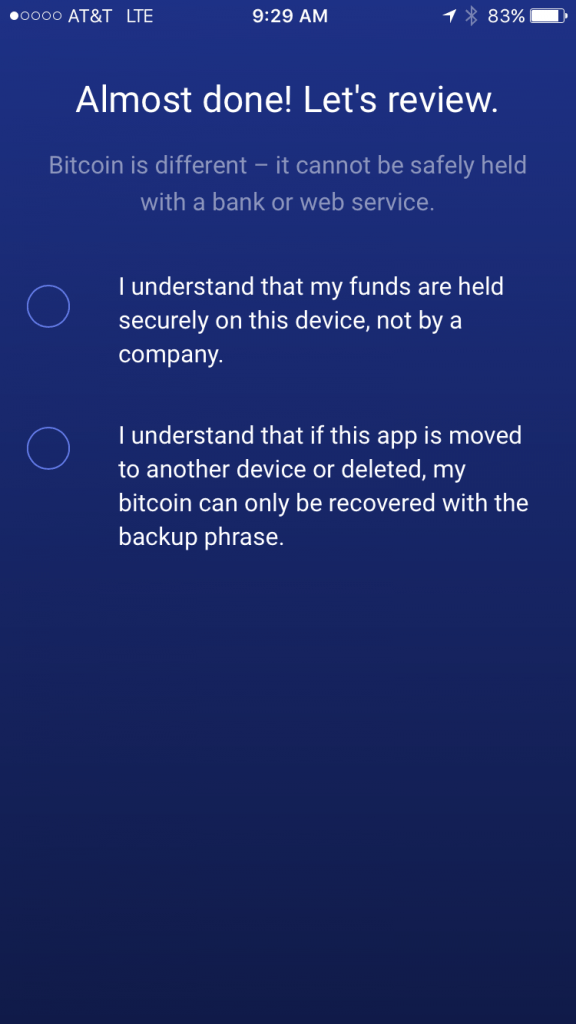
Alright, you are almost done. This will take you to the final step of backup process.
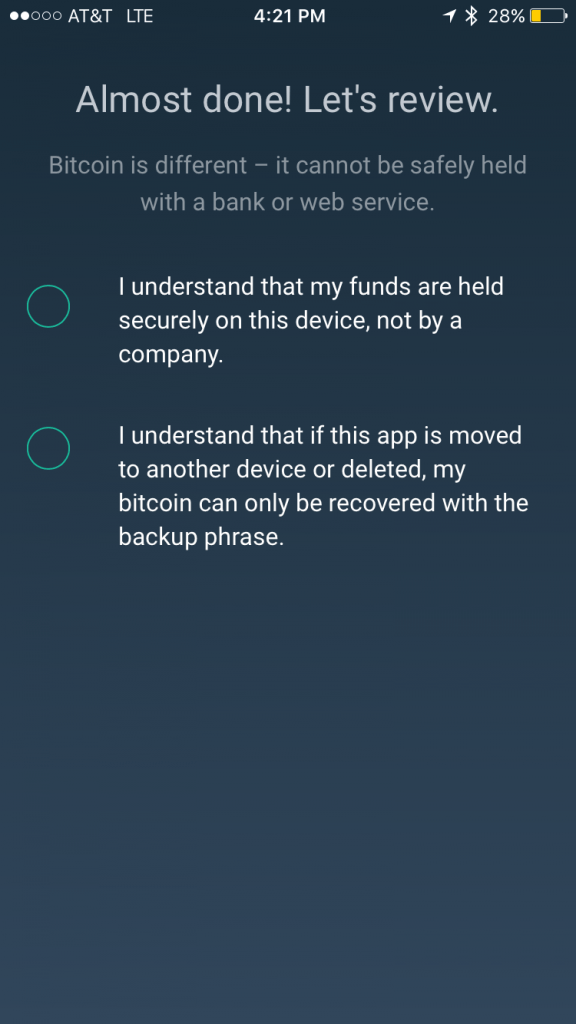
Copays reminds its users that bitcoin is different – it cannot be safely held with a bank or web service.
Before you can proceed, Copay will ask you check off that you understand the following:
✔️ I understand that my funds are held securely on this device, not by a company.
✔️ I understand that if this app is moved to another device or deleted, my bitcoin can only be recovered with the backup phrase.
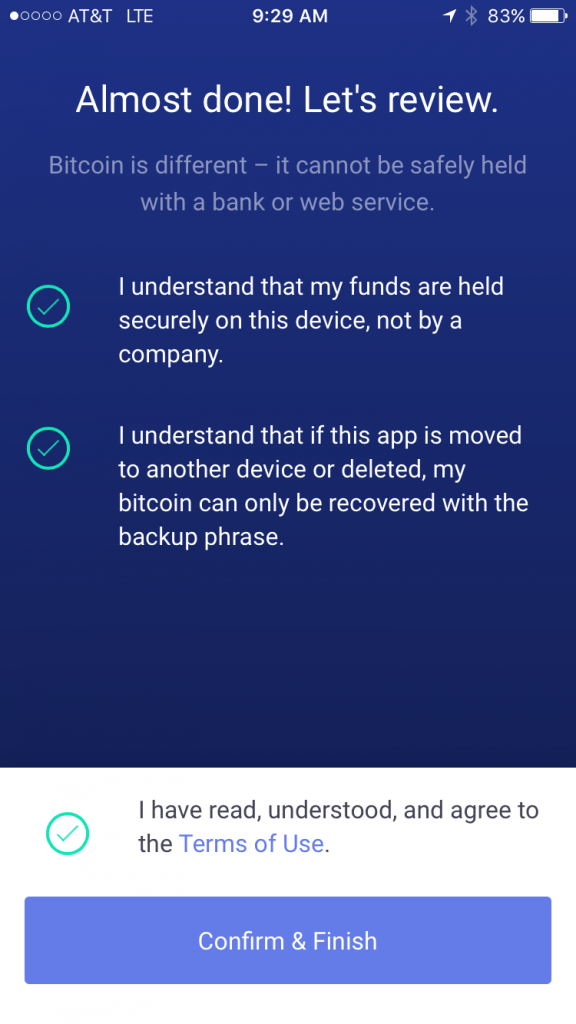
After you check the first two boxes, a third will appear at the bottom of your screen.
This one verifying…
✔️ I have read, understood, and agree to the Terms of Use.
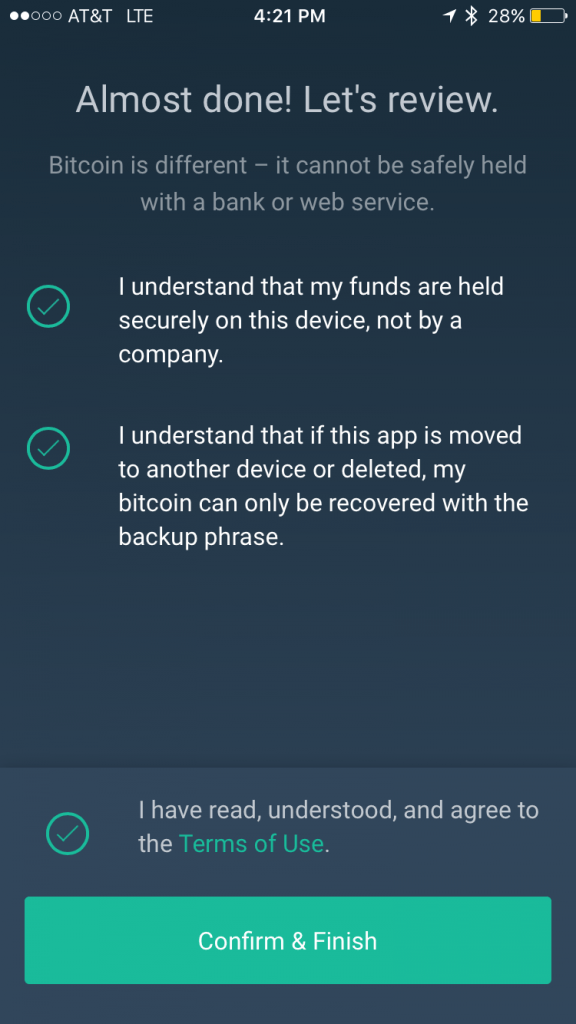
Check the Terms of Use box, and then select “ Confirm & Finish”.
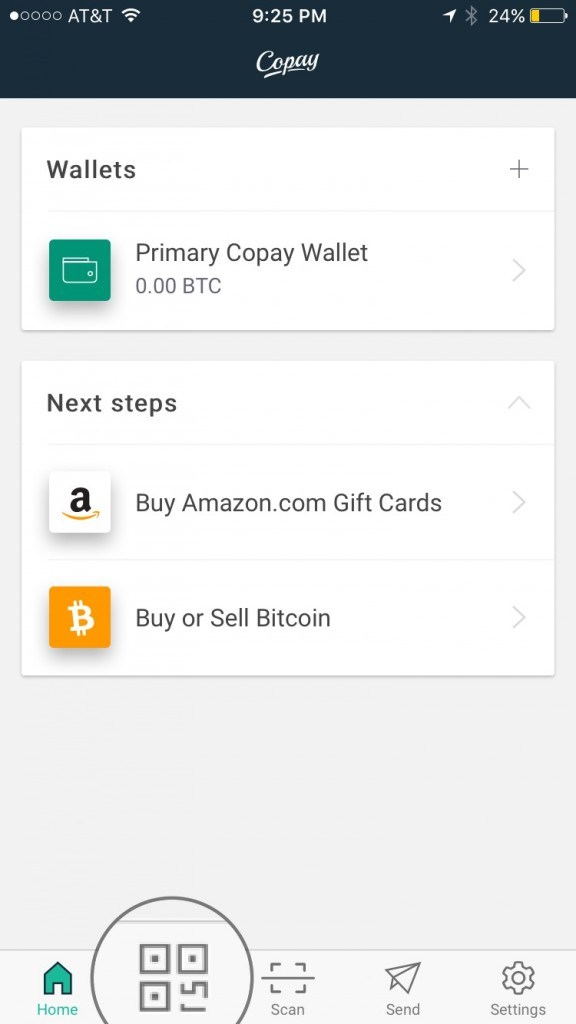
Congratulations, you’re wallet is ready for use. Below is what your Homepage looks like.
Along the bottom of the homepage you’ll find the home button, receive, scan, send, and settings icon options.

Under the Next steps section of the homepage, are the Buy Amazon.com Gift Cards and Buy or Sell bitcoin wallet features.
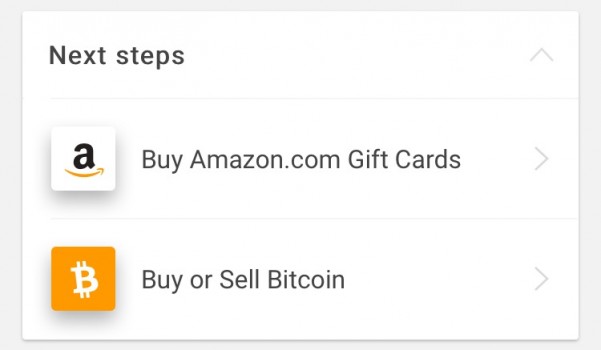
We’ll come back to these later in this guide.
Now that you have a secure wallet, you’re probably wondering how to receive and send bitcoin.
How to Receive Bitcoin with Copay
To receive a payment, tap on the “Receive” icon along the bottom access menu.
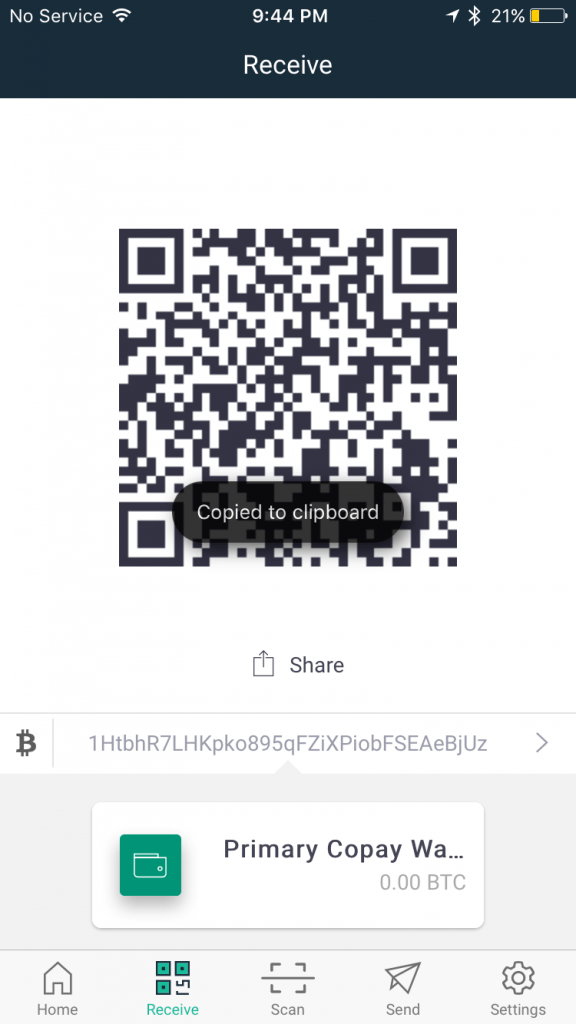
Your wallet Receive screen displays a large QR code in the middle, a share icon link below it, access to every page within the app via the icon screen along the bottom, your personal wallet address, the name of your wallet, and the amount of BTC in that particular wallet.
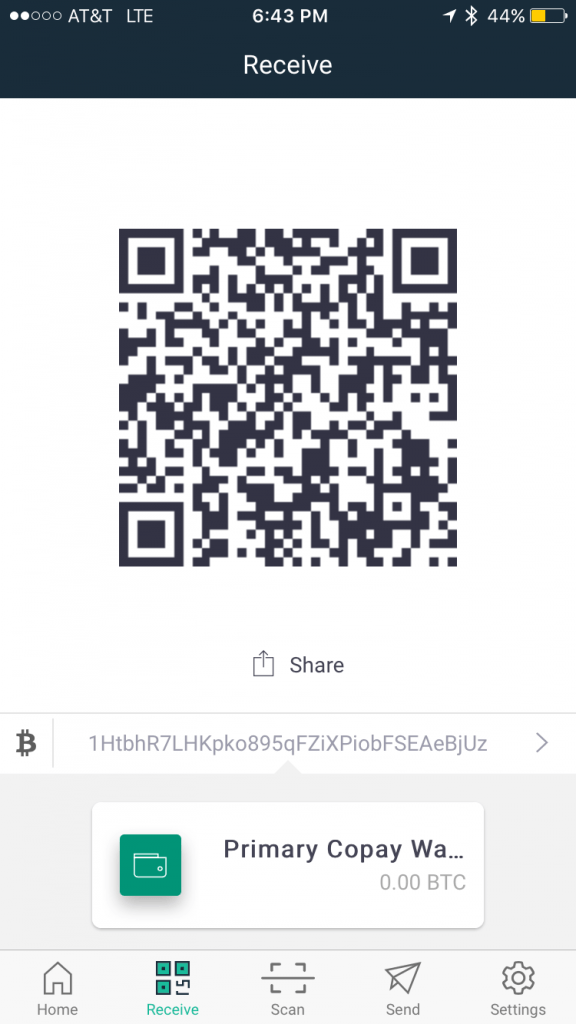
The running string of number you see above your green wallet icon and name is your personal wallet address.

Anyone with this address can send you bitcoins!
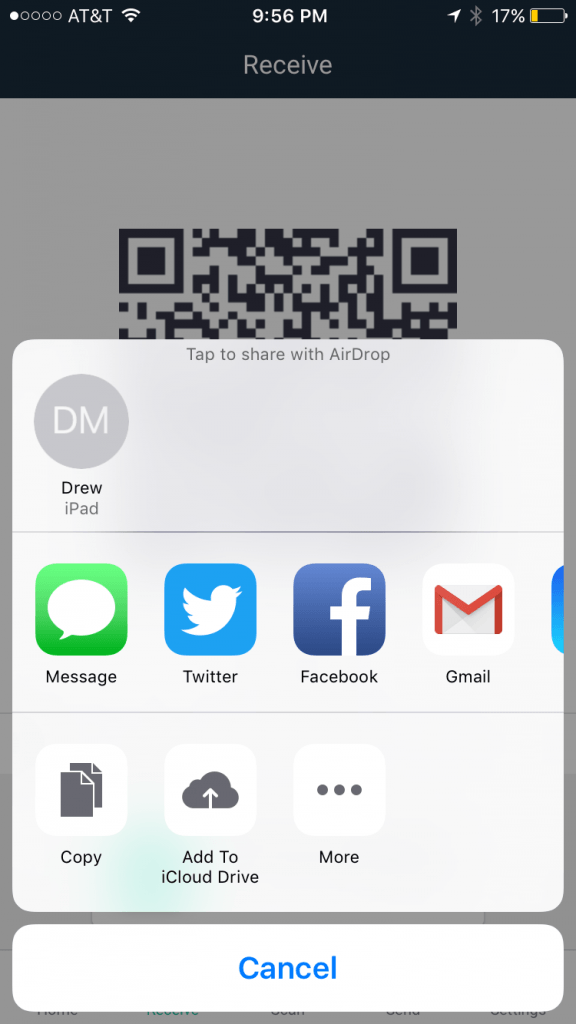
To share your address with anyone, tap the share icon and you can share it via SMS, Twitter, Facebook, Gmail, and more.
Or…
Tap the QR code, a “Copied to clipboard” message will briefly flash along the bottom of the QR code and you can add this address to any message field or social media platform.
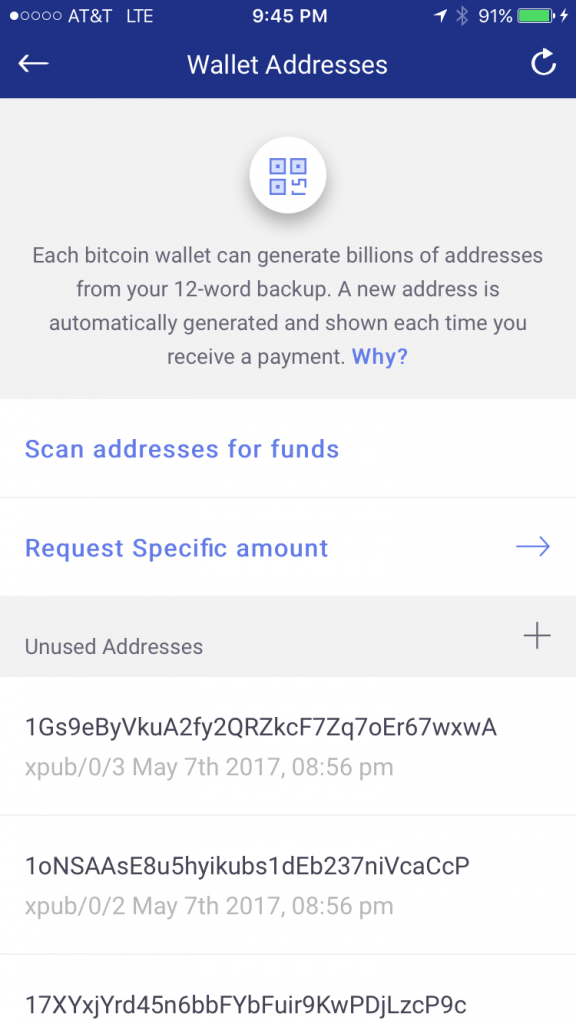
To request a specific amount, tap your personal wallet address number string, this will take you to the Wallet Addresses page.

NOTE: Each bitcoin wallet can generate billions of addresses from your 12-word backup. A new address is automatically generated and shown each time you receive a payment.
Why?
It’s a good idea to avoid reusing addresses – this both protects your privacy and keeps your bitcoins secure against hypothetical attacks by quantum computers.
Go ahead and tap _, “Request Specific amount”.
_
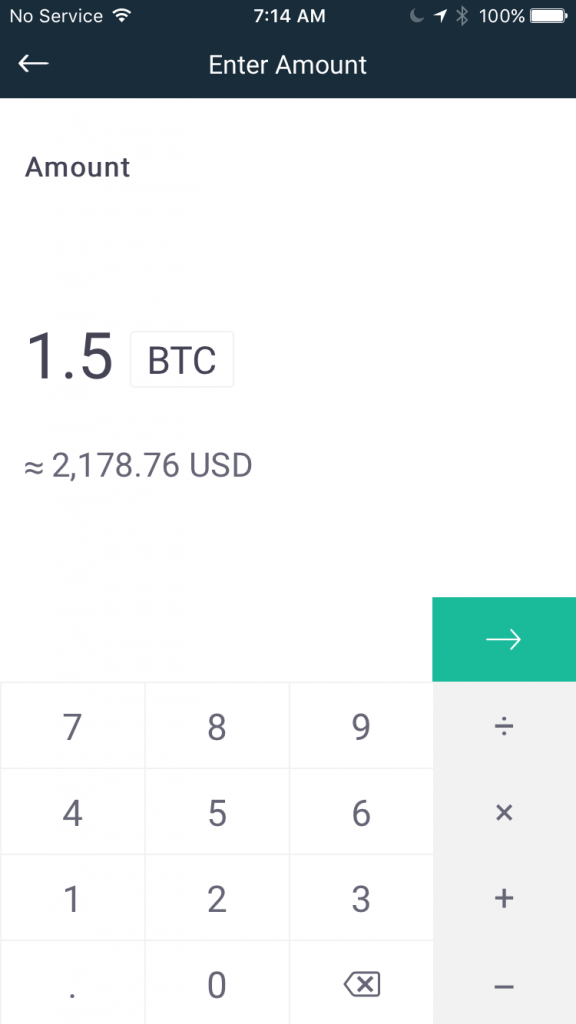
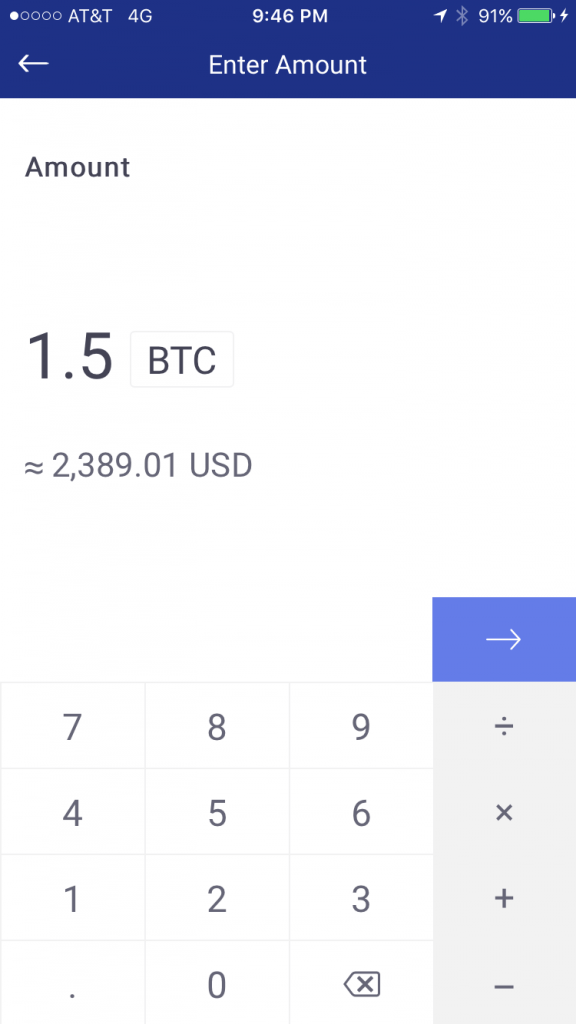
Next, enter the amount you wish to request, and then tap the green arrow above the ➗ sign.
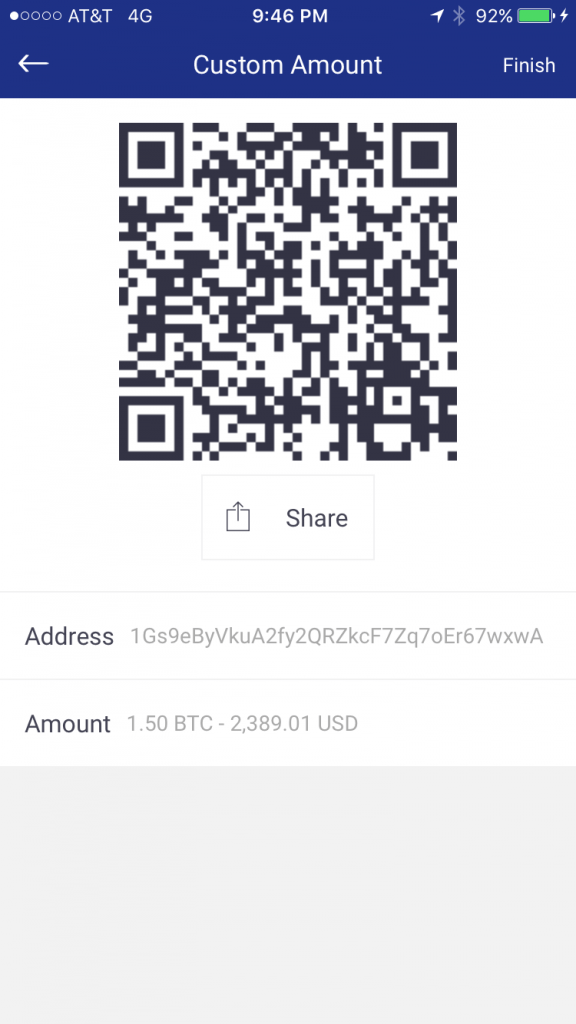
Your wallet will generate a QR code with those details in it to send to the other party.

You can share and/or send this QR code request payment to anyone via SMS, Gmail and many social media platforms.
Next to the Receive icon along the bottom of your homepage is the Scan icon.
The Scan option allows you to easily capture other wallet addresses to seemingly send and receive bitcoins.
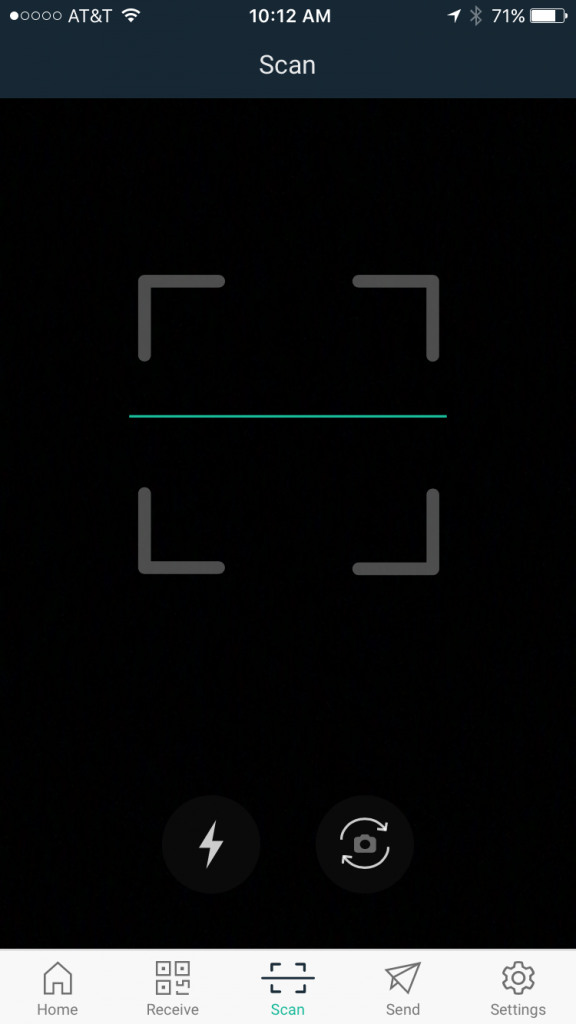
Simply, hold your phone over the QR code of another users wallet and your phone will quickly capture this information.
SEND ACTUAL FUNDS PAGE
Next to the Scan icon along the bottom of your screen is the Send icon in the form of a paper airplane.
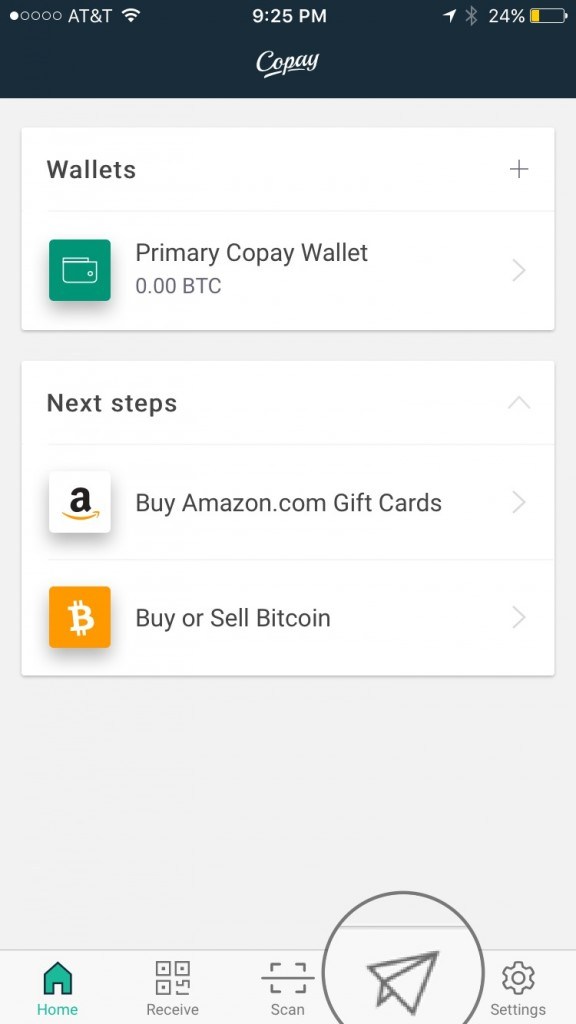
To send a payment, tap on the “Send” icon along the bottom access menu.
Buy Amazon.com Gift Cards
Bitpay Bitcoin Wallet Review and User Guide
Manage your bitcoin finances in one app with the secure, open source wallet by BitPay.
BitPay carefully designed this app for new users, without hiding important information or removing powerful features.
How to use BitPay
First, download BitPay from the Apple App Store.
Once installed, open the app.
After you open the app, you will be taken to the Get Started page.
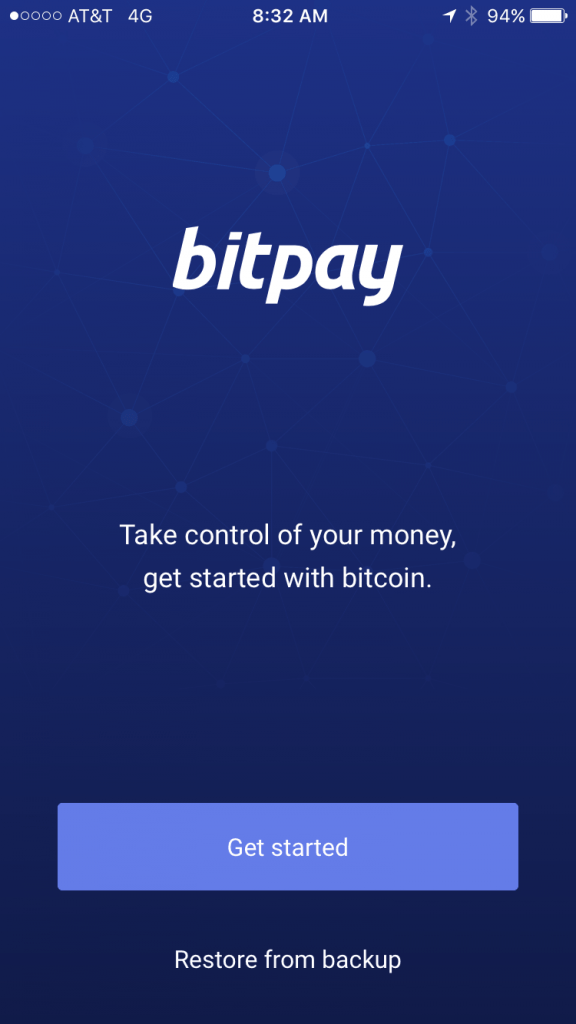
To open a wallet with BitPay, select, “Get started”.
BitPay provides users with three short inforgraphic pages. The first page is about bitcoin as secure, digital money and how easy it is to make payments.
Select, “Got it”.
The second page is about bitcoin as currency. You can trade it for other currencies like US Dollars, Euros, or Pounds.
Select, “Make’s sense”.
The third page is about user control of their bitcoin. BitPay, stores your bitcoin with cutting-edge security.
Not even BitPay can acces it.
Select, “Create bitcoin wallet”.
No backup, no bitcoin.
Since only you control your money, you’ll need to save your backup phrase in this app gets deleted.
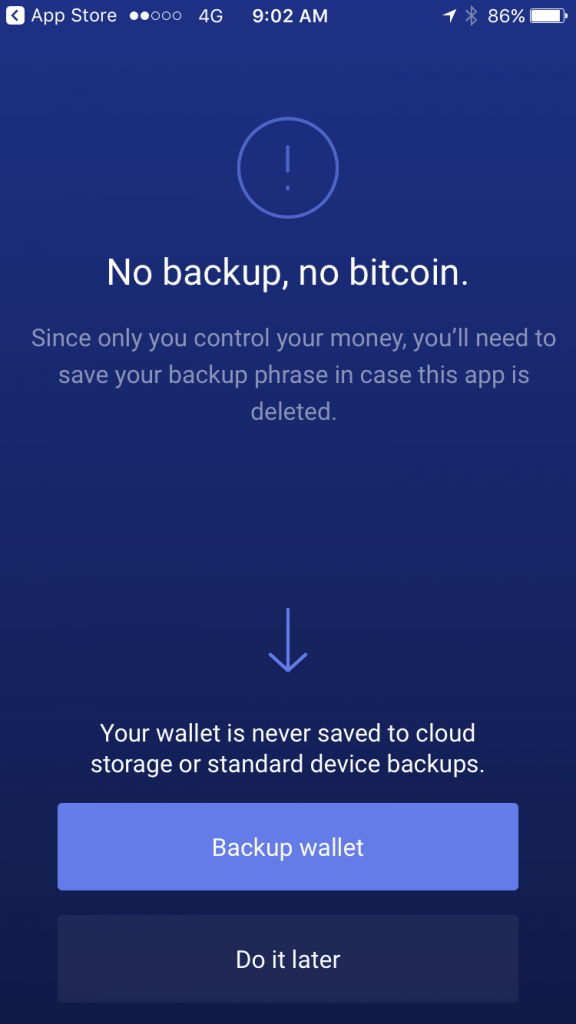
You wallet is never saved to cloud storage or standard device backups.
Select, “Backup wallet”.
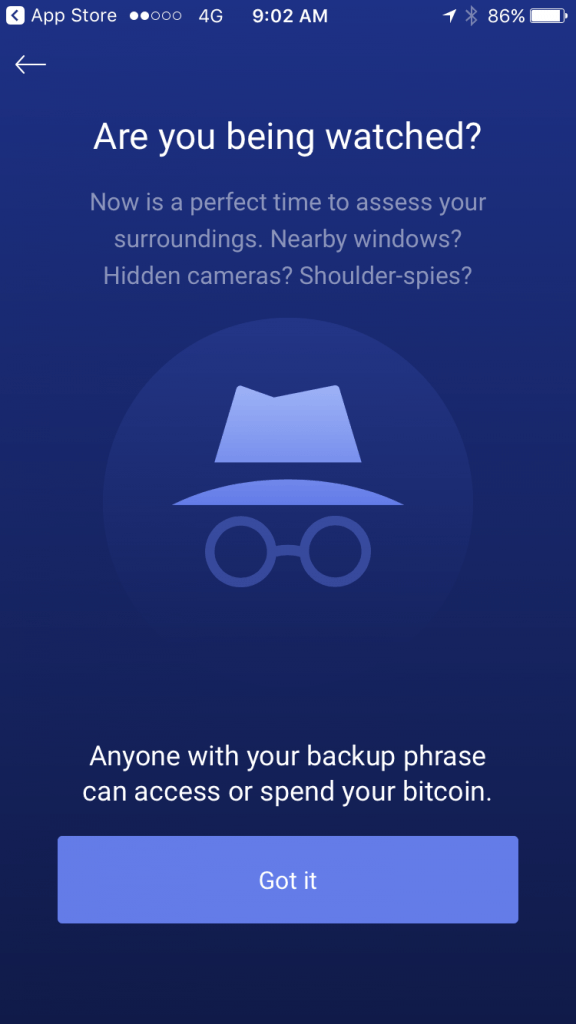
Before setting up your wallet, BitPay reminds you that anyone with your backup phrase can chess or spend your bitcoins.
Select, “Got it”.
On the next page, the team at BitPay kindly reminds us that screenshots are not secure.
If you take a screenshot, your backup may be viewed by other apps. You can make a safe backup with physical paper and a pen.
Select, “I understand” to continue.
NOTE: DO NOT enter it into a password manager field or software, (i.e. a browser, or word document). This information can be accessed via malware such as CoinThief, and other Trojan viruses .
Here is a link to a SecureMac OSX/CoinThief Identification Manual and Removal Instructions that was released as a result.
Please carefully write down this 12 word phrase on the next screen.
BitPay will confirm you did this on the next screen.
NOTE: I took screenshots just for this wallet review. I will not be storing any personal funds or using this wallet for anything, otherwise I take BitPay’s advice and write my phrases on physical paper and a pen.
Select, “I’ve written it down”.
Next, BitPay will ask you to please tap each word in the correct order.
After you do this, an “Is this correct?” message box will pop up asking you to confirm this is correct.
Select, “Confirm”.
Congratulations, your bitcoin wallet is backed up!
Be sure to store your recovery phrase in a secure place. If this app is deleted, your money cannot be recovered without it.
Select, “Got it”.
Alright, you are almost done. This will take you to the final step of backup process.
BitPay reminds its users that bitcoin is different – it cannot be safely held with a bank or web service.
Before you can proceed, BitPay will ask you check off that you understand the following:
✔️ I understand that my funds are held securely on this device, not by a company.
✔️ I understand that if this app is moved to another device or deleted, my bitcoin can only be recovered with the backup phrase.
After you check the first two boxes, a third will appear at the bottom of your screen.
This one verifying…
✔️ I have read, understood, and agree to the Terms of Use.
Check the Terms of Use box, and then select “Confirm & Finish”.
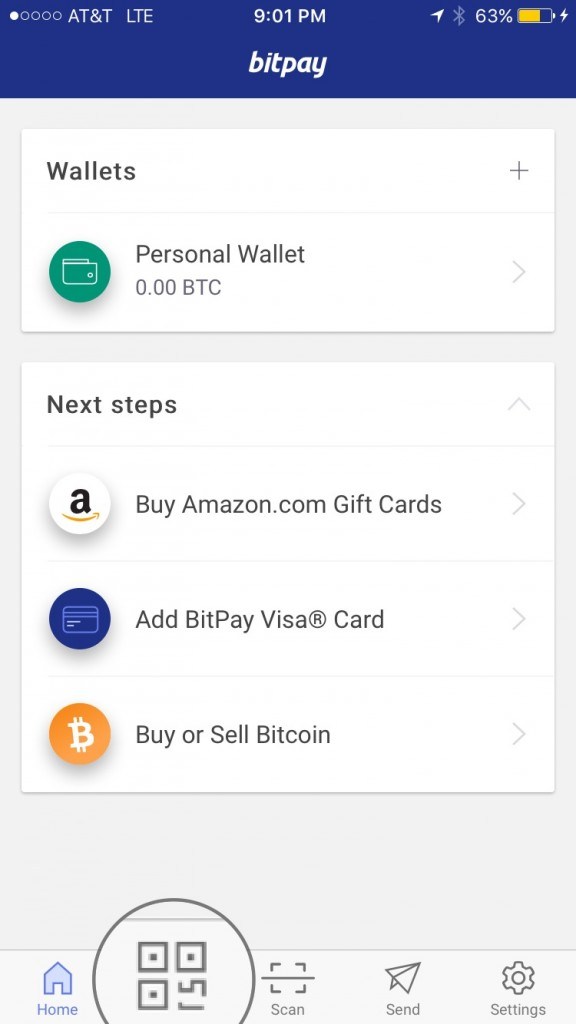
Congratulations, you’re wallet is ready for use. Below is what your Homepage looks like.
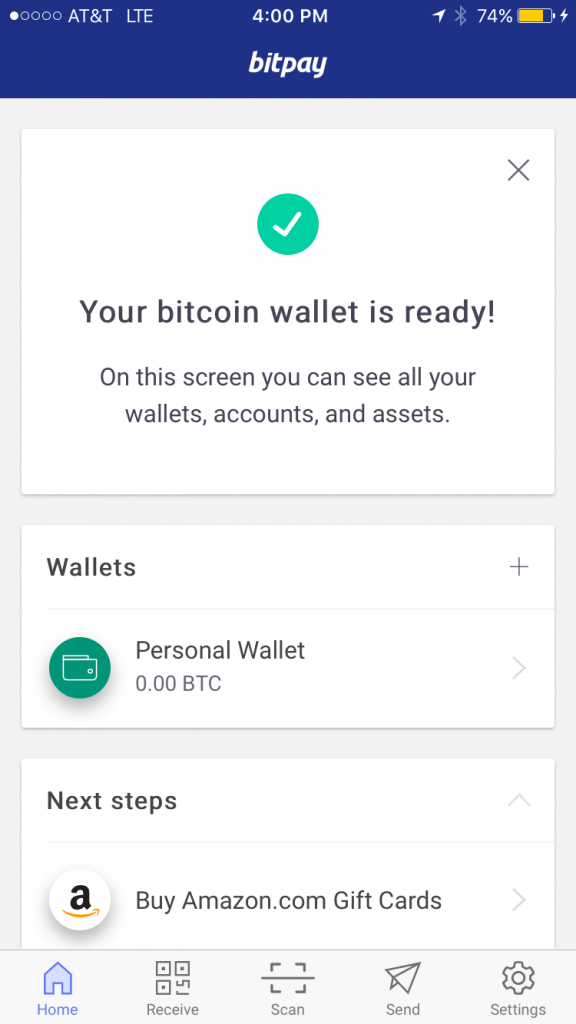
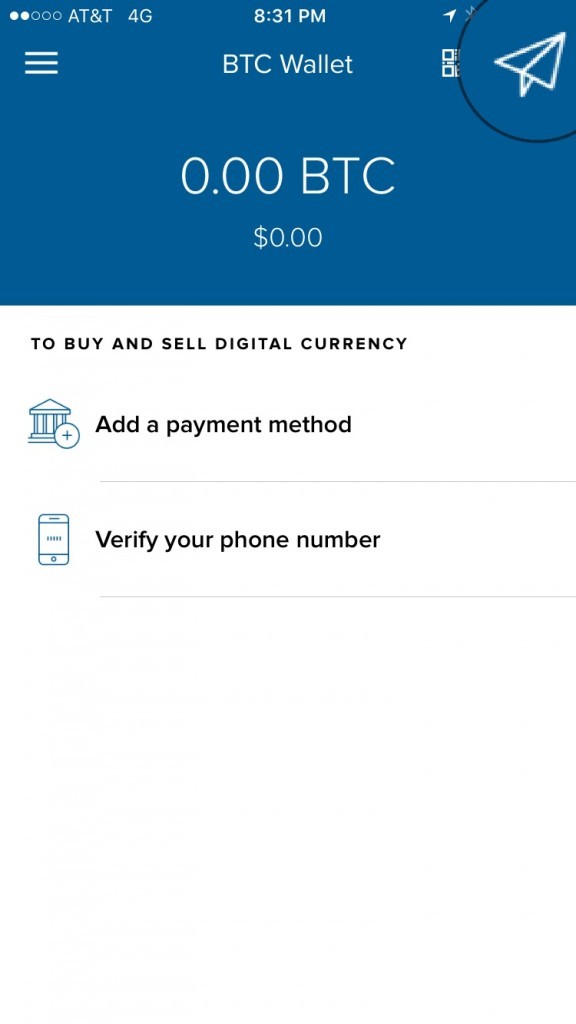
Under the Wallets section of the homepage is where your newly created wallet is located. Your account amount is found under your wallet name (0.00 BTC).
Along the bottom of the homepage you’ll find the home button, receive, scan, send, and settings icon options. These icons will remain along the bottom regardless of which page of the app you are on.

Under the Next steps section of the homepage, are the Buy Amazon.com Gift Cards, BitPay Visa Card, and Buy or Sell bitcoin wallet features.

We’ll come back to these later in this guide.
Now that you have a secure wallet, you’re probably wondering how to receive and send bitcoin.
How to Receive Bitcoin
To receive a payment, tap on the “Receive” icon along the bottom access menu.
Your wallet Receive screen displays a large QR code in the middle, access to every page within the app via the icon screen along the bottom, your personal wallet address, the name of your wallet, and the amount of BTC in that particular wallet.
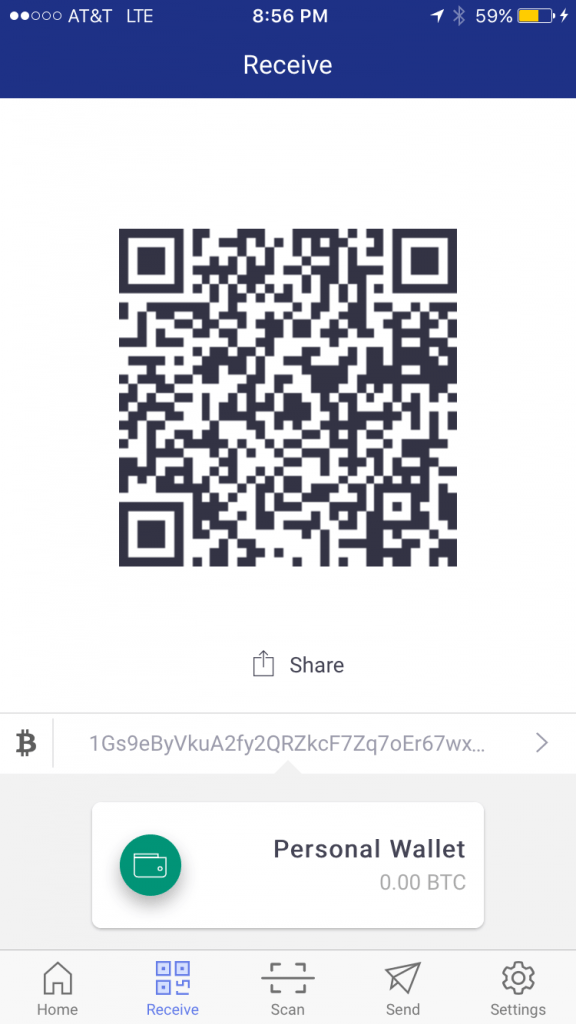
The running string of number you see above your green wallet icon and name is your personal wallet address.

Anyone with this address can send you bitcoins!
To share your address with anyone, tap the share icon and you can share it via SMS, Twitter, Facebook, Gmail, and more.
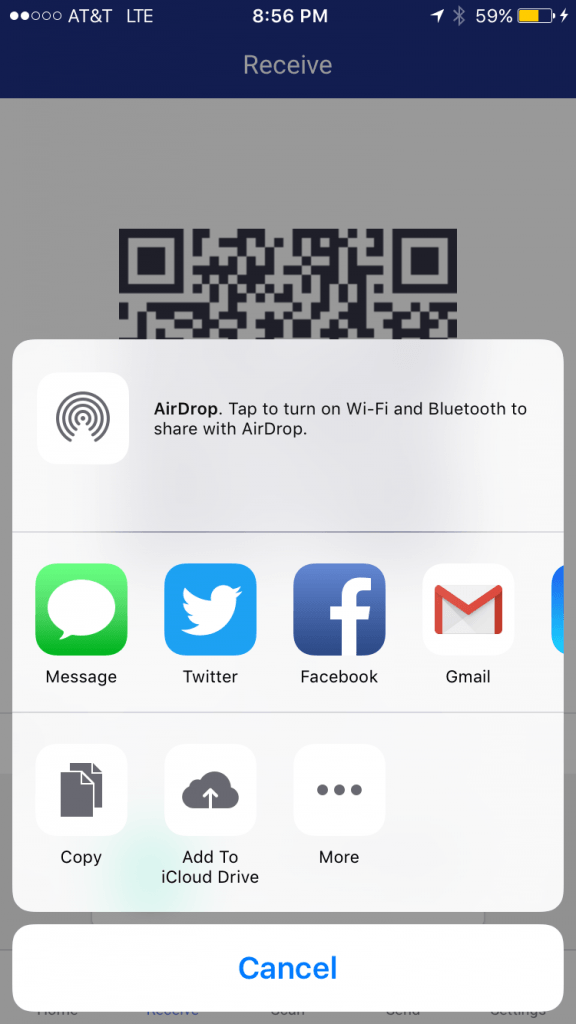
Or…
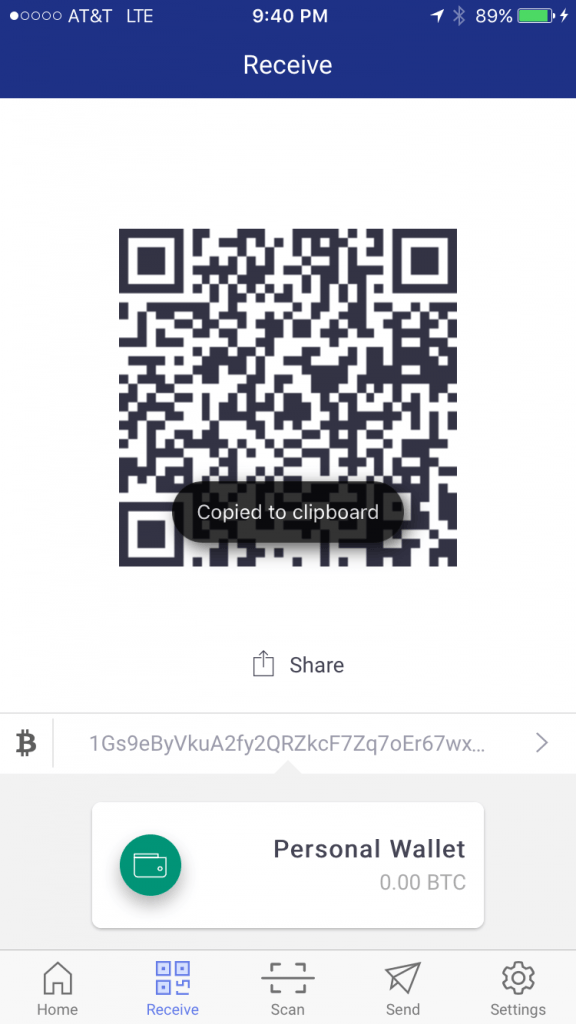
Tap the QR code, a “Copied to clipboard” message will briefly flash along the bottom of the QR code and you can add this address to any message field or social media platform.
To request a specific amount, tap your personal wallet address number string, this will take you to the Wallet Addresses page.
NOTE: Each bitcoin wallet can generate billions of addresses from your 12-word backup. A new address is automatically generated and shown each time you receive a payment.
Why?
It’s a good idea to avoid reusing addresses – this both protects your privacy, and keeps your bitcoins secure against hypothetical attacks by quantum computers.
Go ahead and tap, “Request Specific amount”.
Next, enter the amount you wish to request, and then tap the green arrow above the ➗ sign.
Your wallet will generate a QR code with those details in it to send to the other party.
You can share and/or send this QR code request payment to anyone via SMS, Gmail and many social media platforms.
Mycelium for iPhone Wallet User Guide and Review
Granted the prestigious “Best Mobile App” app by Blockchain.info in 2014, the Mycelium wallet provides the ability to send and receive bitcoins whilst benefiting from an easy to user interface.
How to use Mycelium
First, download Mycelium from the Apple App Store.
Once installed, open the app.
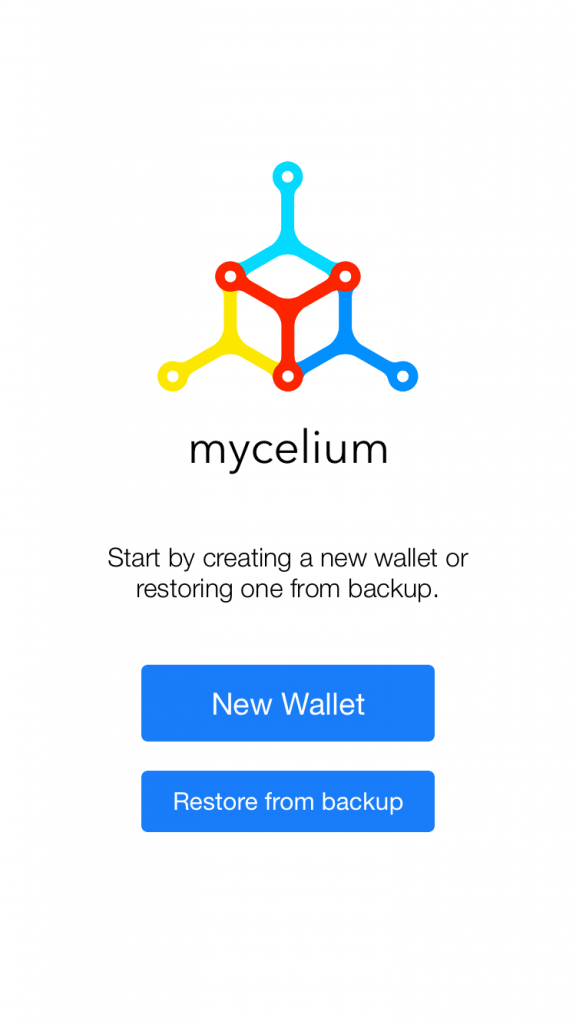
Select “New Wallet”.
Mycelium makes generating your master key a unique experience. In the next step, you will be asked to shake your iPhone to generate a master key.

Go ahead and shake your iPhone until the thin blue bar is completely filled.
To avoid losing your funds, you have to make a backup of your wallet – with it you will be able to easily restore your funds in case of loss, damage, or malfunction of your device.
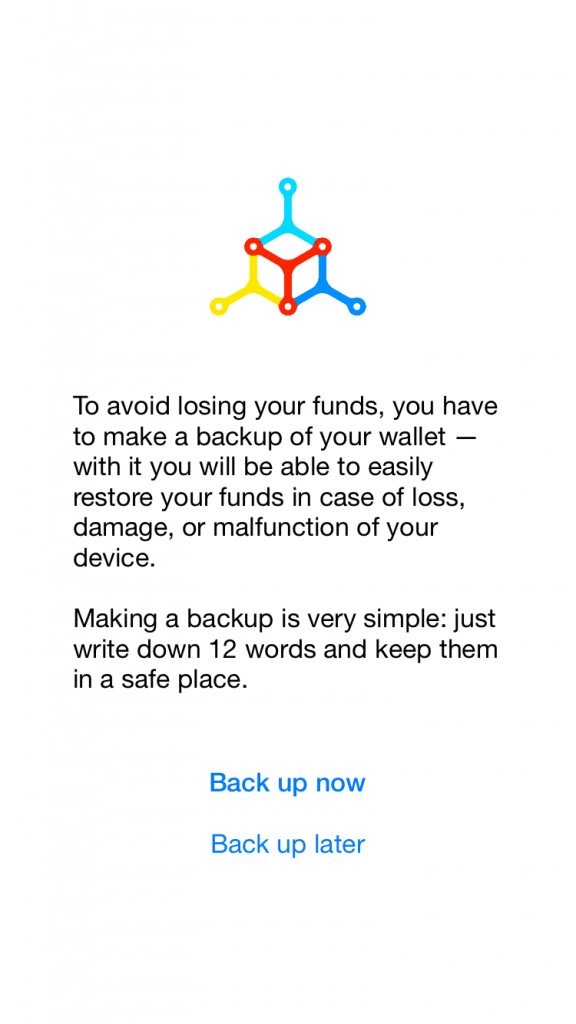
Making a backup is very easy, just write down 12 words and keep them in a safe place.
NOTE: DO NOT enter it into a password manager field or software, (i.e. a browser, or word document). This information can be accessed via malware such as CoinThief, and other Trojan viruses.
Here is a link to a SecureMac OSX/CoinThief Identification Manual and Removal Instructions that was released as a result.
Select, “Back up now”.
NOTE: You can choose to back up your wallet later by selecting the “Back up later” option, however, we strongly advise you to take a few minutes and back it up right away.
The next screen explains that you are about to back up a master seed of your wallet. This seed allows anyone knowing it to spend all funds from your wallet.
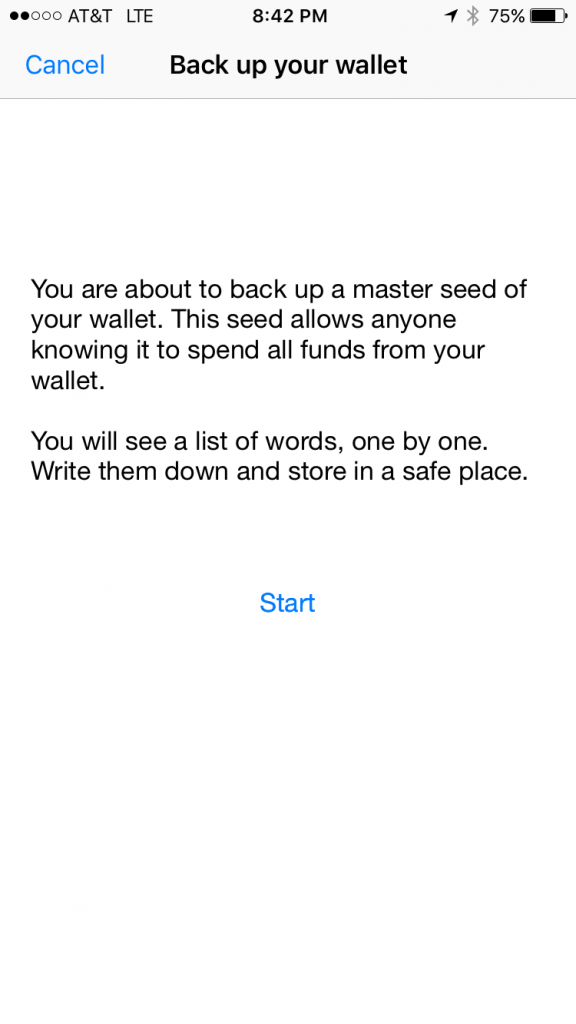
After selecting Start, you will see a list of 12 words, one by one. Write them down and store it in a safe place.
Go ahead and press “Start”.
NOTE: As an extra added security feature, the TOUCH ID for “Mycelium” message box may pop up and ask you to authorize access to the backup via your saved thumbprint.

Next, Mycelium will ask you to enter all 12 generated words, separated by a space to verify they are written correctly into the grey field above “Next” as shown below.
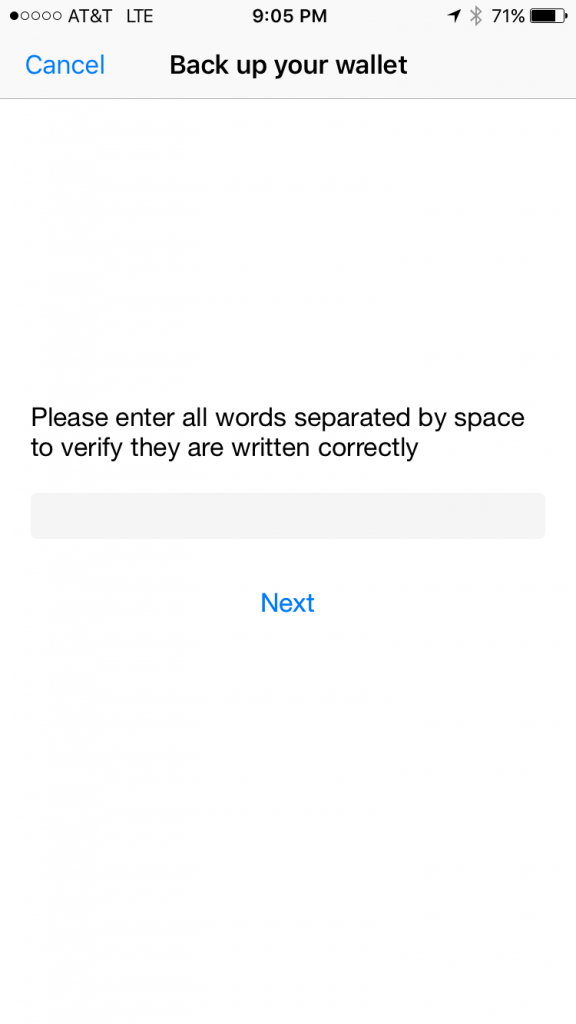
Correctly entered words will show up in green lettering, incorrect entries will remain in black.
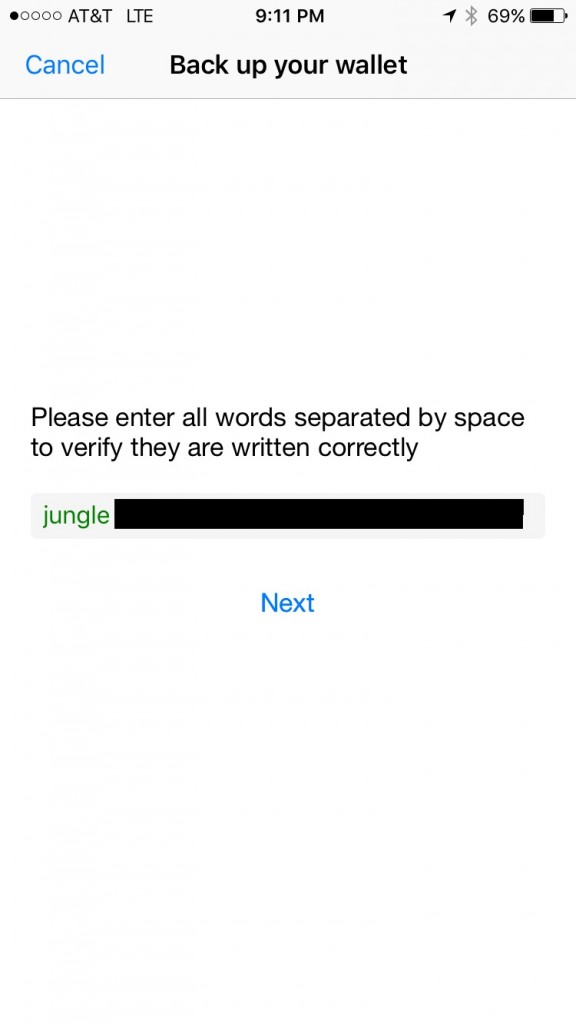
Once you’ve entered all 12 words correctly, select “Next”.
If you enter all 12 words correctly, you will be taken to the backup is complete message.
Mycelium reminds you to keep your master seed safe. You can use it to restore your wallet when you install Mycelium Wallet on another device (or reinstall on this one).
Go ahead and press “Finish”.
This will take you to Mycelium Wallet’s homepage.
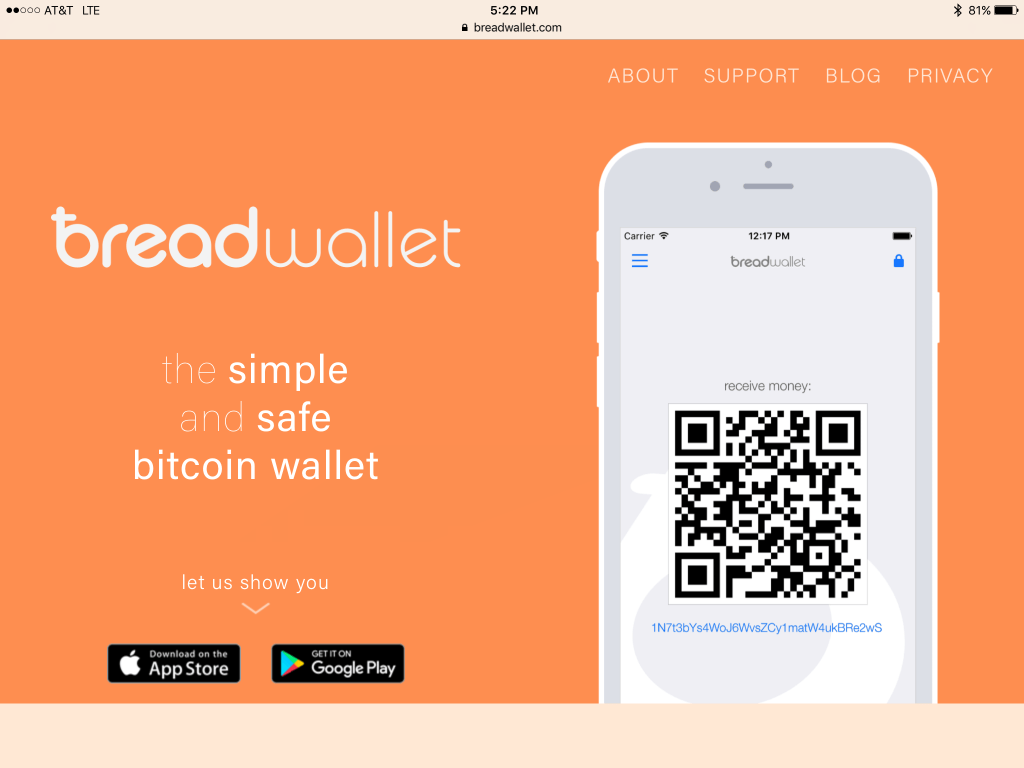
breadwallet Review and User Guide
breadwallet is one of the most popular bitcoin wallets available on iOS.
This breadwallet review and user guide will show you how to help create, use and secure breadwallet and bitcoin on your iOS iPhone/tablet easier, and how to send and receive payments.
The team at breadwallet clearly understands bitcoin can be confusing. With this in mind they created a wallet with a focus on ease of use, security, and privacy. They have kept the wallet’s usability quite bare bones. We really like breadwallet because it’s clear how to use, even if you know nothing about bitcoin.
breadwallet focuses the majority of user’s experience between just two screens, send and receive. Swipe to move between them.
breadwallet is extremely user friendly, it’s probably the most user friendly wallet for iOS.
This is our favorite part about breadwallet…
The interface is simple to navigate, and it’s easy to send and receive bitcoin payments. breadwallet focuses the majority of user’s experience between just two screens, send and receive – simply swiping right/left to move between them.
The team at breadwallet has made it extremely simple to get started with bitcoin.
1. Download breadwallet
2. Choose a passcode
That’s it, you’re ready to receive your first payment. No login names or passwords, and no generating cryptographic keys or configuring settings.
… And that’s enough for most users!
breadwallet primarily focuses on ease of use, security, and privacy.
Breadwallet was the first fully decentralized standalone iOS bitcoin wallet. It uses a seed phrase to restore private keys. This means if breadwallet goes down, or out of business, users can still restore their wallet holdings.
Private keys are derived directly from the seed phrase, private keys are stored in a hardware-encrypted-on-device-key, meaning breadwallet connects directly to the bitcoin network via a client Simplified Payment Verification (SPV).
An SPV client is a bitcoin implementation that does not verify everything. Instead, it relies on either connecting to a trusted node, or putting its faith in high difficulty algorithms as a proxy for proof of validity. There are no proprietary servers that can go down causing you to lose your bitcoins.
You can even install the app from a copy in your iTunes library should the app disappear from the App Store.
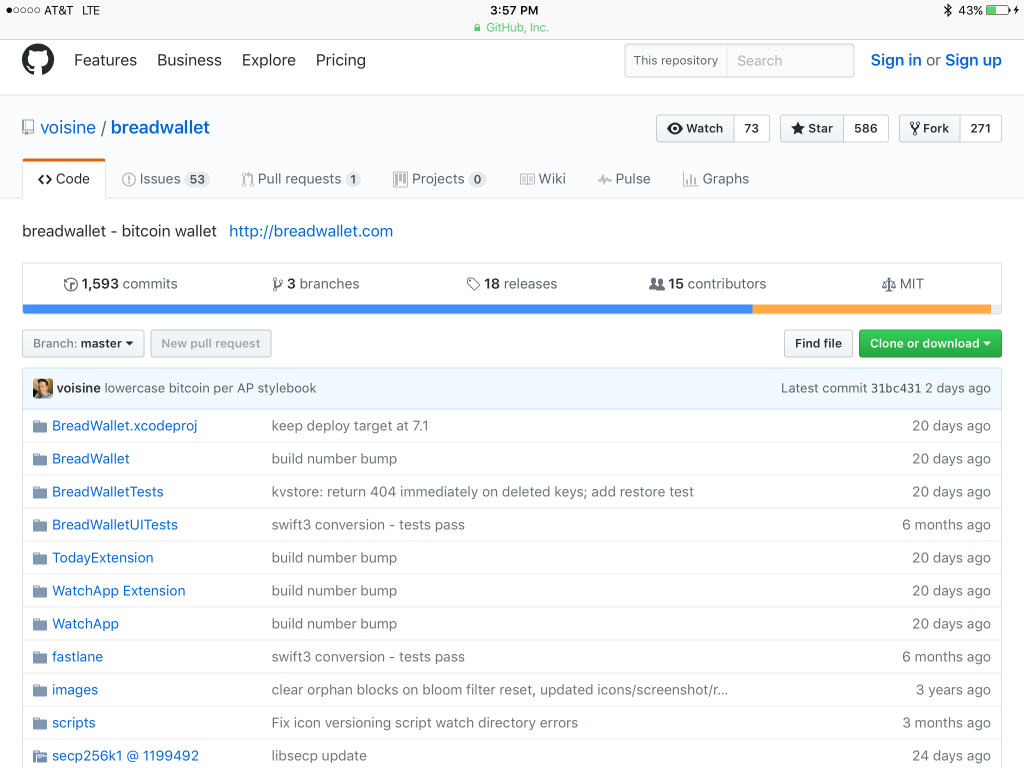
The source code is also freely available on GitHub, so anyone can build and install it themselves if they wish.
Breadwallet is one of the only fully decentralized wallets, which means your funds are stored in your own phone, locked down by industry-leading hardware encryption. Not even breadwallet employees can access your funds without your consent.
Being in charge of protecting your own money may sound intimidating, but once you write down your recovery phrase your funds are safe in the event your phone is ever lost or stolen.
breadwallet runs BIP0032 software. BIP or (Bitcoin Improvement Proposal) allows for enhanced security features by making the wallet hierarchically deterministic (HD). This adds extra security by not using wallet addresses twice and allows users to generate an unlimited number of addresses and private keys from the same seed.
Implementing HD wallet software means wallets can be easily backed up using only their generated twelve-word mnemonic phrase. We strongly advise you implement this feature right away to backup your wallet info and access to funds.
The only thing breadwallet lacks are advanced features that more serious bitcoin users would enjoy having. However, the company’s target market audience is with first time bitcoin and wallet users so the lack of advanced features is not a concern.
Users of breadwallet aren’t able to enjoy the security advantages involved with multisig addresses.
Multisignature (often called multisig) is a form of technology used to add additional security for bitcoin transactions. Multisignature addresses require another user or users sign a transaction before it can be broadcast onto the blockchain.
Bitcoin ‘wallet’ providers including, Coinbase, Greenaddress, Electrum, Armory, among others have been outspoken about the benefits of enabling multisig addresses for their users. The links above will redirect you to those respective sites multisig information page.
The other frustrating disadvantage in regards to security is breadwallet’s lack of two-factor authentication. Breadwallet is becoming increasingly popular among iOS users, especially new users.
While some will stay on and continue to use breadwallet for ease of use, but many users may move on to other wallet choices if breadwallet continues to lag behind in security.
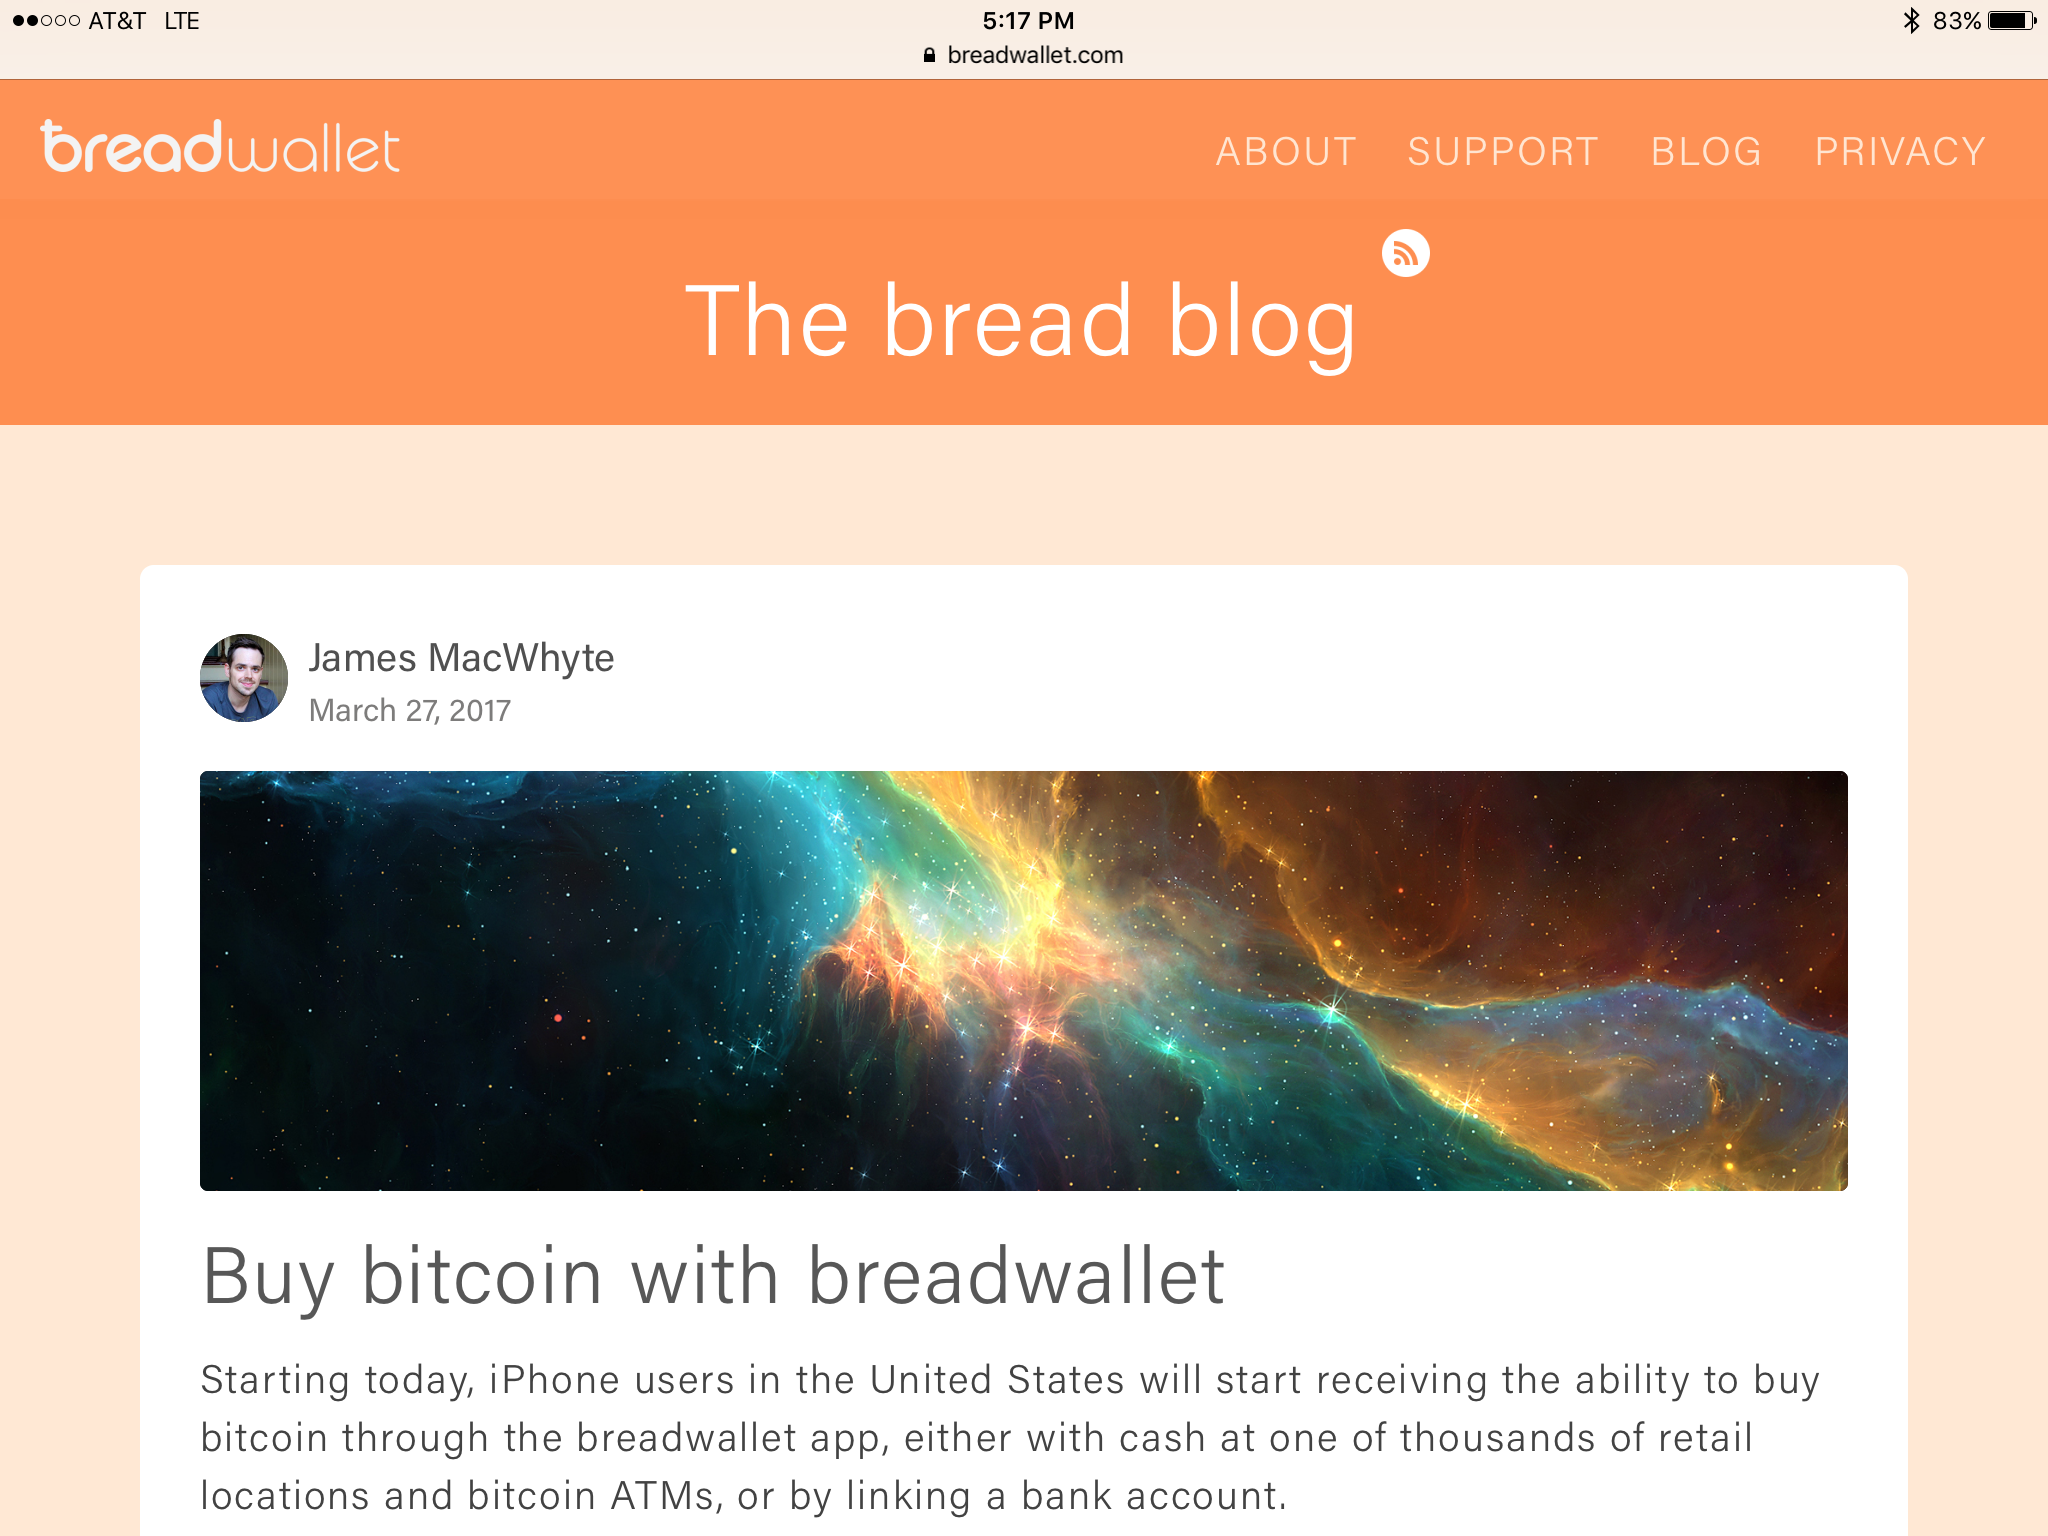
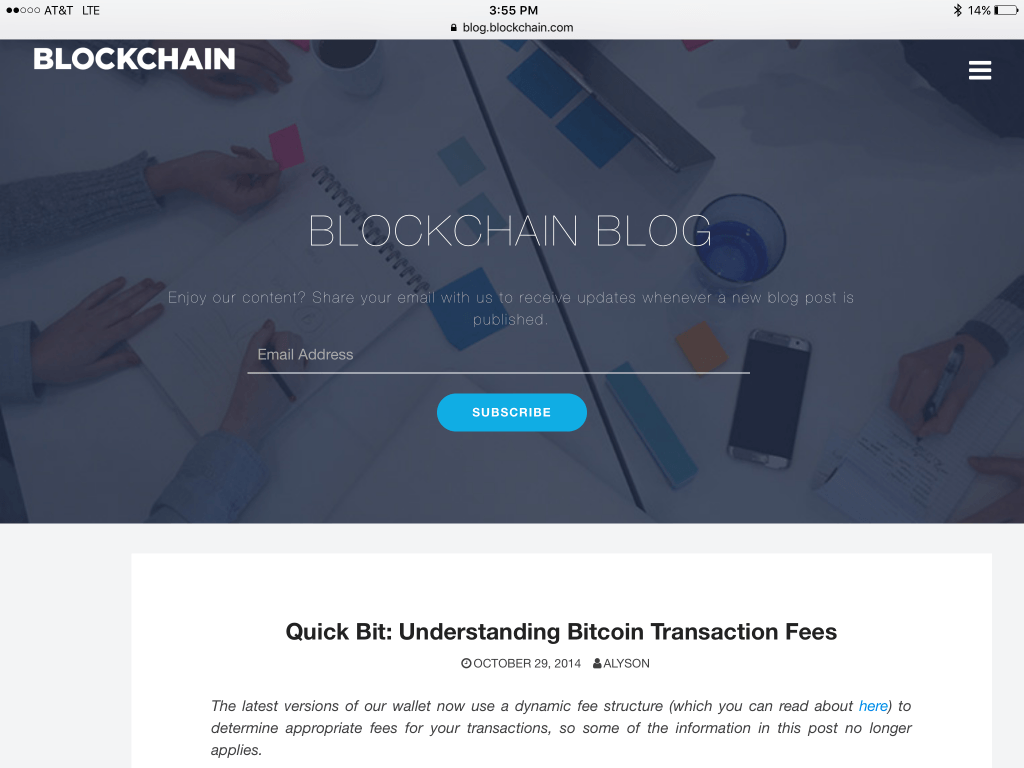
Breadwallet has a blog page dubbed ‘the bread blog’.
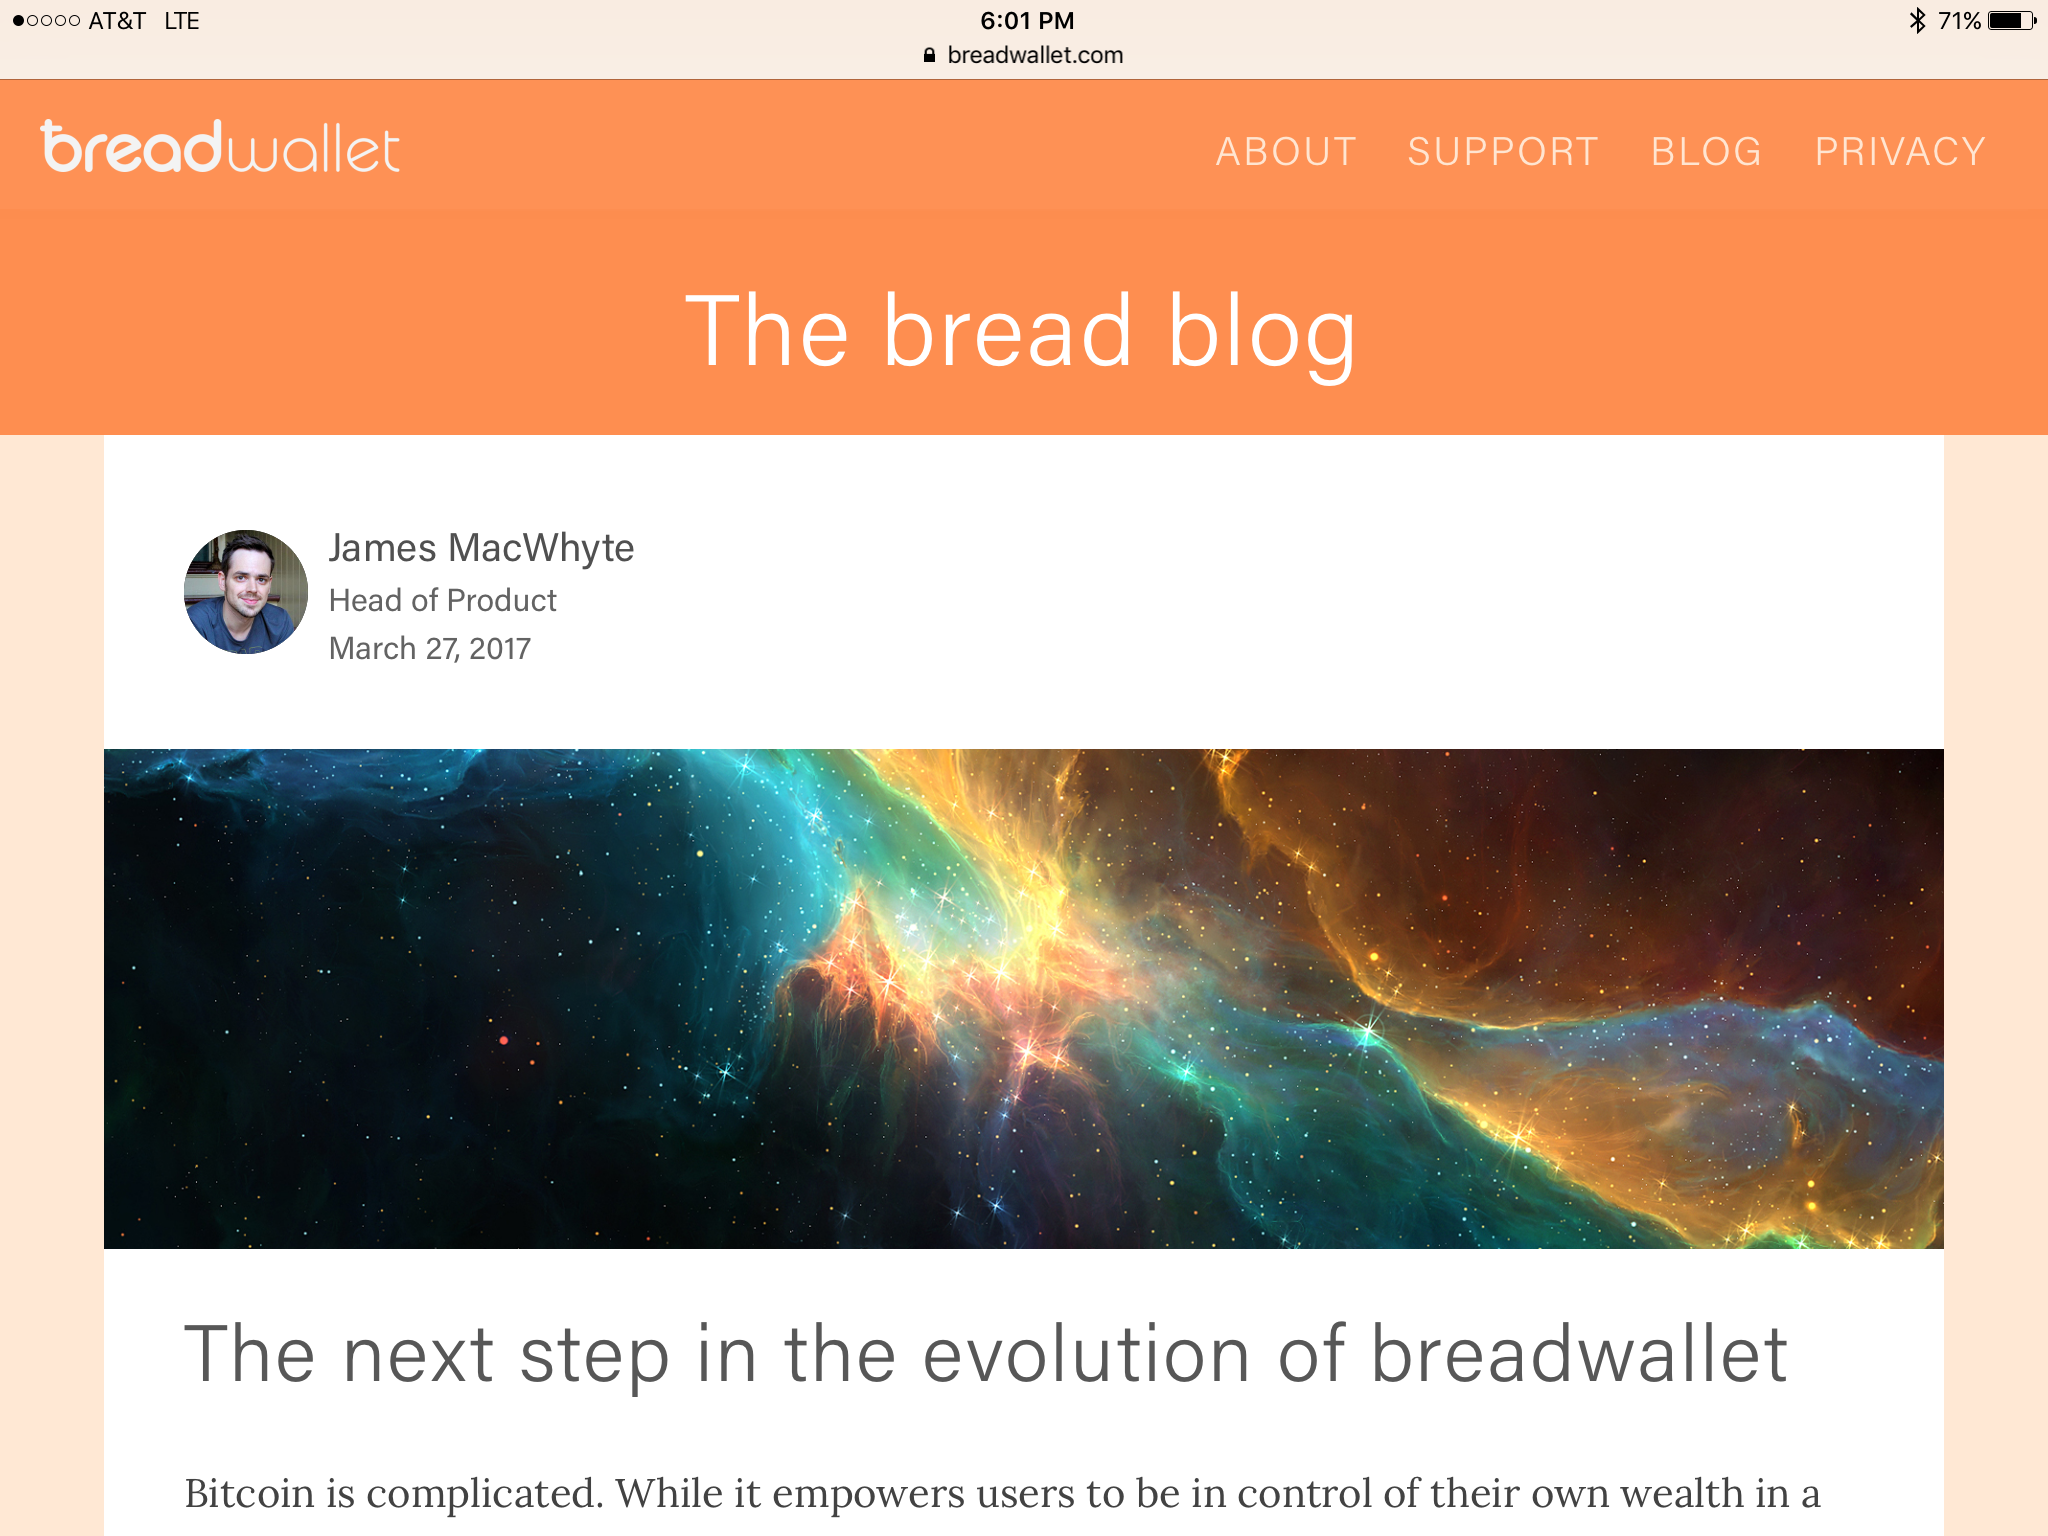
Access to the bread blog can be found in the upper right hand corner of the breadwallet homepage.
Breadwallet updates the bread blog with important news, beta tests, security updates, and other news in the bitcoin space about once a month or when something of note occurs such as recent discussion around a possible bitcoin fork and the implications for users of breadwallet.
On March 27th, 2016 the breadwallet team announced that users can now buy bitcoin from within breadwallet.
Starting today, iPhone users in the United States will start receiving the ability to buy bitcoin through the breadwallet app, either with cash at one of thousands of retail locations and bitcoin ATMs, or by linking a bank account…
“This will be a controlled rollout, meaning a small number of users will be enabled today with the rest of our users gaining access gradually over the coming weeks. If you are eager to try it, please make sure your breadwallet app is up-to-date through the App Store!”
– James MacWhyte, Head of Product
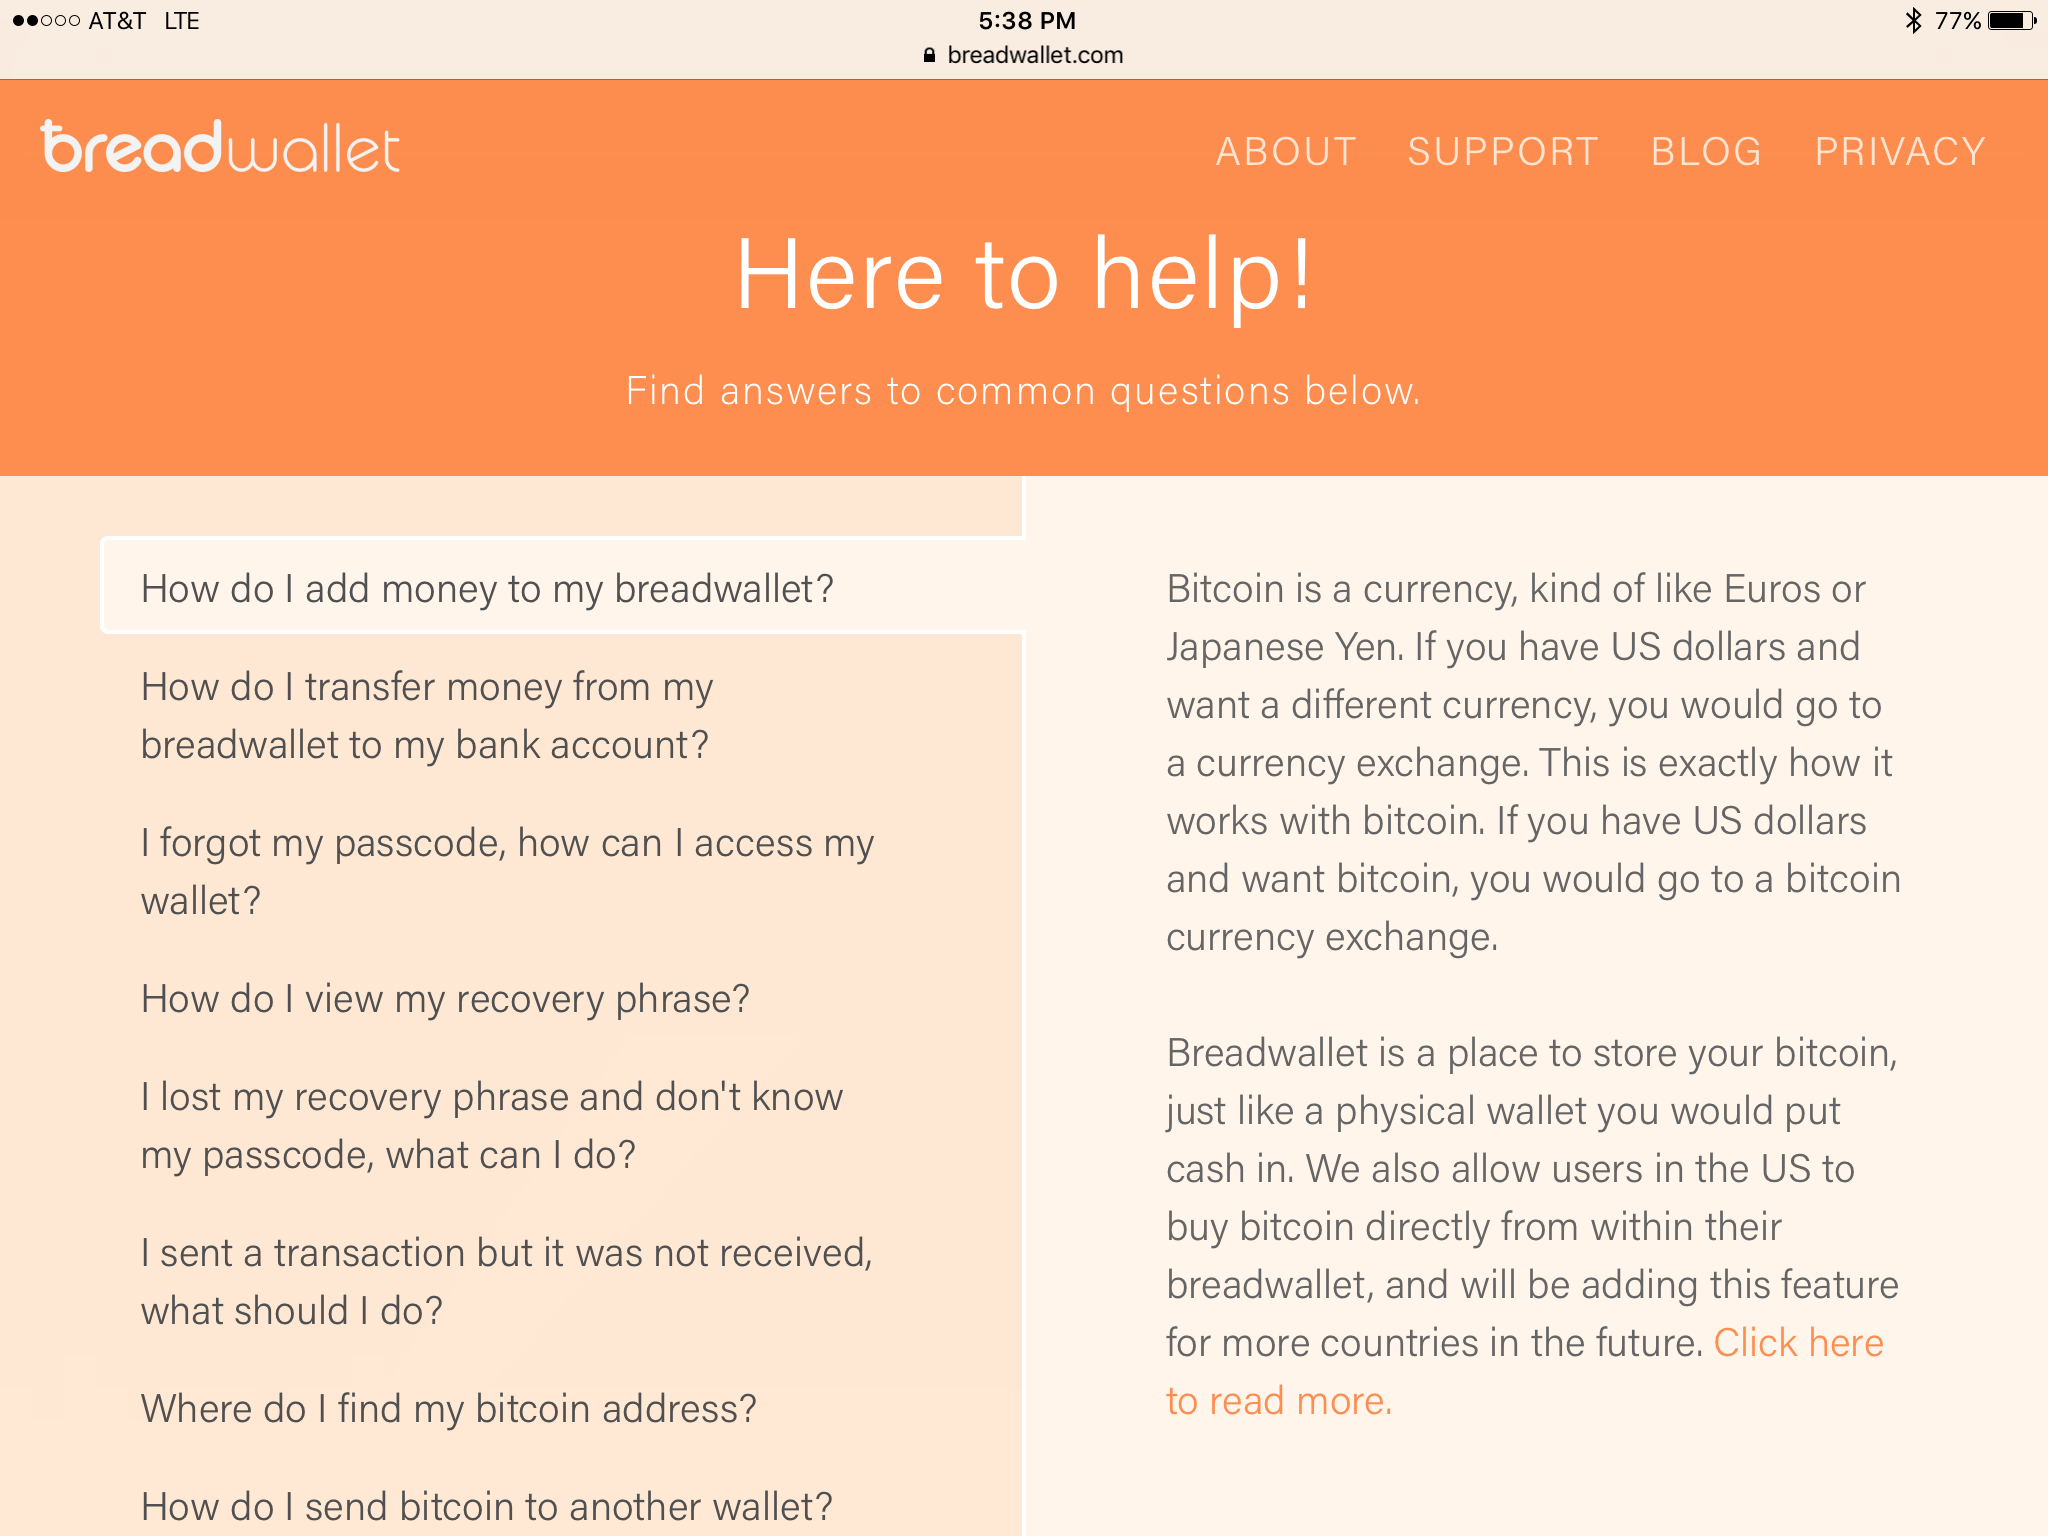
The support section on the breadwallet site provides users with a really helpful resource that answers the most commonly asked questions regarding breadwallet.
Breadwallet has a pretty modest following on twitter, currently 878 as of this post. Despite this, they remain very active with their subscribers.
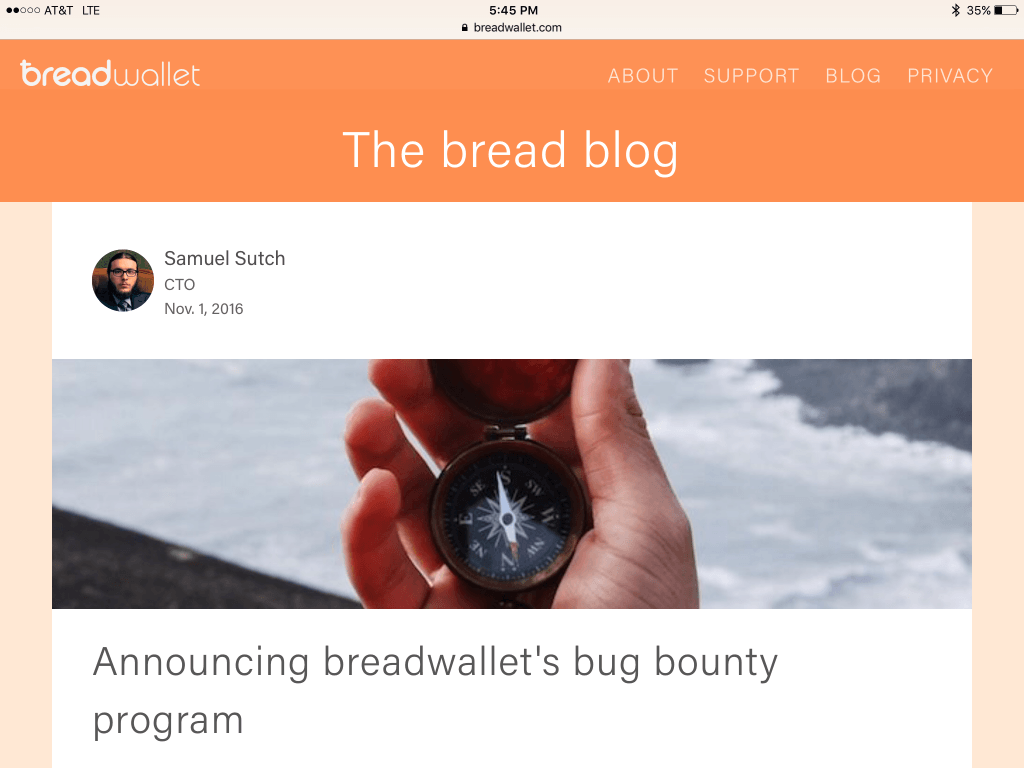
breadwallet Bug Bounty Program
On November 1 2016, breadwallet announced a bug bounty program with the hopes of developing a continuing relationship with the security research community.
Breadwallet will maintain a reward program for security experts that find vulnerabilities in any of breadwallet’s products, services or properties.
The breadwallet team notes that generally any product that is developed by breadwallet is in the scope of the bug bounty program.
This includes, but is not limited to:
breadwallet’s open source code bases (found on github.com/breadwallet)
Website CMS system (breadwallet.com)
Any of their API systems (api.breadwallet.com)
To reward security researchers with the hard work they put into disclosing vulnerabilities Breadwallet offers a minimum reward of $100 USD for a security bug that is found in any of the above products and services in scope. A $500 minimum reward is available for any bug affecting user funds.
How to Use breadwallet
First, download breadwallet from the Apple App Store.
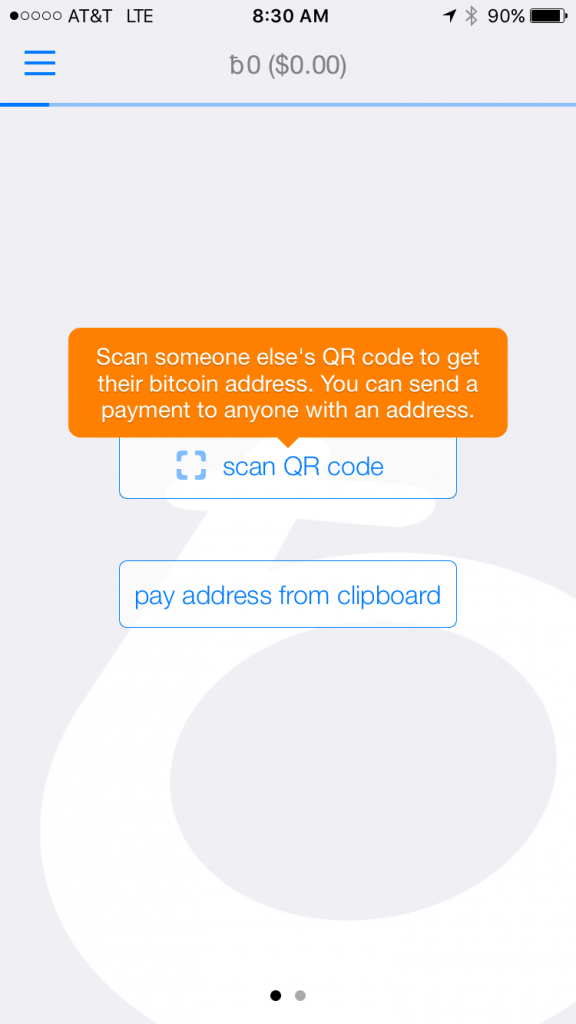
Once installed, open the app and select “new wallet”. You should see a screen like the one below:
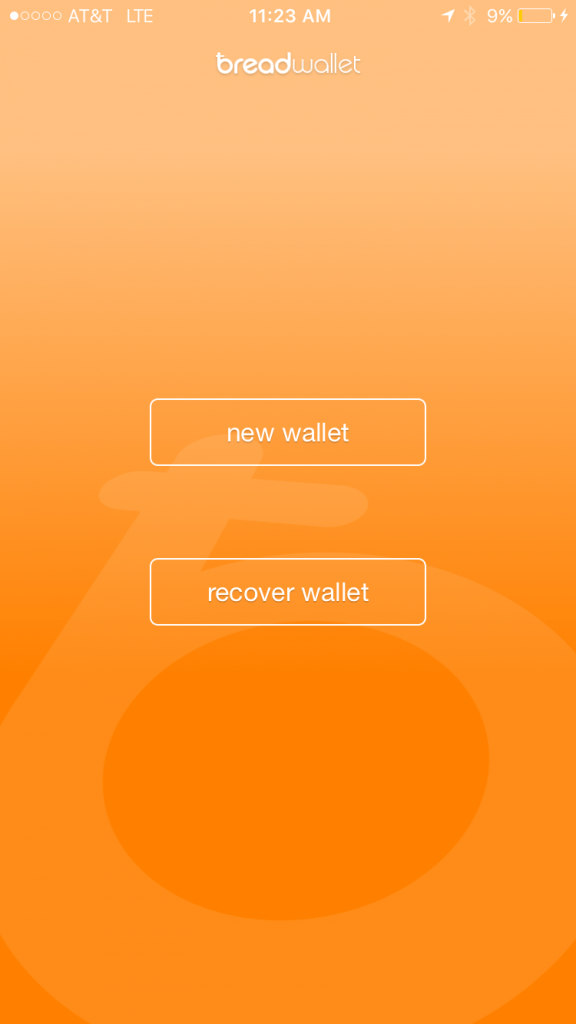
Next, breadwallet will ask you to generate a wallet recovery phrase. This phrase is your wallet backup. Grab something to write your backup phrase on and tap “generate recovery phrase”.
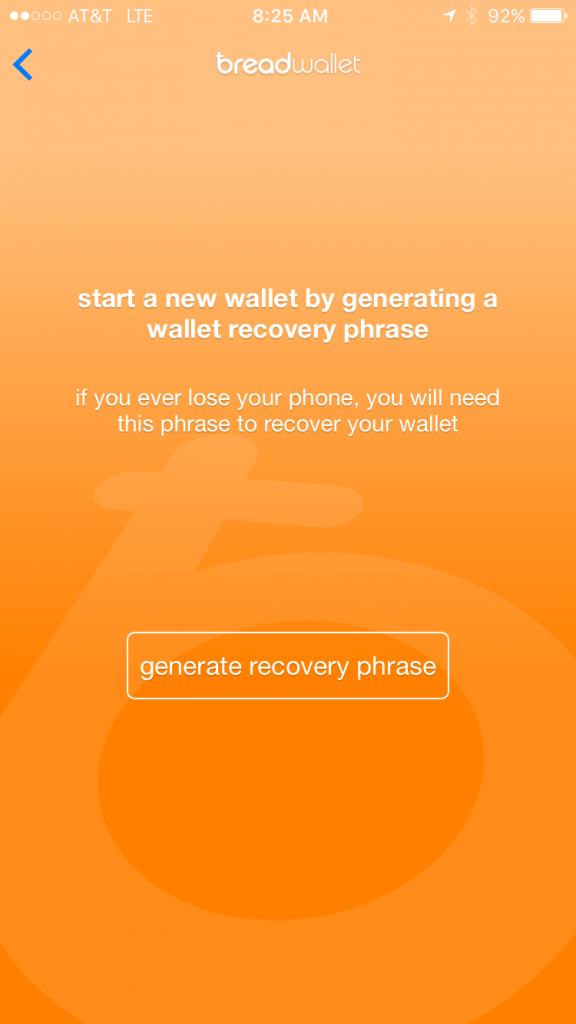
NOTE: You may be required to enter your iPhone password once you tap “generate recovery phrase”.
breadwallet will now display warnings that are very important to follow!
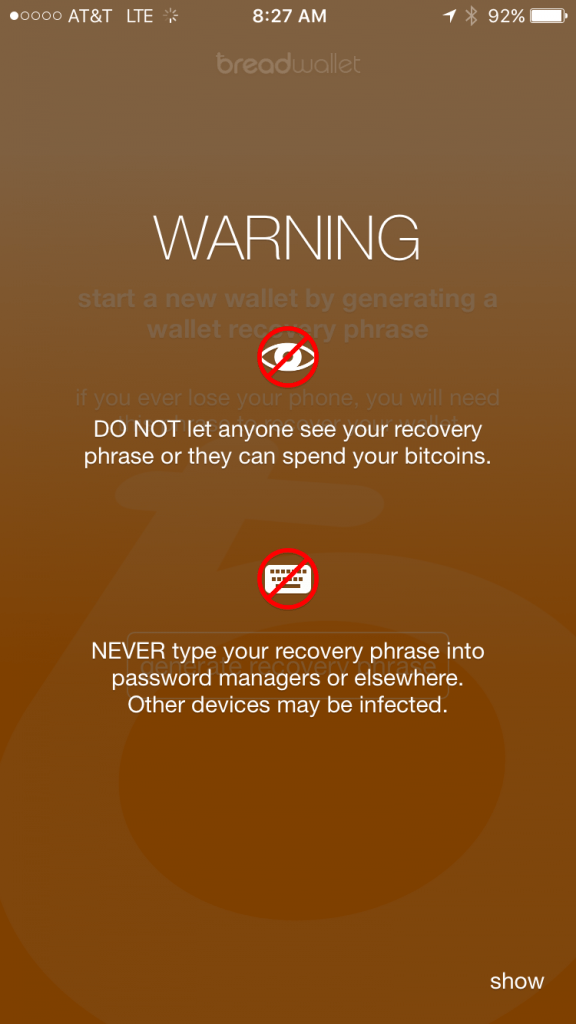
Remember, the 12 word “recovery phrase” that is generated, it is backup protection for your wallet.
NOTE: Anyone who has this 12 word combination can access your wallet, even without access to your iPhone. So be careful with your word combination.
If you lose your device or it is stolen, this recovery phrase is the only way to get your wallet back (your recovery phrase can be always be found under settings).
Protect yourself by making sure to follow what breadwallet says.DO NOT share the code with anyone,DO NOT let anyone else see it, and **DO NOT **enter it into a password manager field or software, (i.e. a browser, or word document). This information can be accessed via malware such as CoinThief, and other Trojan viruses.
NOTE: Here is a link to a SecureMac OSX/CoinThief Identification Manual and Removal Instructions that was released as a result.
In the next step, you will receive your 12 word recovery phrase. We would show a picture, but the wallet doesn’t allow you to take a screenshot of this phrase.
NOTE: If you attempt to take a screenshot of your phrase you receive the following message:
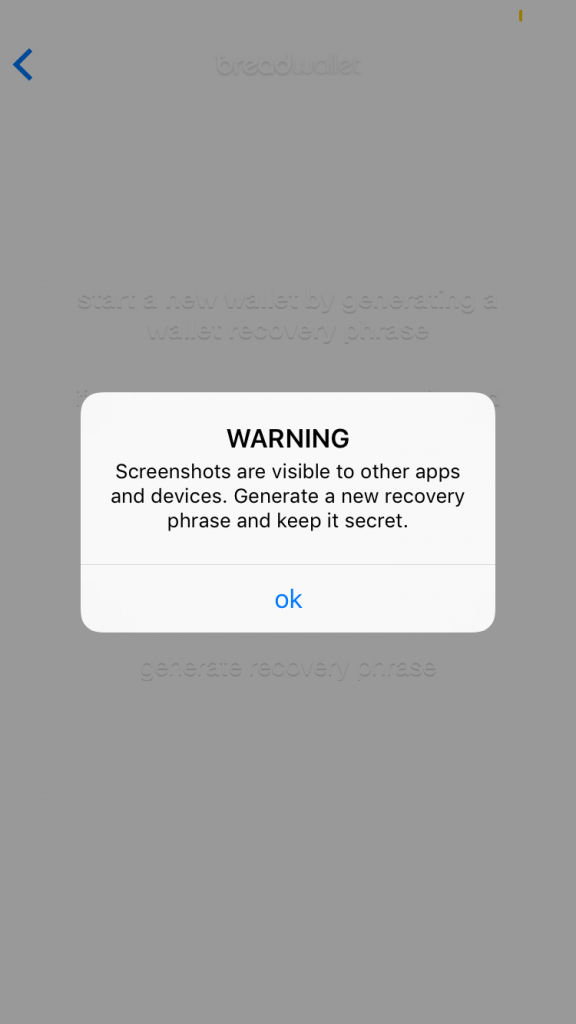
Make sure you write down your phrase. You will need to confirm the phrase to prove you wrote it down by checking the box that will appear under your phrase.
Once you confirm your phrase, breadwallet will ask you to choose a 4-digit passcode for “bread”.
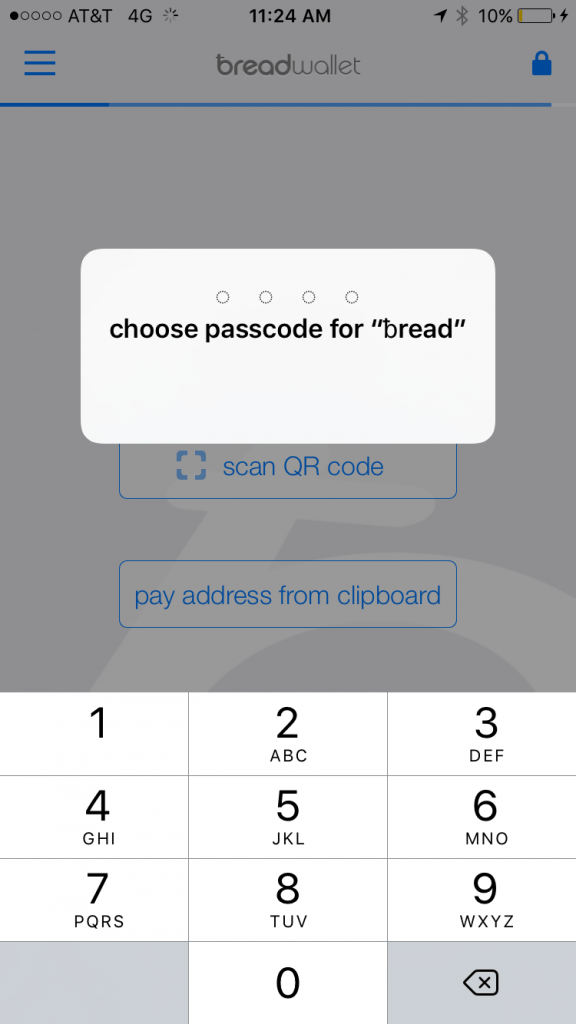
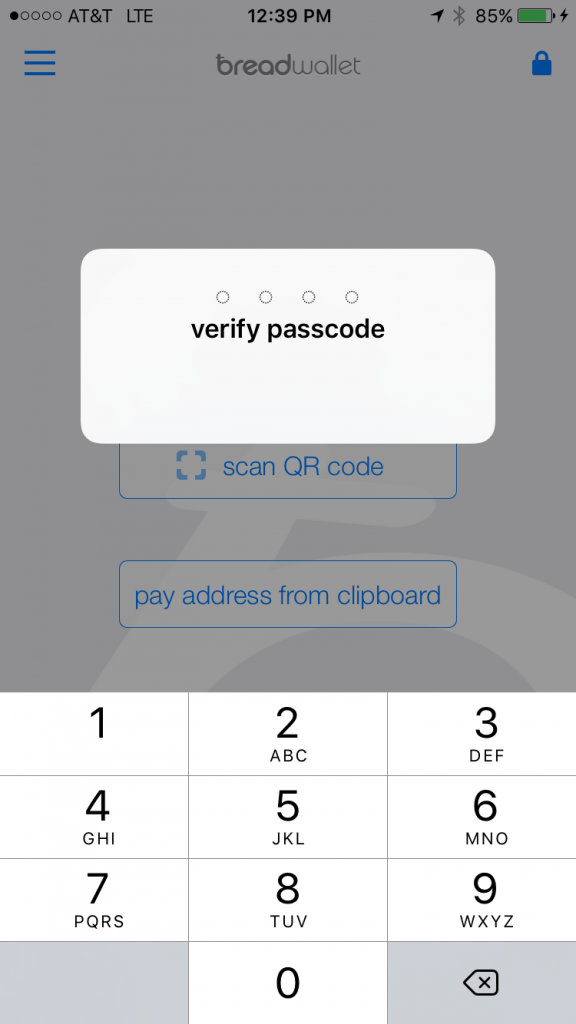
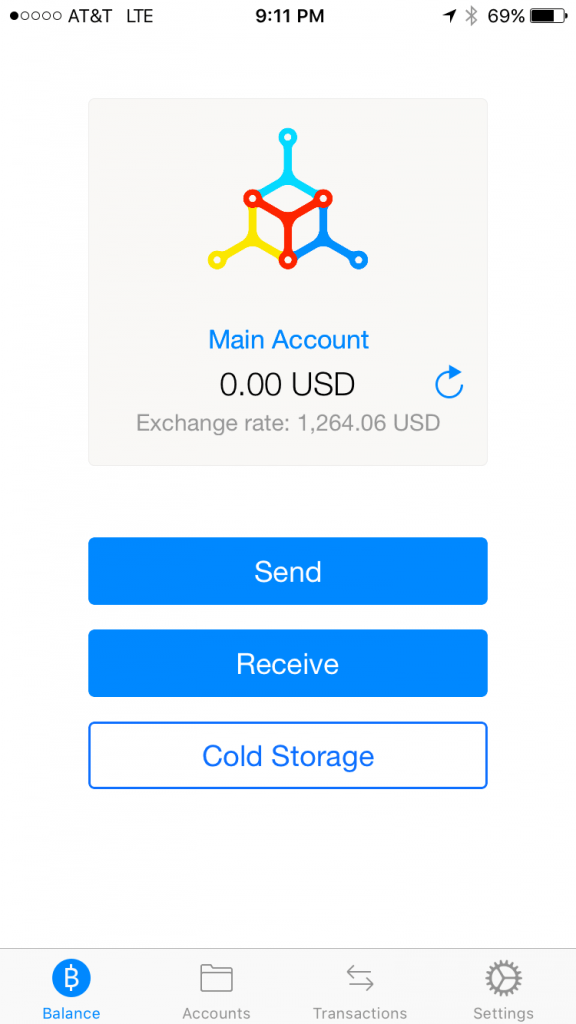
Re-enter your chosen 4-digit passcode and breadwallet setup is now complete. You will now be taken to the breadwallet home screen that displays the default send money screen:
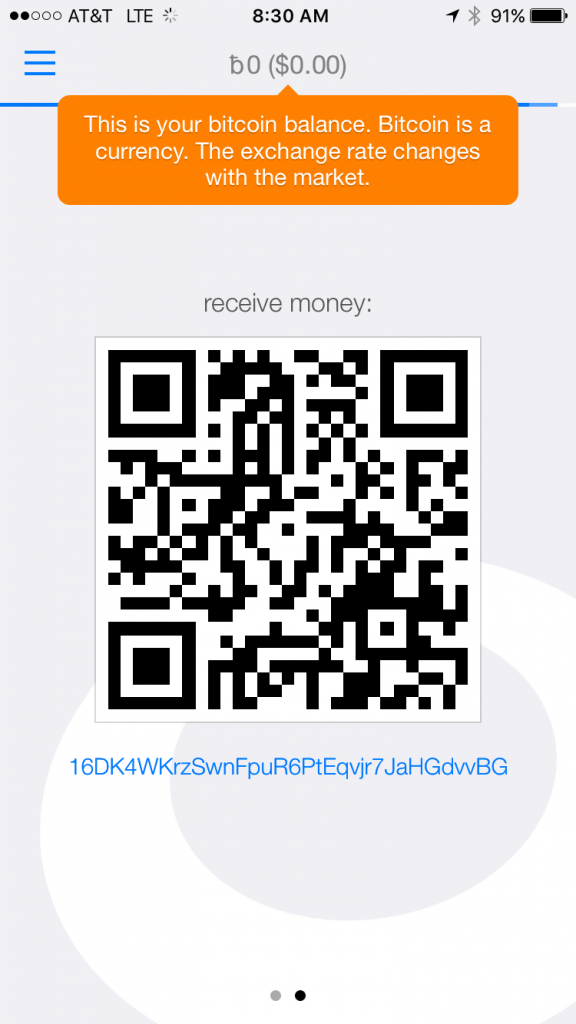
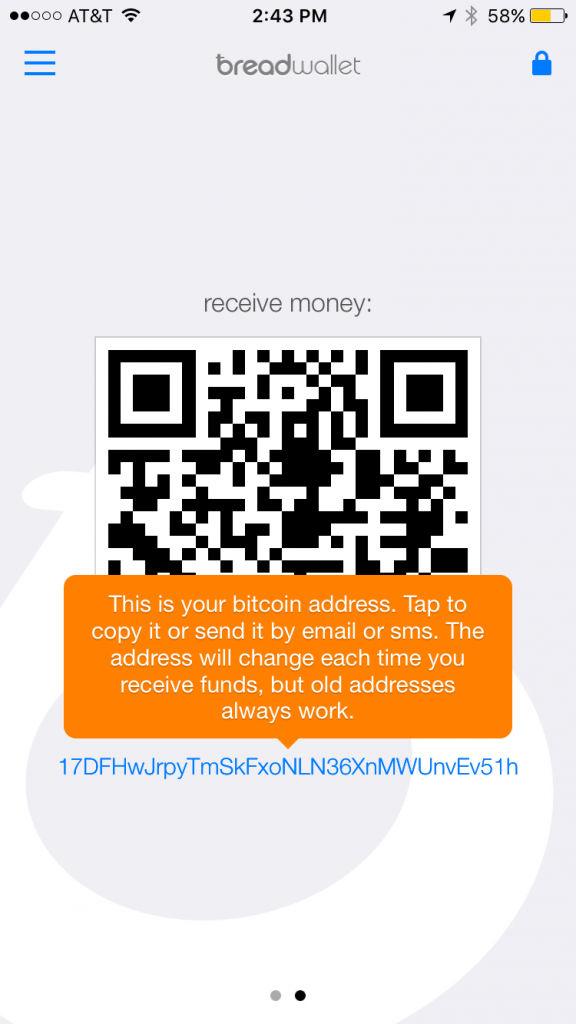
To receive a payment, swipe right and you should see the “receive money” screen like the one below. Share your address with the sender by simply scanning the QR code above or you can email/SMS someone the address above (1QFV…7v8) to the recipient’s address.
Next, wait for the sender to send the funds, breadwallet should notify you once the funds have been received.
Anyone with this address can send you bitcoins!
NOTE: the address will change each time you receive a payment. You will not be able to send the funds you have just received until you receive one confirmation (approx. 10 minutes).
Now, I’m sure you are wondering…
How can I send bitcoins with breadwallet?
This is easy!
- AirBitz for iPhone User Guide and Review
- Copay Review and User Guide
- Bitpay Bitcoin Wallet Review and User Guide
- Mycelium for iPhone Wallet User Guide and Review
- breadwallet Review and User Guide
- Blockchain.info Wallet Review
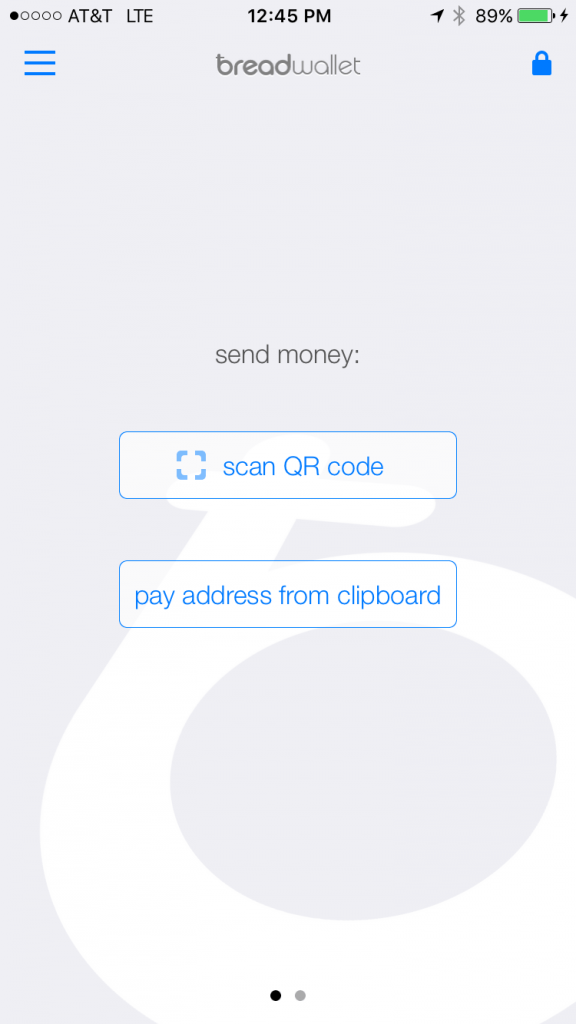
To send a payment, just swipe left and you should be taken to the “send money” screen with “scan QR code” and “pay address from clipboard” like the one below:
To send payment using the “scan QR code” option, scan the recipient’s address and enter the amount you wish to send, and tap the “pay” button that appears in the upper right hand corner:
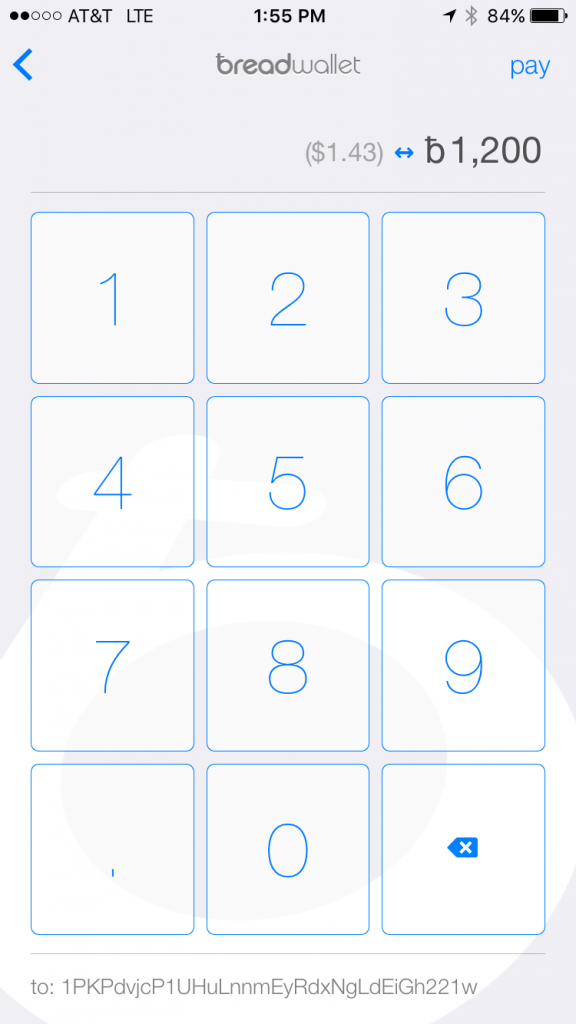
You can also use the “pay address from clipboard”. Copy the address you are sending bitcoins to, and when you return to your breadwallet, the address will show up under the “pay address from clipboard” button.
To pay, enter the amount tap “pay” and enter your PIN or thumb print to complete the transaction:

_NOTE: You can also go back to the main sending screen and tap “pay address from clipboard”. This can be useful if you received an address via SMS or email and want to send to that address.
_
Your transaction has now been sent. You can see recent transactions by tapping the stacked horizontal lines settings tab in the upper left hand corner.
We realize your wallet is probably empty right now. Don’t worry, in the next step we will give you a few tips and show you how to add or transfer money to your wallet.
How to Add Funds to breadwallet
As of now, breadwallet does not offer a way to buy bitcoins from directly within the wallet.
You will need to purchase bitcoins from an exchange and then send them to your breadwallet. Here are some of our sites highest rated and recommended exchanges you can use:
Coinbase: Coinbase is a digital asset exchange company headquartered in San Francisco, California. It operates exchanges of bitcoin, Ethereum and other digital assets with fiat currencies in 33 countries, and bitcoin transactions and storage in 190 countries worldwide.
Bitstamp: Bitstamp is a bitcoin exchange based in Luxembourg. As of 2016, it was the world’s second largest by volume. It allows trading between USD currency and bitcoin cryptocurrency. It allows USD, EUR, bitcoin or Ripple deposits and withdrawals.
BuyBitcoinWorldwide: Buy Bitcoin Worldwide (our site) will help you find a Bitcoin exchange in your country.
breadwallet Fees
You may notice when sending a payment there is a small fee attached.
Breadwallet has had to raise fees in the app several times, and will continue to do so as needed according to a breadwallet developer.
This fee will vary based on when you send your transaction and how much money you’re sending.
breadwallet FAQ
This section aims to answer some of the most commonly asked questions about breadwallet. If you still need help after reading the FAQ section below, feel free to leave a comment and we’ll do our best to help.
Can I Buy Bitcoins from Within breadwallet?
On Decmeber 13th, 2016 global asset exchange Kraken acquired Glidera. Glidera announced the acquisition of the award-winning wallet funding service Glidera.
Chicago-based Glidera is the world’s first non-custodial buying and selling service for wallets that has grown quickly since its launch in 2015 to integrate with 10 of the top bitcoin wallets.
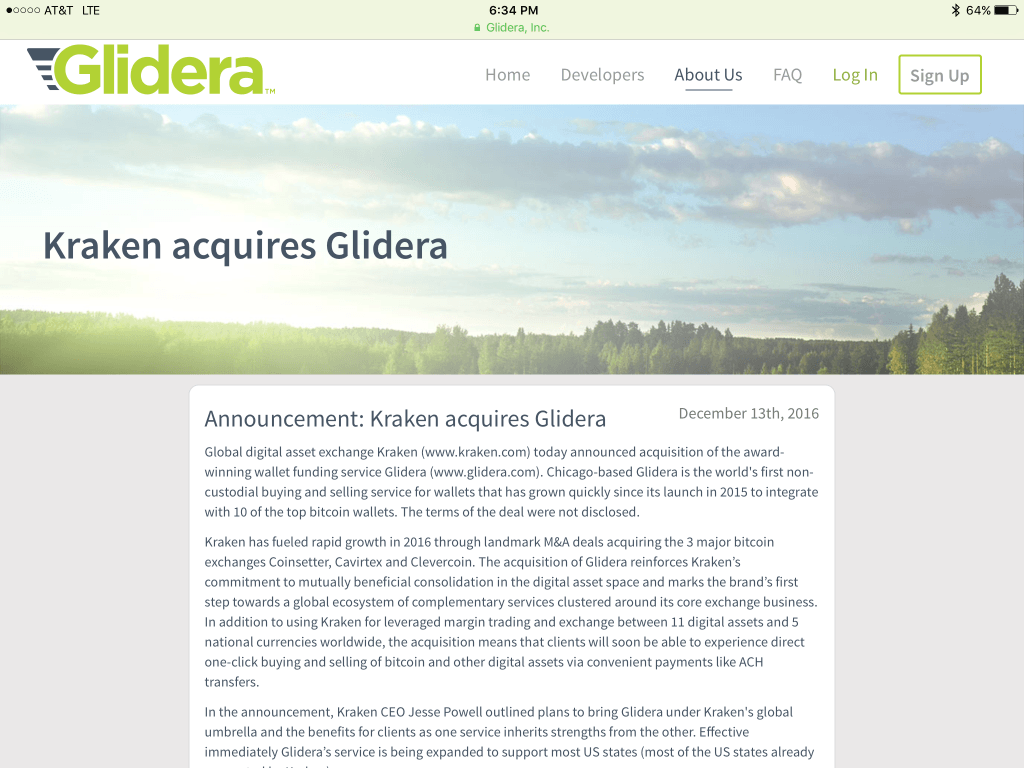
The terms of the deal were not disclosed. Bank account services have been rebranded and are now are provided by Kraken Direct.
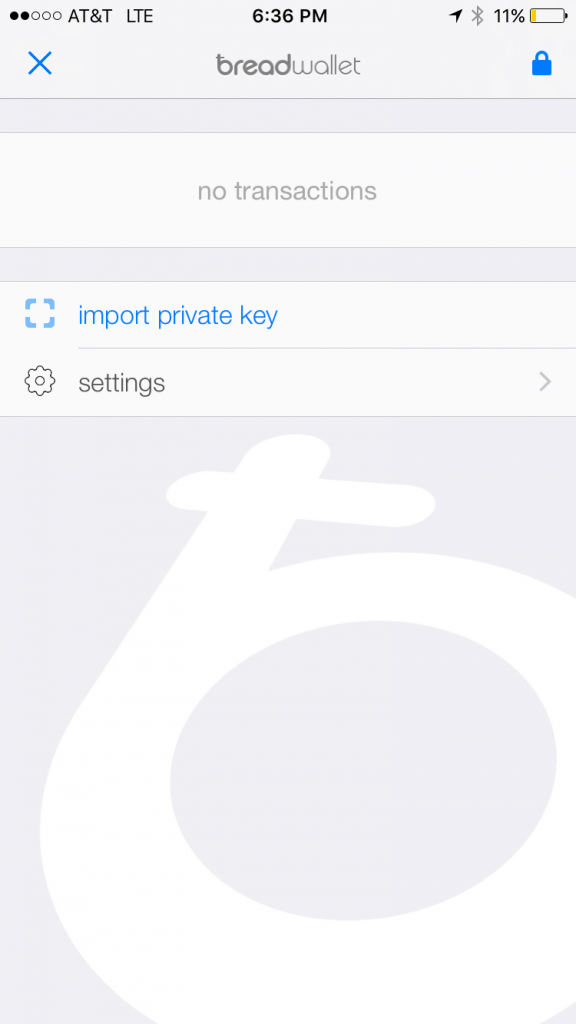
breadwallet Import Private Key
If you want to import bitcoins from another wallet, it’s easy to do. Just tap the stacked horizontal lines settings tab in the upper left hand corner and select “import private key”.
From there, you can scan any private key QR code and send bitcoins using the app.
Under settings, you will be able to access the about section, see your recovery phrase, change your local currency, enable/disable app notifications, start/recover another wallet, rescan blockchain, change/add a PIN code, or join breadwallets early access program.
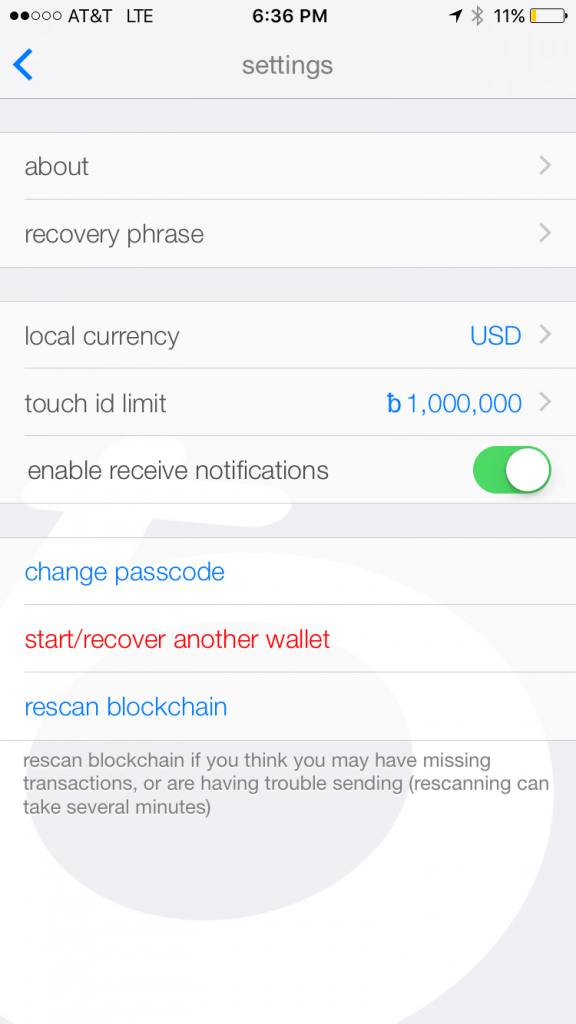
The rescan blockchain is a feature you enable if you think you may have missing transactions, or are having trouble sending (rescanning can take several minutes).
breadwallet early access program offers you the ability to test out new features that are not yet generally available.
breadwallet Recovery Phrase
Although we already discussed the recovery phrase earlier, it deserves its own section.
NOTE: As noted above in the setup phrase section, make sure to keep your recovery phrase in a safe, and secure place.
This is especially true if you are storing large amounts of bitcoins in breadwallet. However, we recommend using a hardware wallet like the Ledger Nano S for storing larger amounts.
The Ledger Nano S is a multi-currency hardware wallet, featuring a screen for payment validation and architect-ed around a secure element for maximum protection of your assets.
Send from breadwallet to Bank Account
Right now there is no way to “send” bitcoins directly from your breadwallet to a bank account.
You will have to send bitcoins from your wallet to an exchange where you then can sell and transfer the money to your bank account.
Below are two sites we recommend for selling your bitcoins:
Coinbase: Coinbase is a digital asset exchange company headquartered in San Francisco, California. With more then $6 billion in digital currency exchanged, operating in 33 counties and serving more than 6.5 million customers, Coinbase is largely considered the number one digital currency exchange in the world.
Kraken: Kraken is a prominent leveraging bitcoin exchange operating in Canada, the EU, Japan, and the US, and “the world’s largest bitcoin exchange in euro volume and liquidity”. It currently has oversight of Mt. Gox claims for lost bitcoins.
breadwallet vs. Coinbase
It’s hard to directly compare breadwallet and Coinbase.
Coinbase is more of an exchange than a wallet. Even though it is considered a very safe exchange to temporarily store small amounts of bitcoins, we strongly recommend you NOT use it to store any significant amount. When you use Coinbase, Coinbase controls your private keys and function as a bitcoin bank. Storing your bitcoins with breadwallet means you control your private keys.
breadwallet vs. Blockchain Wallet
Blockchain is probably the most popular wallet across both iOS and Android platforms. It is primarily a web-based wallet, although it does offer apps for bothiPhone and Android.
The Blockchain wallet is extremely easy to use. The company does not store your wallet on their servers, so there is no third party risk. Even though the wallet offers its users a number of very helpful advanced features, it’s still simple to use, and boosts a solid reputation in terms of overall security.
In early 2016, Blockchain updated their wallet to include enhanced security features by making the wallet hierarchically deterministic. This adds extra security by not using wallet addresses twice. Soon, Blockchain will implement trading features, allowing users to buy bitcoin directly from their wallet.
Based on it’s simplicity for users, we think breadwallet is the better choice if the only function you need to do is send and receive bitcoins. However, if you demand a wallet with a wider spectrum of features and functions that is still very user friendly, you should check out Blockchain.
breadwallet vs. Mycelium
Mycelium is among the most popular bitcoin wallets on iOS.
The wallet is moderately user friendly compared to breadwallet. It’s oriented around power users, offering many more features in exchange for a few tradeoffs including security, privacy and ease of use.
breadwallet primarily focuses on ease of use, security, and privacy. Private keys are stored in a hardware-encrypted-on-device-key, meaning breadwallet connects directly to the bitcoin network via a simplified payment verification client (SPV).
An SPV client is a bitcoin implementation that does not verify everything. Instead, it relies on either connecting to a trusted node, or putting its faith in high difficulty algorithms as a proxy for proof of validity. There are no proprietary servers that can go down causing you to lose your bitcoins.
Mycelium is not an SPV wallet. As part of a recent update, Mycelium has begun to support bitcoin hardware wallet KeepKey.
A hardware wallet is a secure bitcoin wallet that generates and stores your private keys on the hardware device itself. The private keys never leave the security of the device.
We think the advanced features in Mycelium may confuse some users, so if simplicity is your goal, breadwallet has the slight edge. Like Blockchain, if you are familiar with the bitcoin space and want more features, then give Mycelium a look.
How to Transfer bitcoins from Coinbase to breadwallet
Coinbase is the most popular exchange in the US. Since breadwallet is one of the most popular iPhone wallets, it’s no surprise we get asked how to send bitcoins from Coinbase to breadwallet.
The team at breadwallet has made this transfer easy to complete.
Simply open breadwallet on your iPhone and swipe right to the receive money page that shows your address, it should look like the screen below:
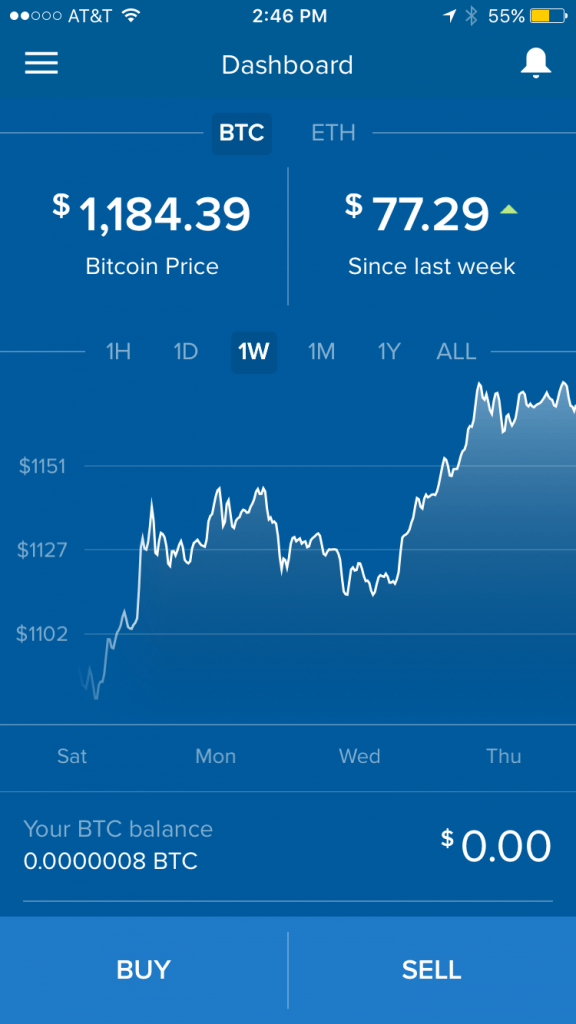
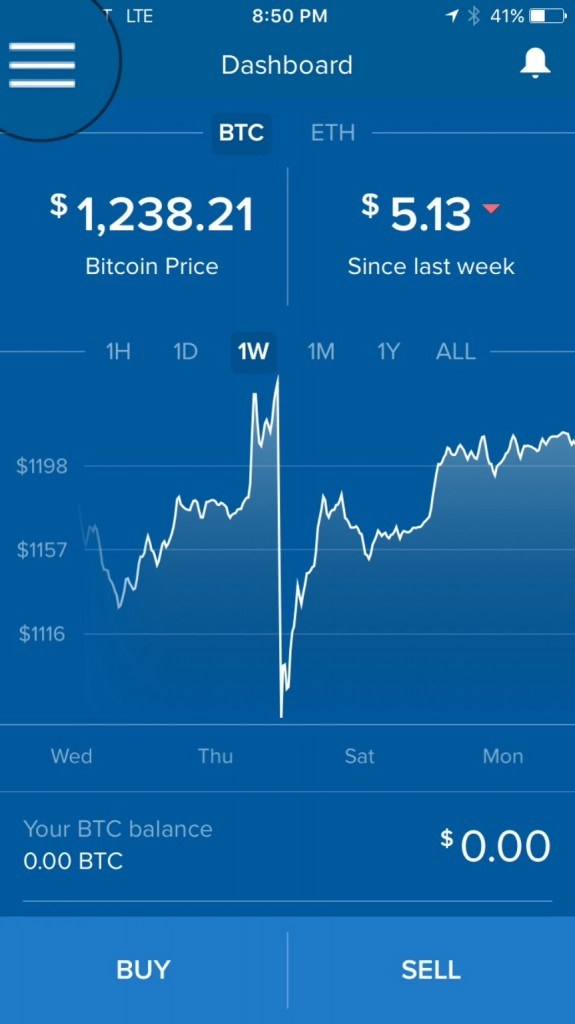
Now, login to your Coinbase account, it will take you to the “Dashboard” screen:
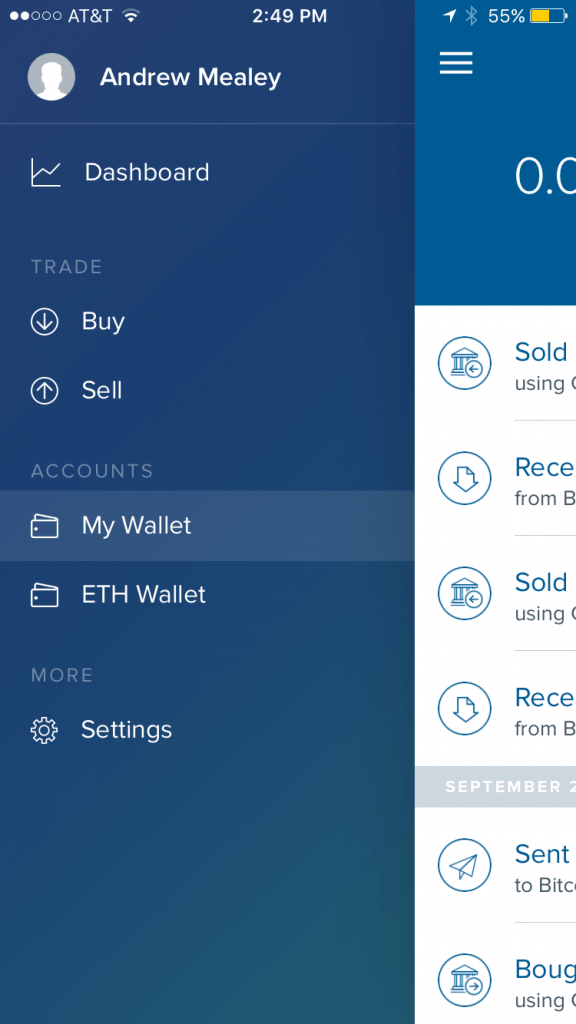
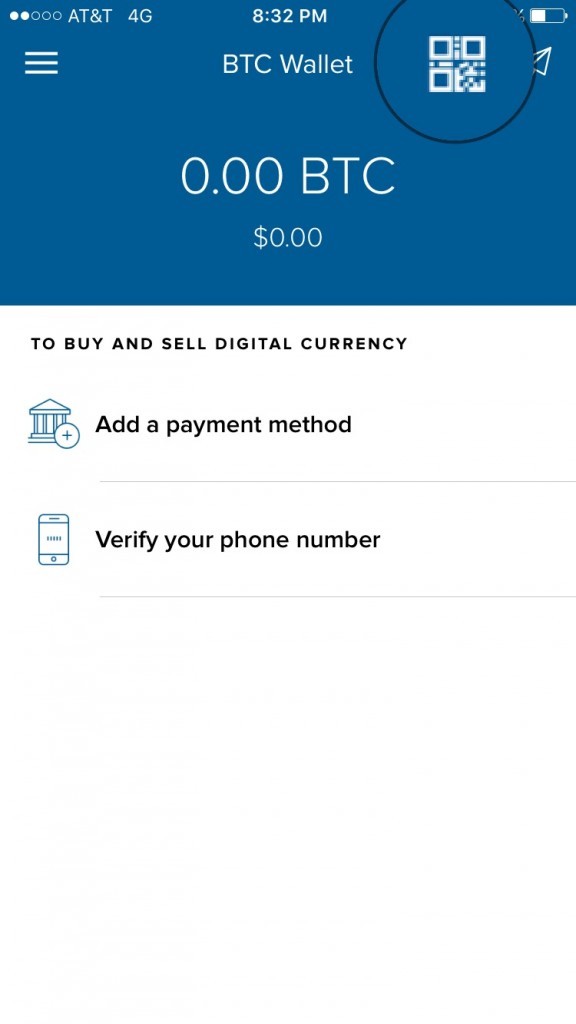
Next, tap the stacked horizontal lines in the upper left hand corner, this will open your wallet options tab. Then tap the “My Wallet” button icon, it is highlighted in the picture below.
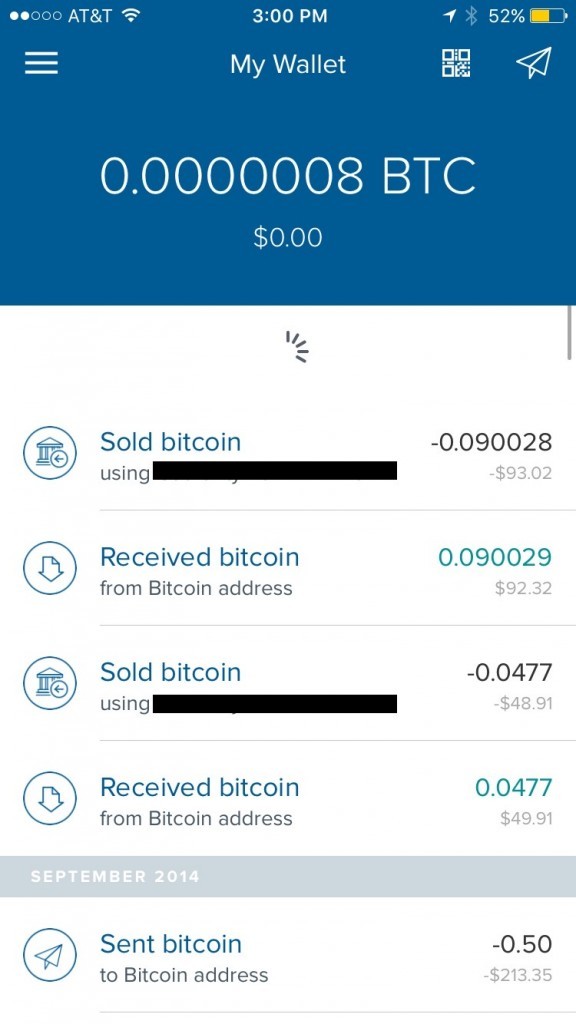
On the next page, you will find two small icons in the upper right hand corner of the screen, one to scan to a QR code, and another of a paper airplane. Both will take you to the send or request screen.
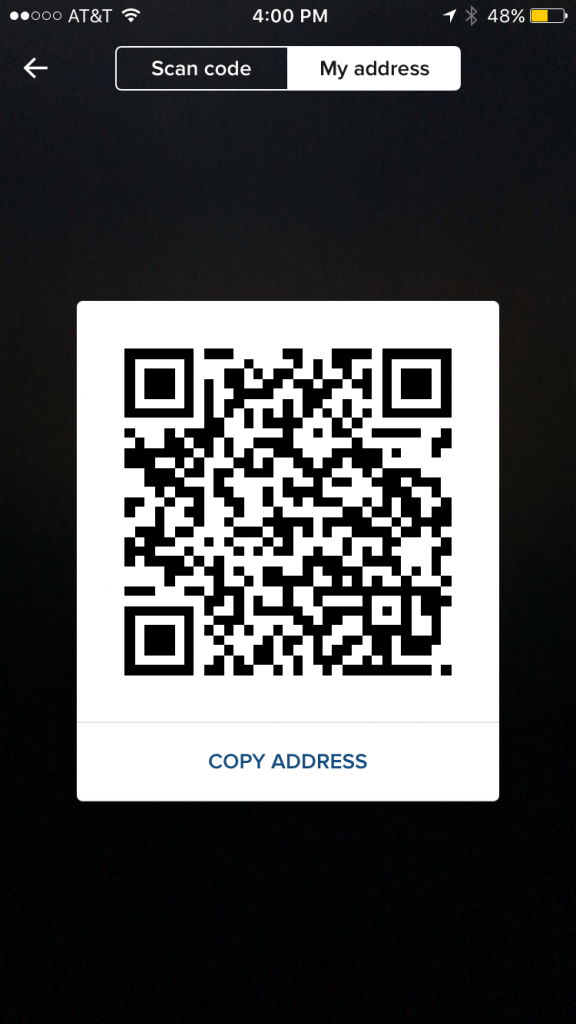
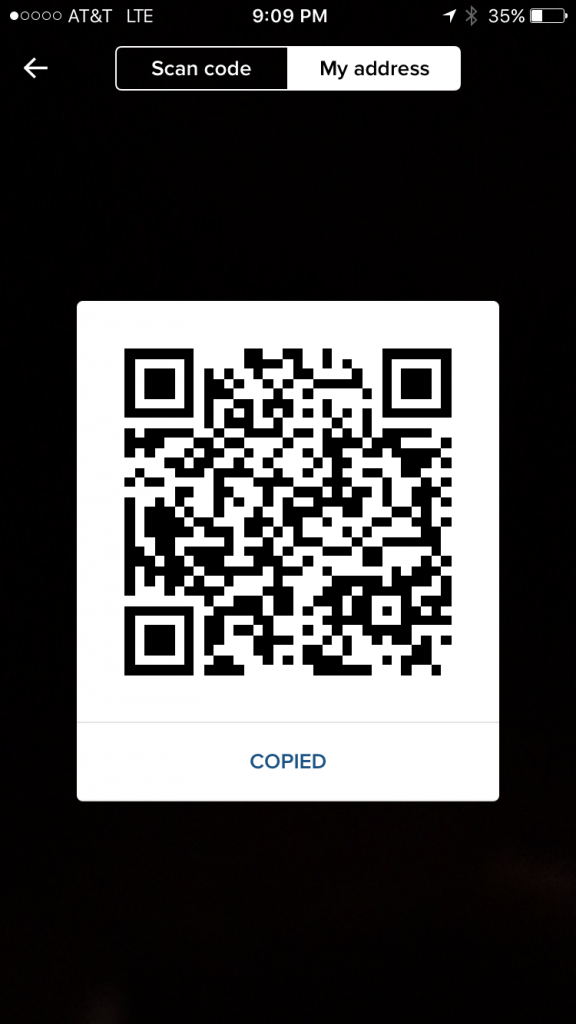
Using the QR code method, you can either scan your breadwallet address code by taking a picture of it as seen below, or the “My address” button highlighted in white below.
Tap the “COPY ADDRESS” button you see above. The “COPY ADDRESS” field will flash the “COPIED” as seen below:
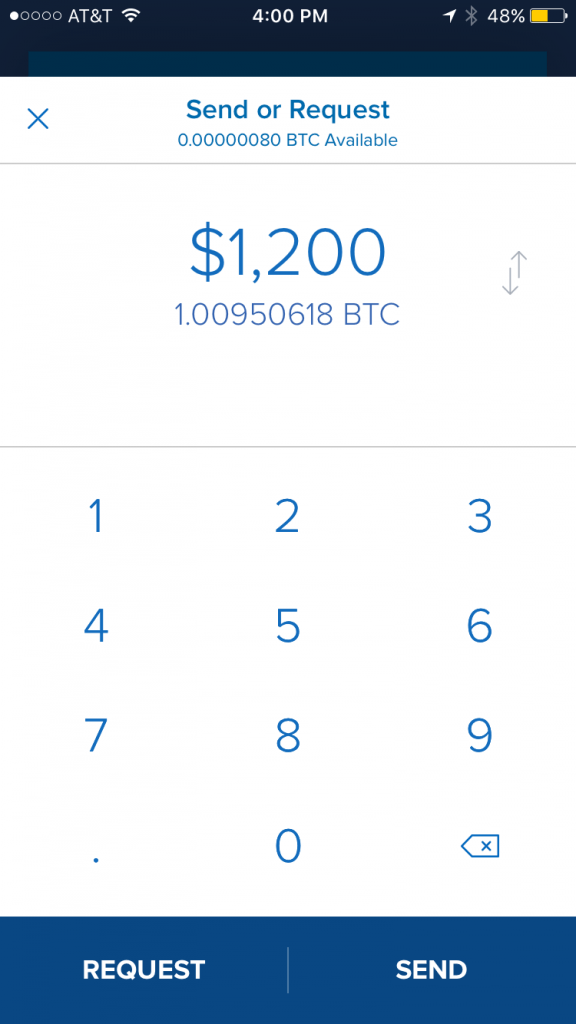
Or you can tap the “paper airplane” icon instead, and it will also take you to the Send or Request screen.
From there, just enter the amount you want to send or request and press the “SEND” button in the bottom right hand corner of the screen:
That’s it! The bitcoins from Coinbase should be on their way to your breadwallet
breadwallet Support
bread wallet has a detailed FAQ on their website that should help answer most users basic questions.
For all further inquiries, you can email breadwallet directly at: [email protected] or leave a voicemail for the business team by calling 1-650-466-8375.
Blockchain.info Wallet Review
Note that blockchain.info is actually a web Bitcoin wallet, but the review and guide below will go over its iOS app.
Blockchain wallet is the most popular wallet across both iOS and Android platforms. It’s primarily a web-based wallet, although it does offer apps for bothiPhone and Android.
It only takes seconds to setup a wallet, in fact, all you need is a verifiable email address to get started.
Blockchain wallet (BW) is extremely easy to use. The company doesn’t store your wallet on their servers, so there is no third party risk. The platform offers its users a very interactive blog platform where members of the Blockchain regularly engage with users in regards to updates, security, or anything of needs.
Even though BW offers its users a number of very helpful features, it is still simple to use, and boosts a good reputation in terms of overall security despite a number of challenges in recent years; it still lacks advanced features such as multisig address flexibility and security.
Users of BW aren’t able to enjoy the security advantages involved with multisig addresses.
Multisignature (often called multisig) is a form of technology used to add additional security for bitcoin transactions. Multisignature addresses require another user or users sign a transaction before it can be broadcast onto the blockchain.
Bitcoin ‘wallet’ providers including, Coinbase, Greenaddress, Electrum, Armory, among others have been outspoken about the benefits of enabling multisig addresses for their users. The links above will redirect you to those respective sites multisig information page.
In early 2016, Blockchain updated their wallet to include BIP 0032 software. BIP or (Bitcoin Improvement Proposal) allows for enhanced security features by making the wallet hierarchically deterministic (HD). This adds extra security by not using wallet addresses twice and allows users to generate an unlimited number of addresses and private keys from the same seed.
Implementing HD wallet software means wallets can be easily backed up using only their generated twelve-word mnemonic phrase. We strongly advise you implement this feature right away to backup your wallet info and access to funds.
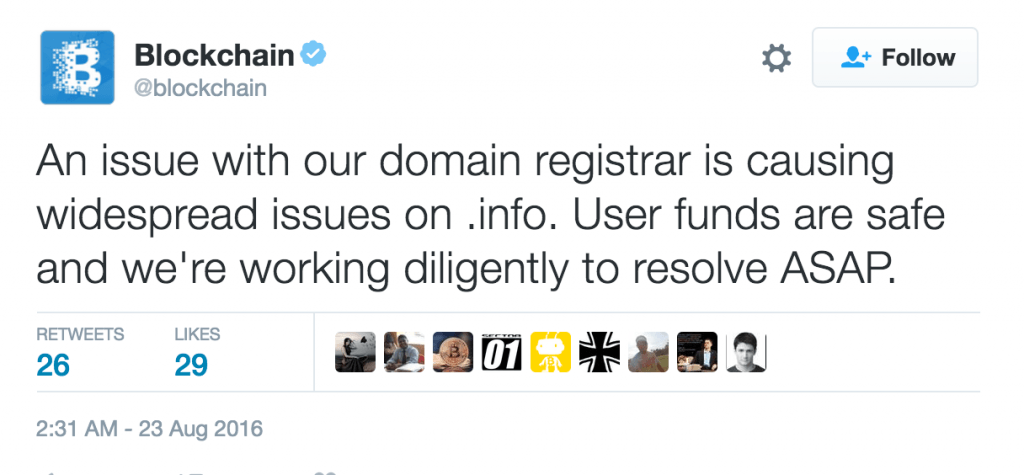
The Blockchain platform has been subject to various outages throughout the years. This is one of the worrying things for most bitcoin users; in previous outages, users were unable to access their funds went Blockchain.info went down. During these moments, there is no way to access either the web or mobile wallet, as they are linked together.
“We are pleased to report that after years of pioneering the hybrid approach, our software has powered over 100 million transactions and has been used by millions of people across the globe. In fact, our software powers 100,000 transactions a day – more than any other bitcoin product.”
— says Blockchain.info’s official blog
We advise you only use this wallet as a backup solution, rather than making it your primary choice.
Luckily for all users, it’s possible to backup your BW to a mobile device, allowing convenient access to your funds.
Blockchain.info provides two different additional layers.
For both the browser and app version, users can enable an two-factor authentication security measure. This means they will receive a text message every time someone tries to log into their wallet.
Two-Factor Authentication (TFA or 2FA abbreviated) is a process to verify your identity when trying to access a service on the web, using two forms of authentication. Blockchain.info’s 2FA uses your regular password in combination with one of the following methods: SMS message (text message), Yubikey, Google Authenticator, or Email.
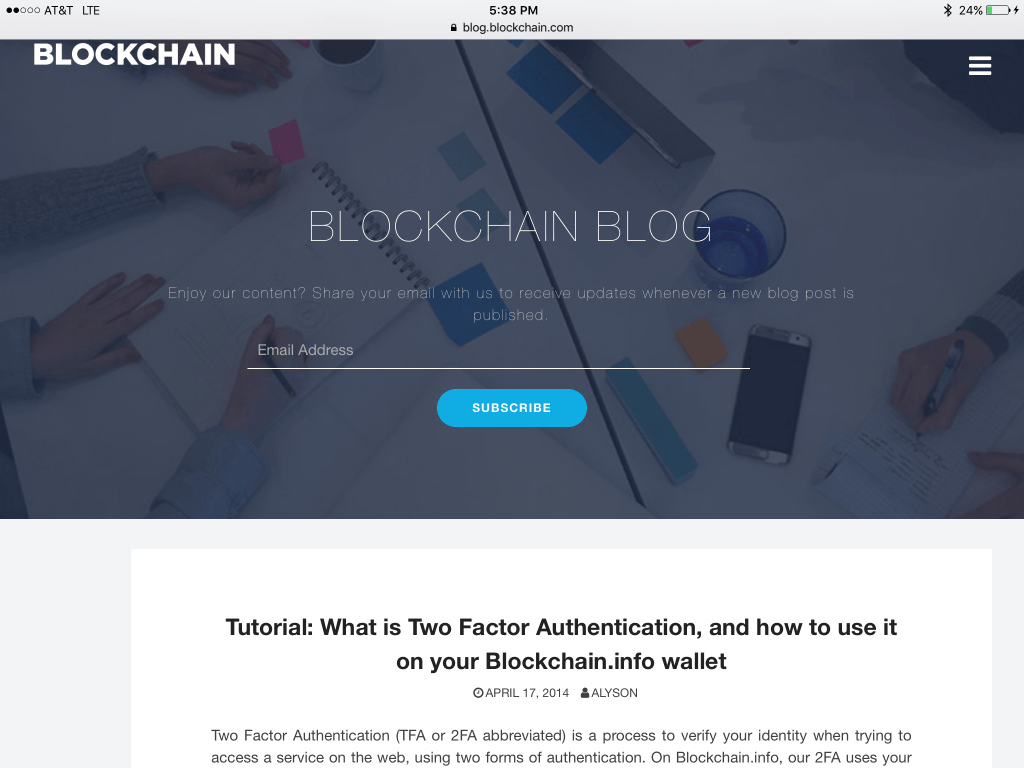
You can find a Blockchain.info blog post tutorial here.
NOTE: For best security practices, we’d recommend the first three options as being superior to Email .
Later in this review, we’ll show you how to enable TFA for your BW.
How to Use Blockchain.info wallet
First, download the Blockchain wallet from the Apple App Store.
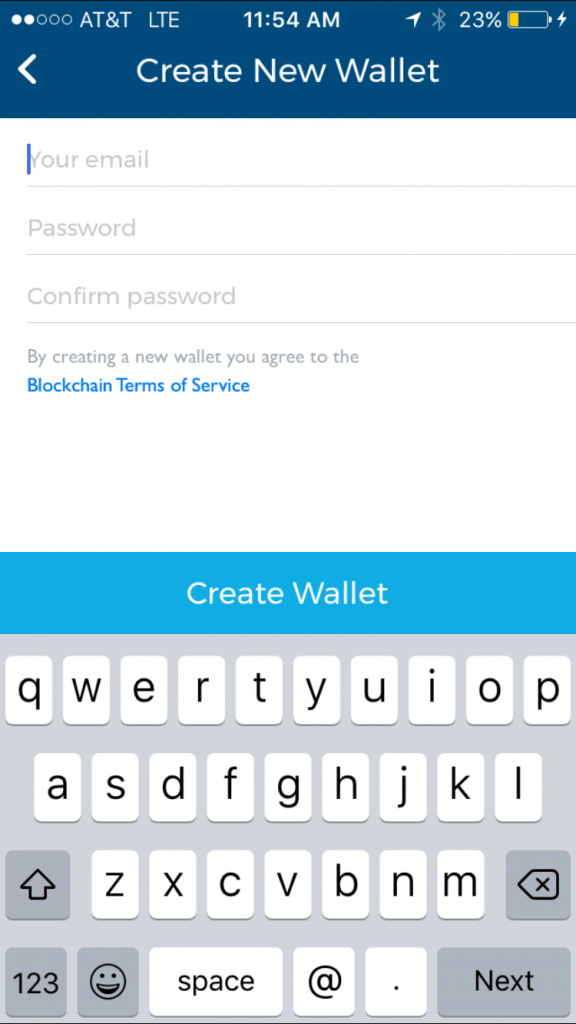
Once installed, open the app and select “CREATE NEW WALLET”. If you already have a wallet with Blockchain, just tap “ Log into my Wallet”, you should see a screen like the one below:
Next, Blockchain will ask you to enter your email, a password, and to confirm that chosen password by reentering it. Once you are done with this process, tap “CREATE WALLET”.
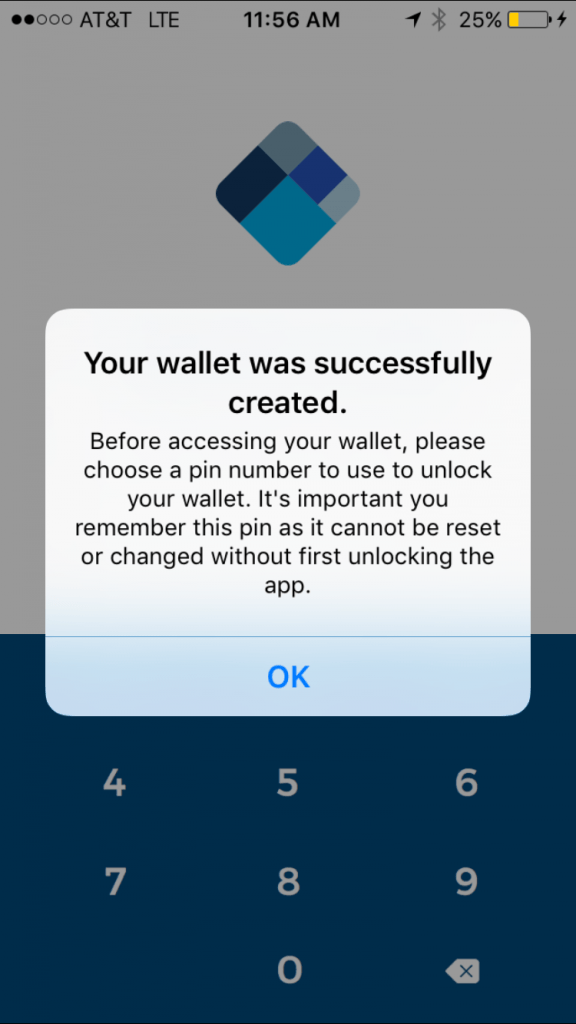
Blockchain will now display a pop up message box letting you know your wallet was successfully created…
NOTE : Before accessing your wallet, please choose a PIN number to use to unlock your wallet. It’s important you remember this pin as it cannot be reset or changed without first unlocking the app.
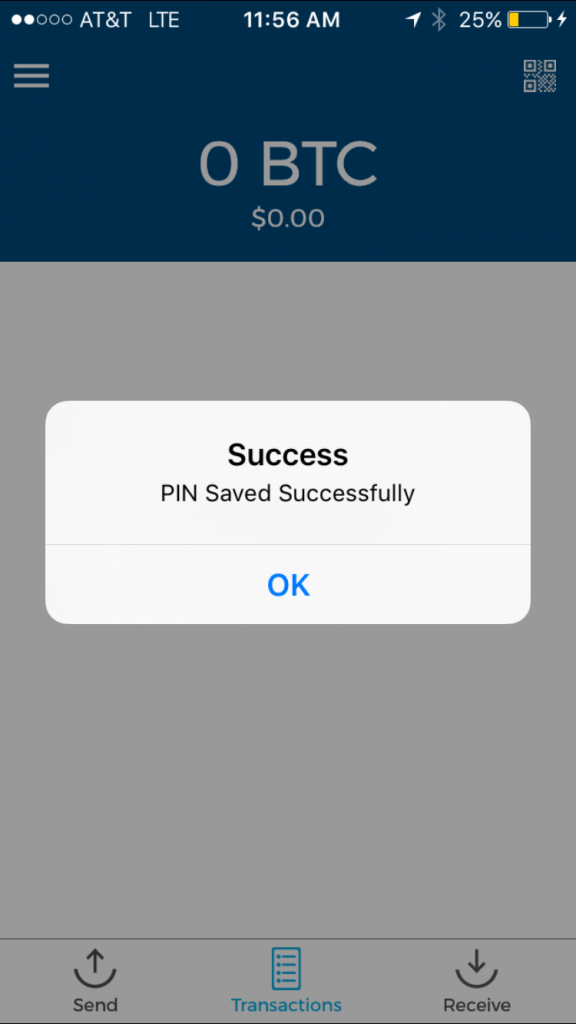
After you have successfully created your 4 digit PIN, Blockchain will display a “Success, PIN Saved Successfully” message. Your screen will look like the one below:
Next, Blockchain will ask you verify your email address. You should receive an email notification shortly after signing up for the wallet.
NOTE: You have the option to verify your email right away, or you can select “I’ll do this later” and verify this email anytime. We recommend you do it right away, but it is not necessary to do.

Once you verify your email, Blockchain will notify you by displaying a green check mark and circle followed by the “Success! You’ve successfully verified your email! Please return to your previous browser/tab to see your wallet” message.
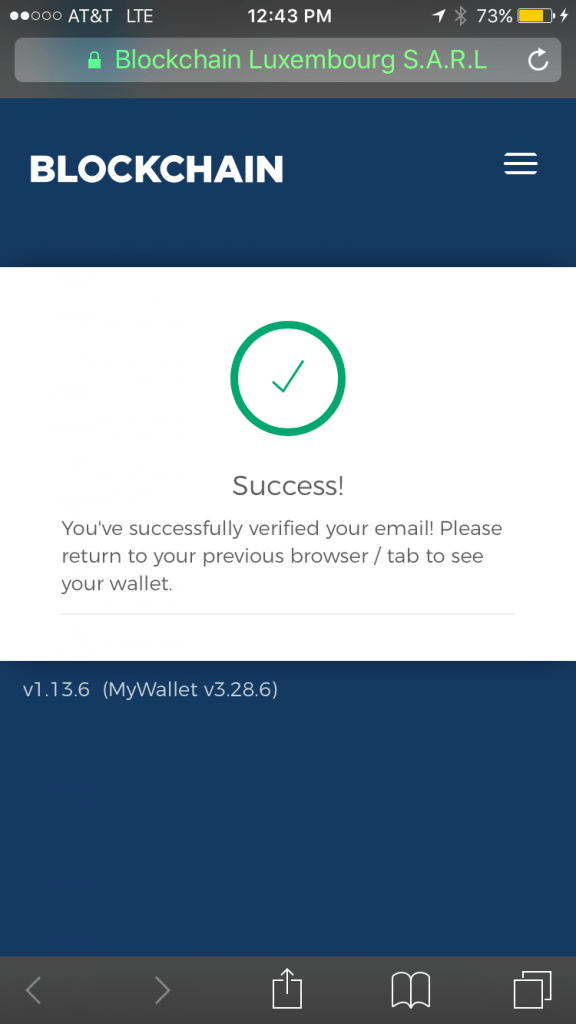
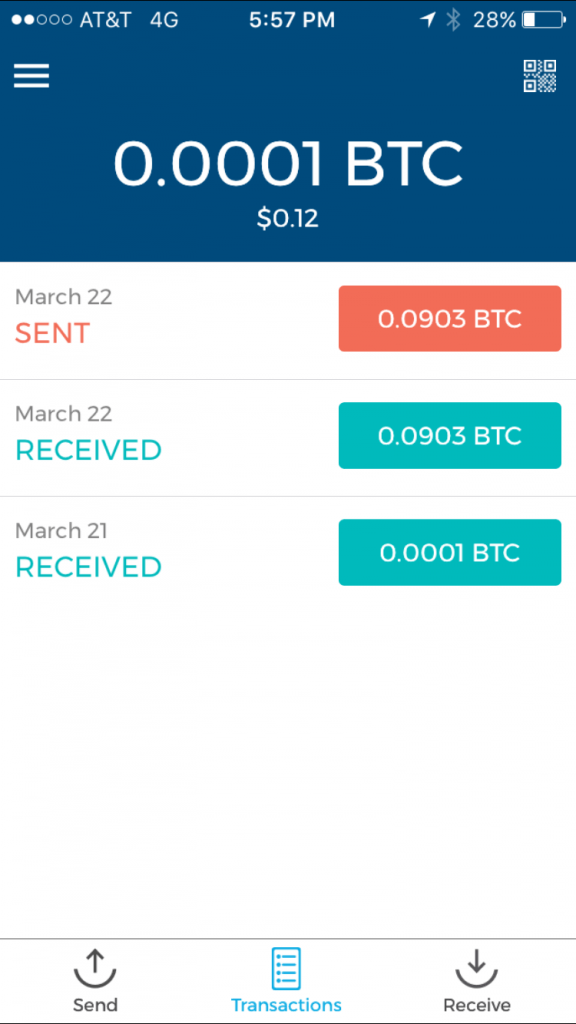
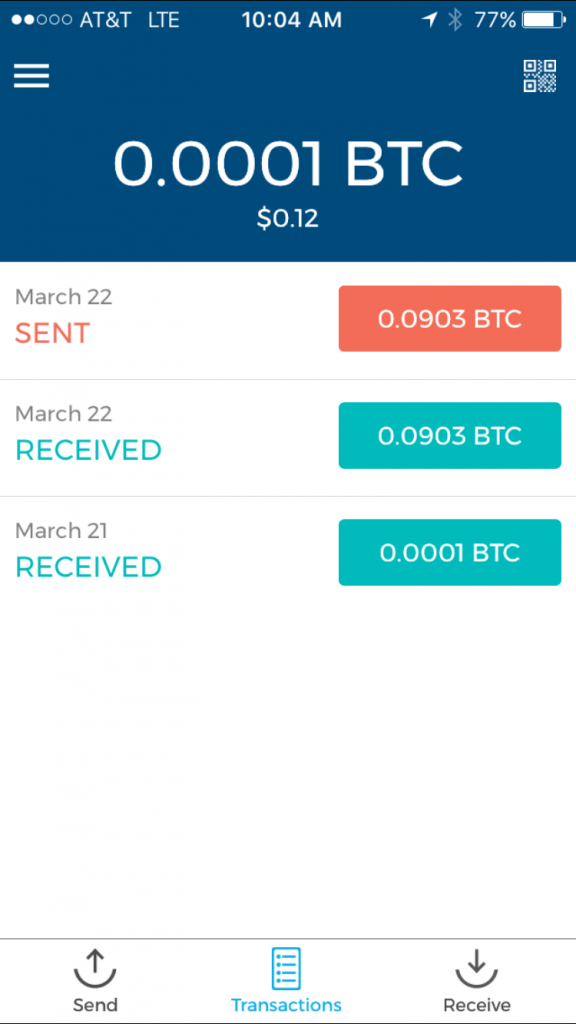
Your home Blockchain screen will look the picture below.
NOTE: This page will always display your most recent transactions .
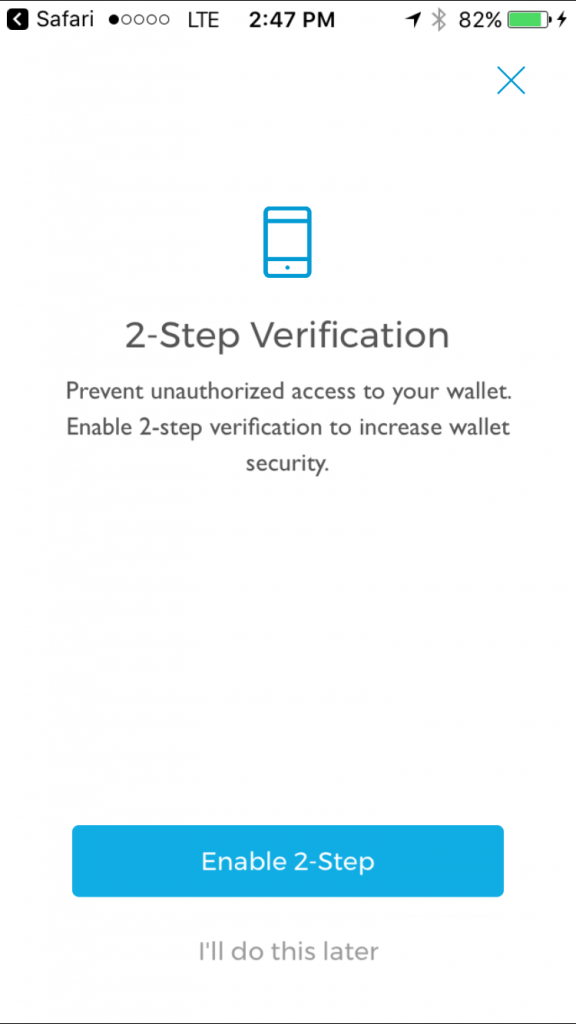
Upon downloading a new wallet, Blockchain will immediately ask if you want to enable to the TFA to help prevent unauthorized access to your wallet. You can enable TFA via SMS on your mobile phone.
NOTE: You can chose to skip this option but we recommend you just take a couple minutes to ensure you have access to your wallet.
The 2-Step Verification page looks like this:
If you decide to enable 2-Step Verification, tap “Enable 2-Step”, the following a message box will pop up. Tap “Enable”.
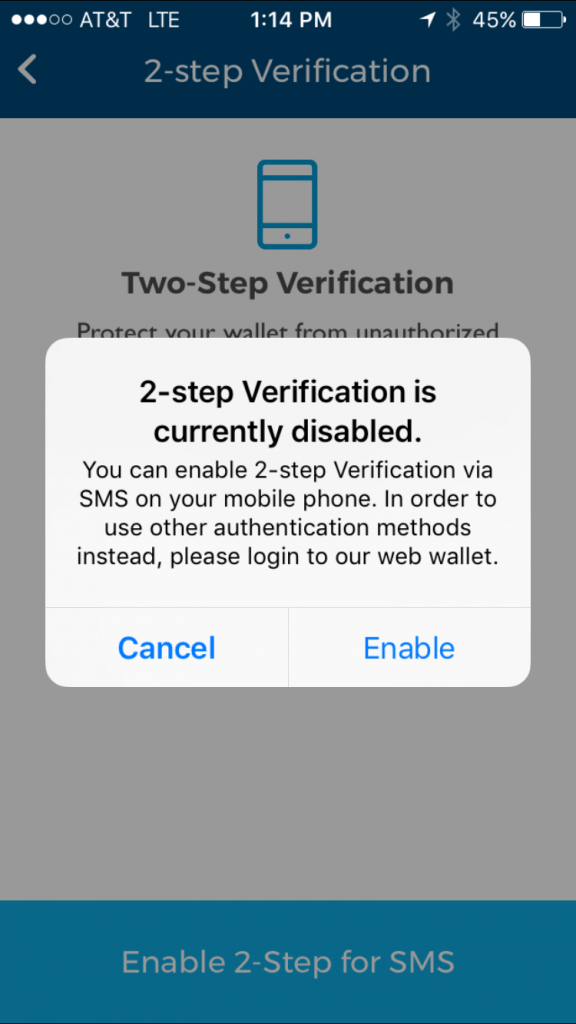
NOTE: You can enable two-factor Verification via SMS on your mobile phone.
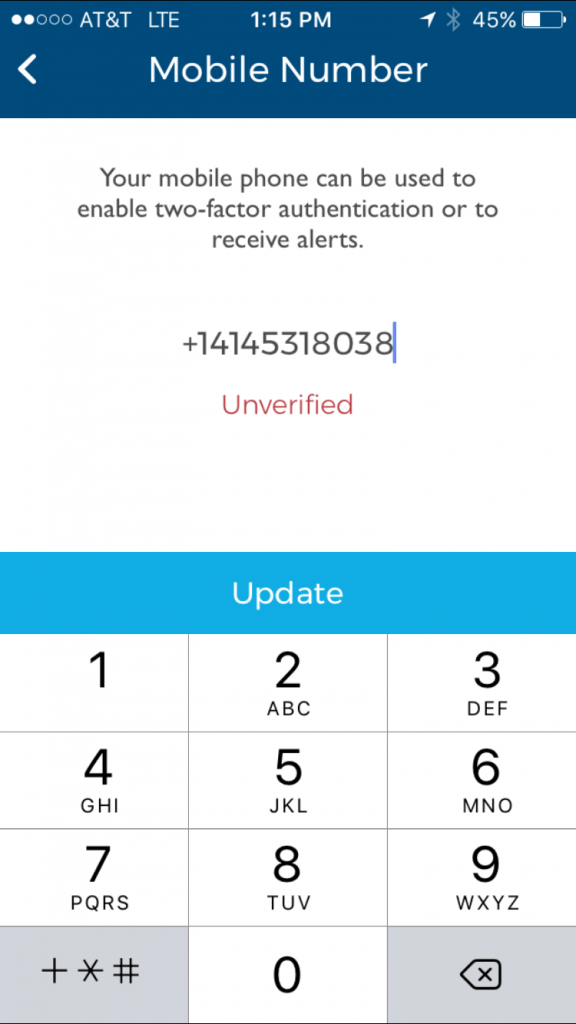
Go ahead and enter you mobile number into the corresponding field as shown above. Then tap the blue “Update” button above the numeric pad.
Shortly after, Blockchain will send you a 5-digit verification code to your mobile device.
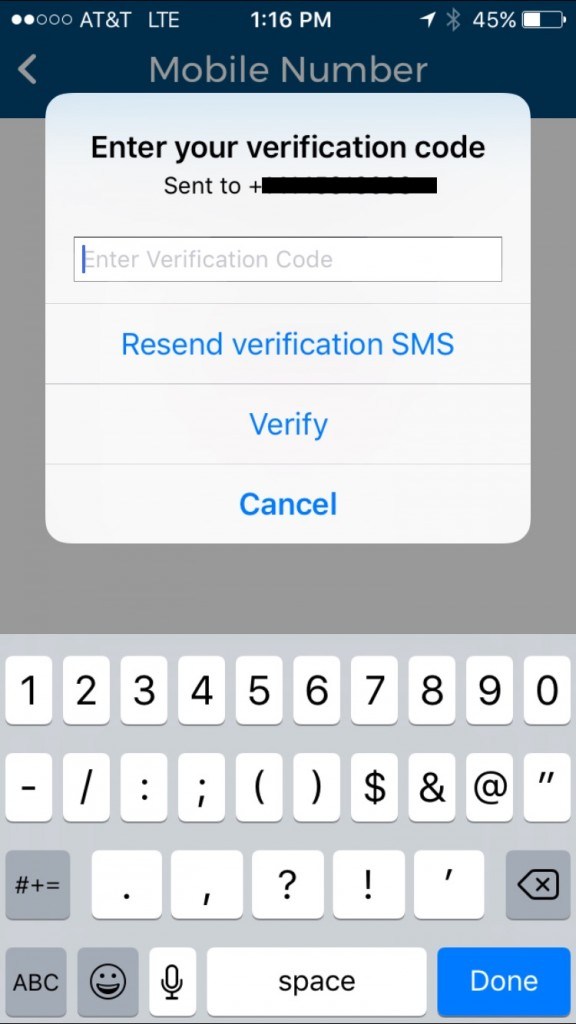
Enter this 5-digit code into “Enter Verification Code” field, then select “Verify”.
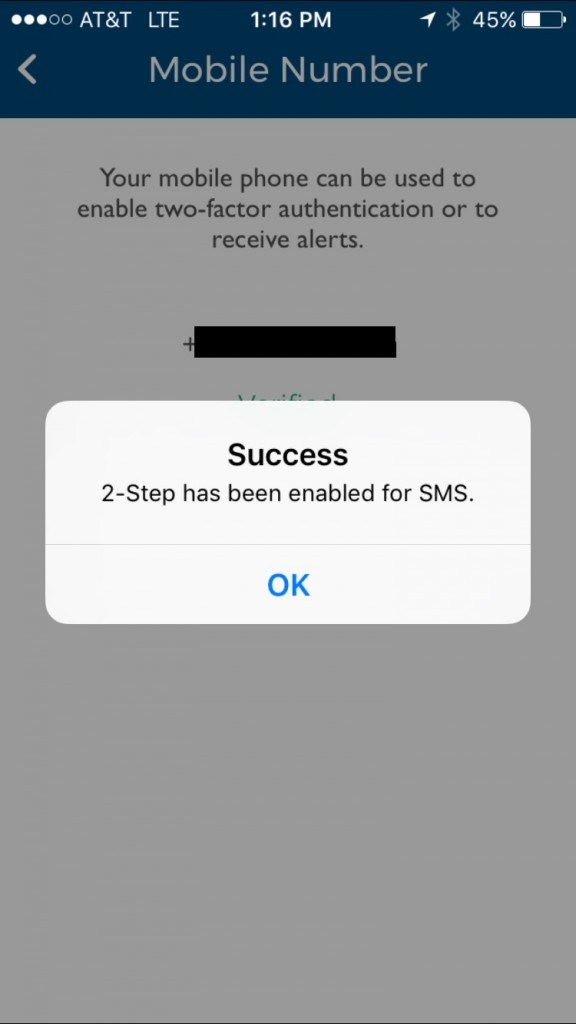
That’s it! You have successfully enabled 2-Step for SMS.
Now that you have a secure wallet, you are probably wondering how to receive/add funds.
To receive a payment, swipe right or tap on “Receive” in the bottom right hand corner of your screen and Blockchain will take you the Receive screen like the one pictured below:
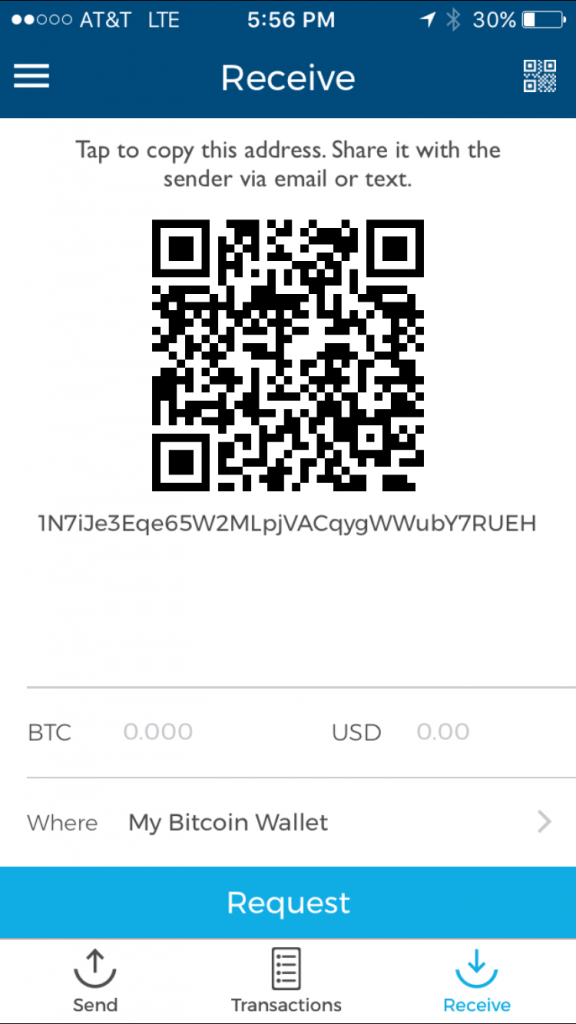
Next, enter the amount of bitcoins you want to send in the BTC or USD field and the current market value will display. Tap “Request” to send the payment request.
To share your address with the sender, follow the message on the screen, “Tap to copy this address” and share it with the sender via email or text”. A “Copied to clipboard” message will briefly flash below the QR code in place address.
Anyone with the address can send you bitcoins!
After this is done, just wait for the sender to send the funds, Blockchain should notify you once the funds have been received.
NOTE: The address will change each time you receive a payment. You will not be able to send the funds you have just received until you receive one confirmation (approx. 10 minutes).*
The wallet also comes equipped with a very handy home screen swipe to receive address option. Upon entering the “ENTER PIN” you will notice a ‘Swipe to Receive option with a arrow above the number pad.

To quickly access your wallet address just swipe left. Both your scannable QR Code and wallet address will be displayed as shown below:

NOTE: This can be useful if you received an address via SMS or email and want to send to that address.
How do I send bitcoin using Blockchain wallet?
The team at Blockchain has made sending bitcoin just as simple as receiving it!
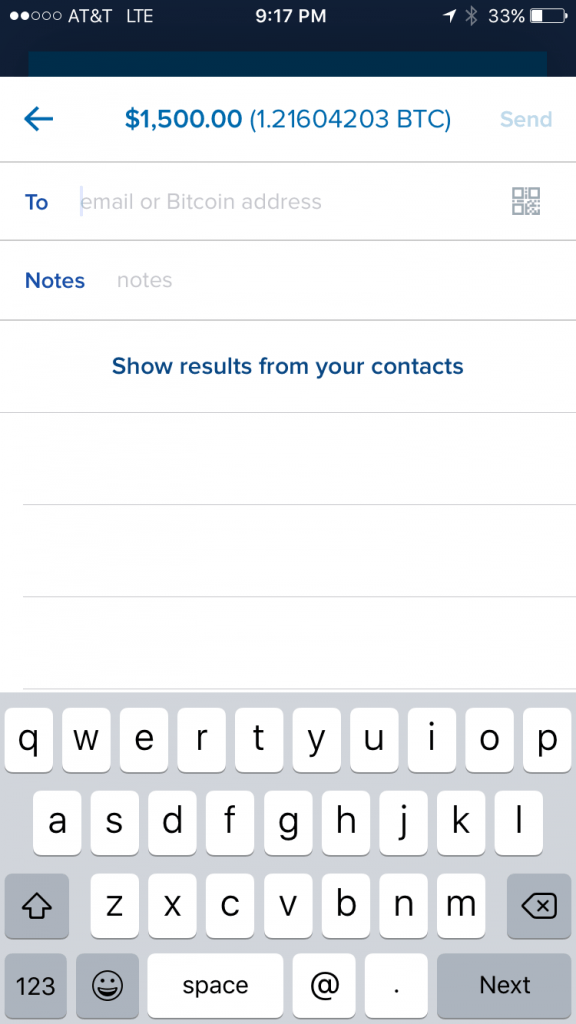
To send a payment, swipe left or tap the “Send” button in the bottom left hand corner of your screen and Blockchain will be take to the ‘Send’ screen like the one below:
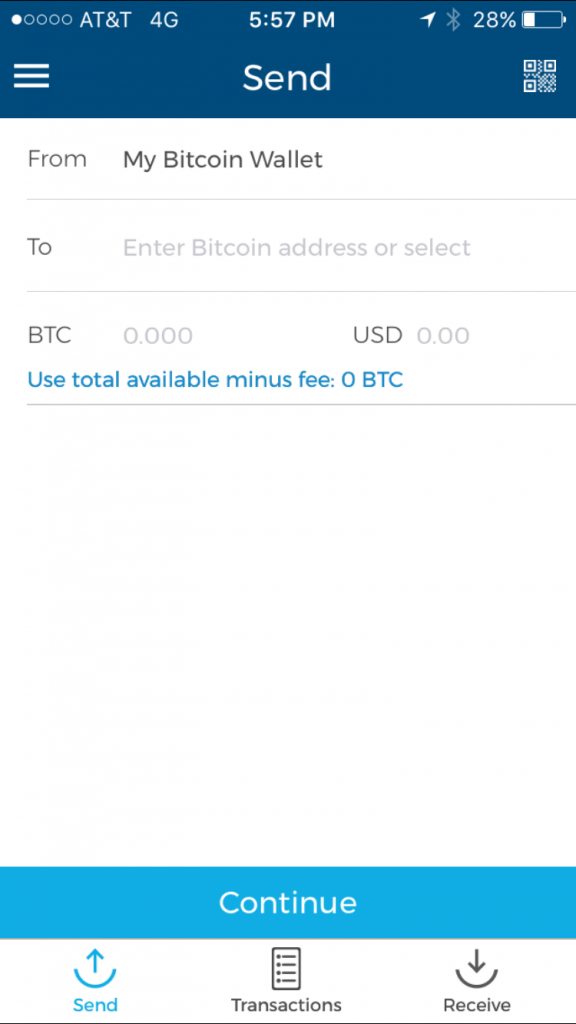
Next, enter the wallet address you wish to send bitcoin to in the “ To” “Enter Bitcoin address or select” field, and the the amount of bitcoins you want to send in the BTC or USD field and the current market value will display. Tap the “Send” at the bottom of the screen to send payment…
Or you can tap the QR code icon in the upper right hand corner, your screen will look like this:
Take a picture of the recipients QR code and their address will be inserted into the “Enter Bitcoin address or select field” for you.
Tap the “Send” at the bottom of the screen to send payment.
How to Add Funds to Blockchain wallet
Here are some of our sites highest rated and recommended exchanges you can use:
Coinbase: Coinbase is a digital asset exchange company headquartered in San Francisco, California. It operates exchanges of bitcoin, Ethereum and other digital assets with fiat currencies in 33 countries, and bitcoin transactions and storage in 190 countries worldwide.
Bitstamp: Bitstamp is a bitcoin exchange based in Luxembourg. As of 2016, it was the world’s second largest by volume. It allows trading between USD currency and bitcoin cryptocurrency. It allows USD, EUR, bitcoin or Ripple deposits and withdrawals.
BuyBitcoinWorldwide: Buy Bitcoin Worldwide is our site. We don’t sell bitcoin and are not an exchange. We just make it easy for you to find a Bitcoin exchange and buy bitcoin.
Blockchain Wallet Fees
You may notice when sending a payment there is a small fee attached, this is a fee given to miners.
Currently, bitcoin transaction fees can average to around .04 cents USD (or 0.0001 BTC) per transaction. Transactions with higher transaction fees tend to be validated faster in the blockchain itself. Conversely, transactions with low or zero transaction fees tend to be validated more slowly, or eventually will get rejected.
Blockchain Wallet FAQ
This section aims to answer some of the most commonly asked questions about breadwallet. If you still need help after reading the FAQ section below, feel free to leave a comment and we’ll do our best to help.
Can I Buy Bitcoins from Within the Blockchain wallet?
As of now, Blockchain does not offer a way to buy bitcoins from directly within the wallet. However, as mentioned in the wallet introduction, Blockchain is implementing trading features, allowing users to buy bitcoin directly from their wallet.
For the time being you will need to purchase bitcoins from an exchange and then send them to your Blockchain wallet.
Blockchain wallet Import Private Key
If you want to import bitcoins from another wallet, it’s easy to do. Just tap the stacked horizontal lines settings tab in the upper left hand corner and tap the “Addresses” option in the drop down menu.

You will be taken to the following screen:
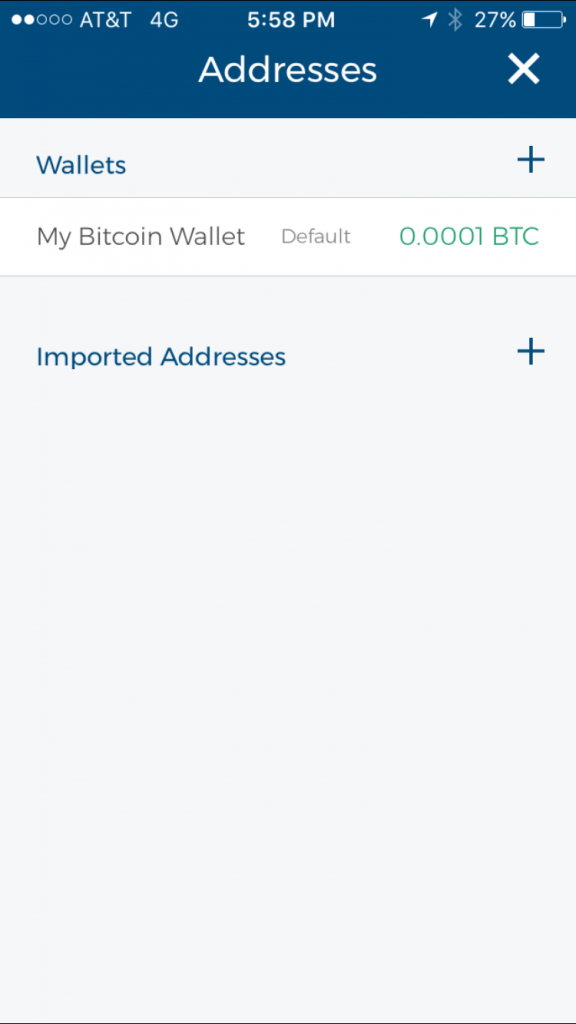
Then, just tap the (+) adjacent to “Imported Addresses” to import additional private key address via QR Code.
Blockchain wallet Backup Funds
Even though we don’t recommend using Blockchain as your primary wallet, or to store a large amount of funds; you should back up your wallet as soon as you download it.
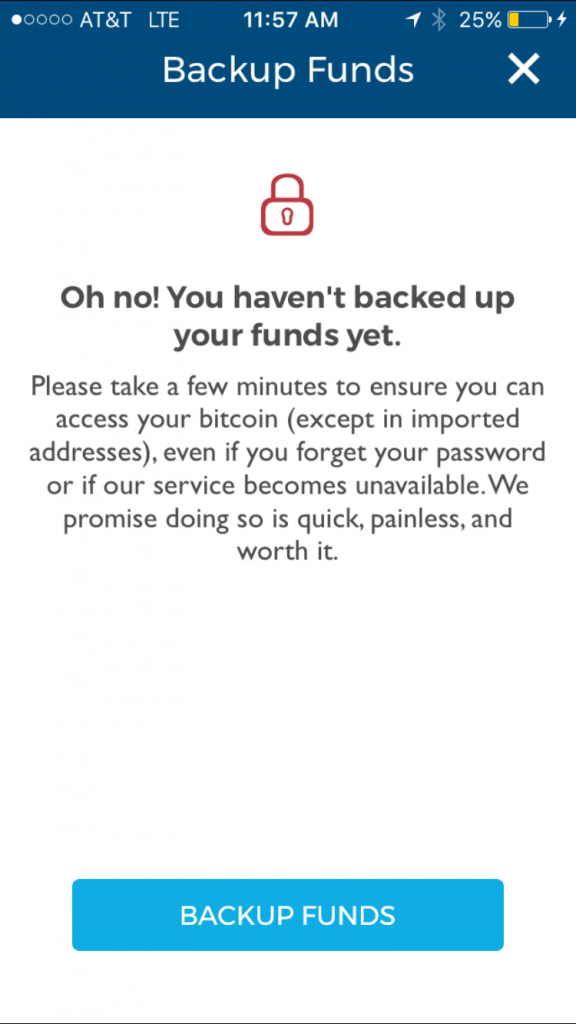
To backup your funds, tap the stacked horizontal lines in the upper left hand corner of your home screen. Choose the “Backup Funds” option on the drop down menu.

The following “You haven’t backed up your funds yet screen will be displayed. Tap the “BACKUP FUNDS” button.
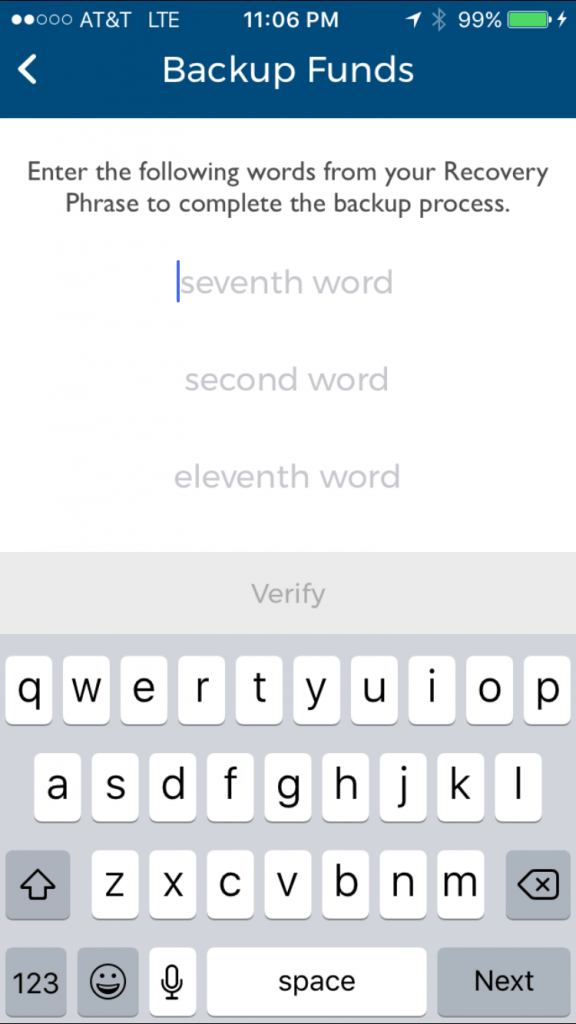
The next screen will display the first of a 12 word “Recovery Phrase” you will need to access your wallet. Following the directions and write down these 12 words on a piece of paper:
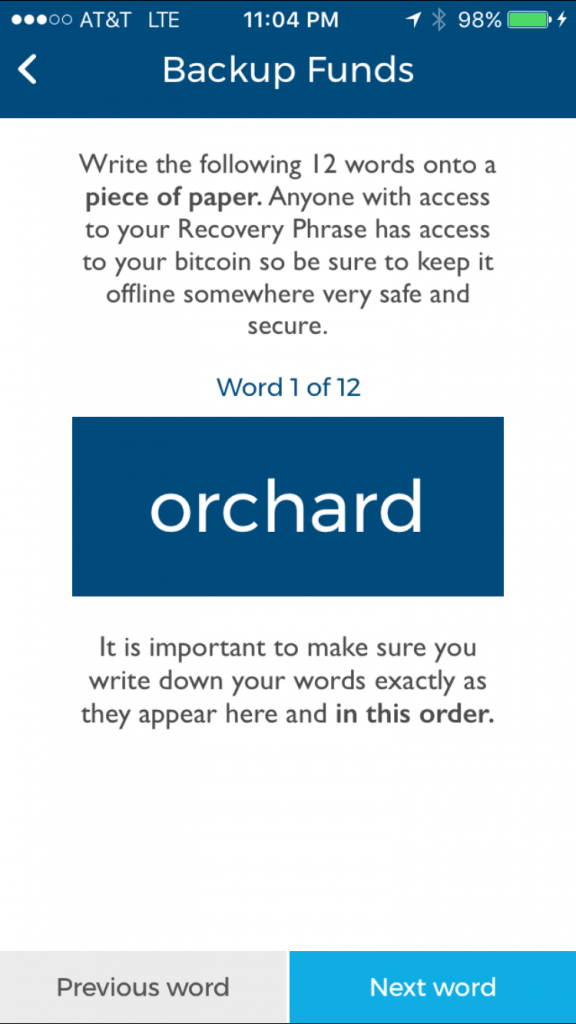
NOTE: DO NOT enter it into a password manager field or software, (i.e. a browser, or word document). This information can be accessed via malware such as CoinThief, and other Trojan viruses.
Here is a link to a SecureMac OSX/CoinThief Identification Manual and Removal Instructions that was released as a result.
After you complete writing down this 12 word phrase you will be asked to enter in 3 of those words to verify that you actually wrote them down. Enter the requested 3 words into the appropriate field and tap verify.
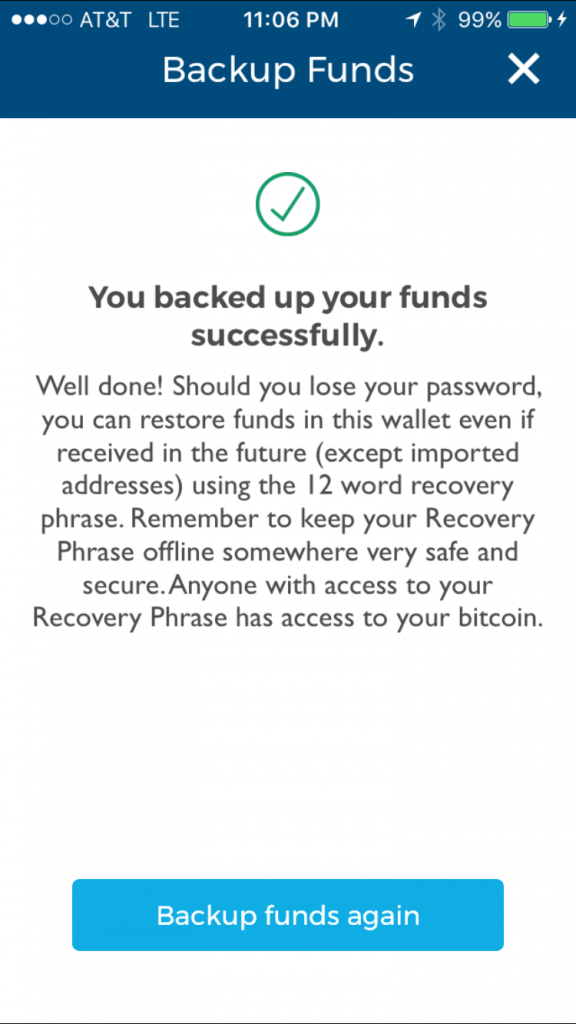
That’s it, congratulations – you have successfully backed up your wallet.
NOTE: Anyone with access to your Recovery Phrase has access to your wallet and bitcoins.
NOTE: As noted above in the setup phrase section, make sure to keep your recovery phrase in a safe, and secure place .
This is especially true if you are storing large amounts of bitcoins in breadwallet. However, we recommend using a hardware wallet like the Ledger Nano S for storing larger amounts.
The Ledger Nano S is a multi-currency hardware wallet, featuring a screen for payment validation and architect-ed around a secure element for maximum protection of your assets.
Send from Blockchain to Bank Account
Right now there is no way to “send” bitcoins directly from your Blockchain wallet to a bank account.
You will have to send bitcoins from your wallet to an exchange where you then can sell and transfer the money to your bank account.
Below are two sites we recommend for selling your bitcoins:
Coinbase: Coinbase is a digital asset exchange company headquartered in San Francisco, California. With more then $6 billion in digital currency exchanged, operating in 33 counties and serving more than 6.5 million customers, Coinbase is largely considered the number one digital currency exchange in the world.
Kraken: Kraken is a prominent leveraging bitcoin exchange operating in Canada, the EU, Japan, and the US, and “the world’s largest bitcoin exchange in euro volume and liquidity”. It currently has oversight of Mt. Gox claims for lost bitcoins.
Blockchain vs. Coinbase
It’s hard to directly compare Blockchain wallet and Coinbase.
Coinbase is more of an exchange than a wallet. Even though it is considered a very safe exchange to temporarily store small amounts of bitcoins, we strongly recommend you NOT use it to store any significant amount. When you use Coinbase, Coinbase controls your private keys, and especially functions as a bitcoin bank. Storing your bitcoins with Blockchain wallet means you control your private keys.
Blockchain vs. breadwallet
breadwallet primarily focuses on ease of use, security, and privacy. Private keys are stored in a hardware-encrypted-on-device-key, meaning breadwallet connects directly to the bitcoin network via a [simplified pa.
An SPV client is a bitcoin implementation that does not verify everything. Instead, it relies on either connecting to a trusted node, or putting its faith in high difficulty algorithms as a proxy for proof of validity. There are no proprietary servers that can go down causing you to lose your bitcoins.
Based on it’s simplicity for users, we think breadwallet is the better choice if the only function you need to do is send and receive bitcoins. However, if you demand a wallet with a wider spectrum of features and functions that is still very user friendly, you should check out Blockchain.
Blockchain vs. Mycelium
Mycelium is among the more popular bitcoin wallets on iOS.
Blockchain wallet features and usability is very similar to Mycelium. It is oriented around power users, offering many more features in exchange for a few trade-offs including security, privacy and ease of use.
As part of a recent update, Mycelium has begun to support bitcoin hardware wallet KeepKey (available for purchase on Amazon).
KeepKey works with the wallet software on your computer by taking over the management for private key generation, private key storage, and transaction signing.
KeepKey generates private key’s using its hardware-based random number generator, combined with randomness provided by your computer. Once your private key is generated, you are given a one-time opportunity to write down a backup of you KeepKey in the form of a twelve-word recovery sentence.
Your private key is stored securely on your KeepKey, never leaving the device. Your KeepKey is PIN-protected, which renders it useless even if it falls into the wrong hands.
We think the advanced features in Mycelium may confuse some users, so if simplicity is your goal, Blockchain has the slight edge. Like Blockchain, if you are familiar with the bitcoin space and want more features, then give Mycelium a look.
How to Transfer Bitcoins from Coinbase to Blockchain
Coinbase is the most popular exchange in the US. Since Blockchain is one of the most popular iPhone wallets, it’s no surprise we get asked how to send bitcoins from Coinbase to Blockchain.
The team at Blockchain has made this transfer easy to complete.
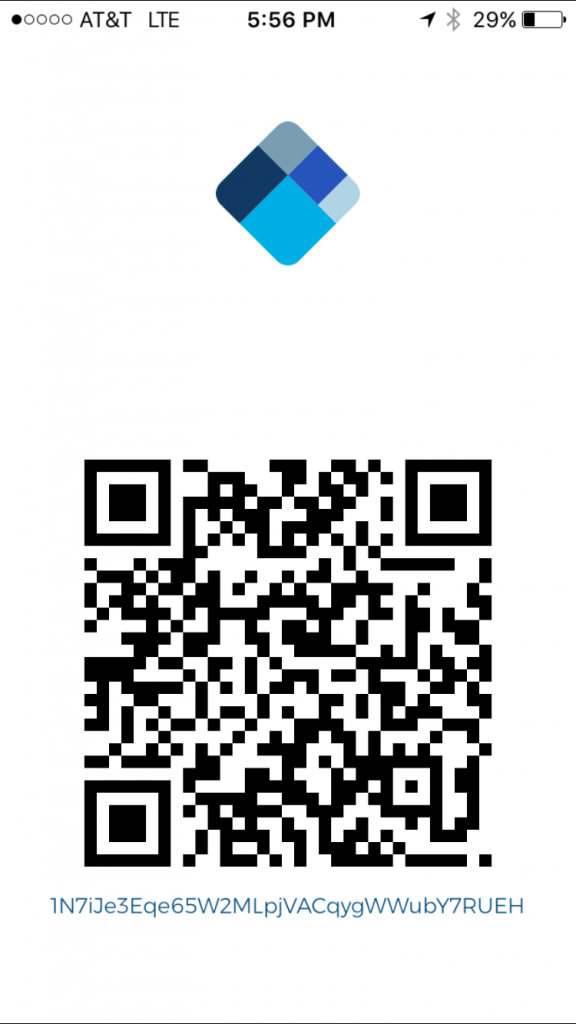
Simply open Blockchain on your iPhone, use the quick “Swipe to Receive” option and swipe left on your screen. The next page that shows your address, it should look like the screen below:
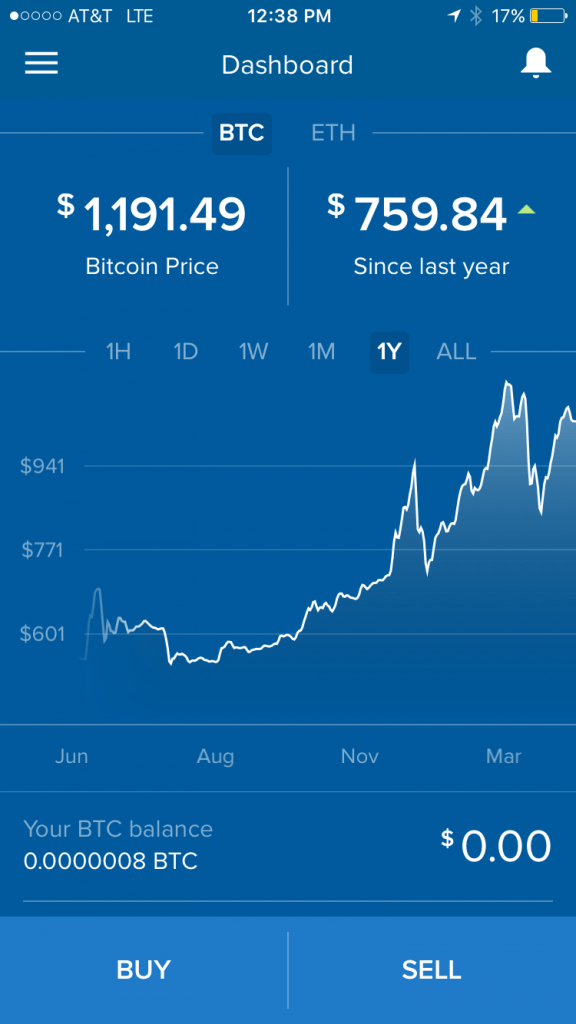
Now, login to your Coinbase account, it will take you to the “Dashboard” screen.
Next, tap the stacked horizontal lines in the upper left hand corner, this will open your wallet options tab.
After, tap the ‘My Wallet’ button icon, it is highlighted in the picture below:

On the next page, you will find two small icons in the upper right hand corner of the screen, one to scan to a QR code, and another of a paper airplane. Both will take you to the send or request screen.
Using the QR code method, you can either scan your Blockchain address code by taking a picture of it as seen below:
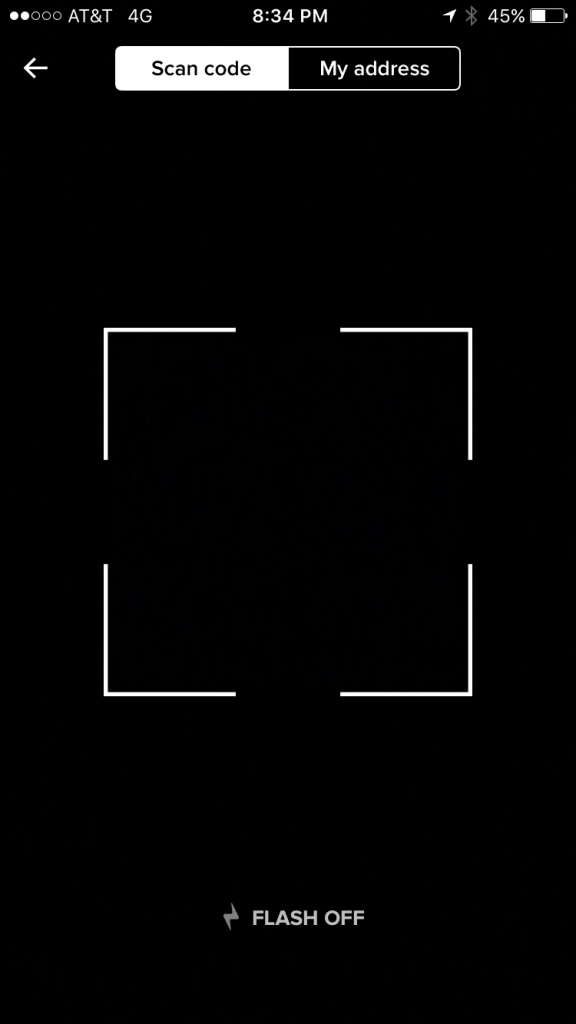
Or the “My address” button highlighted in white below:
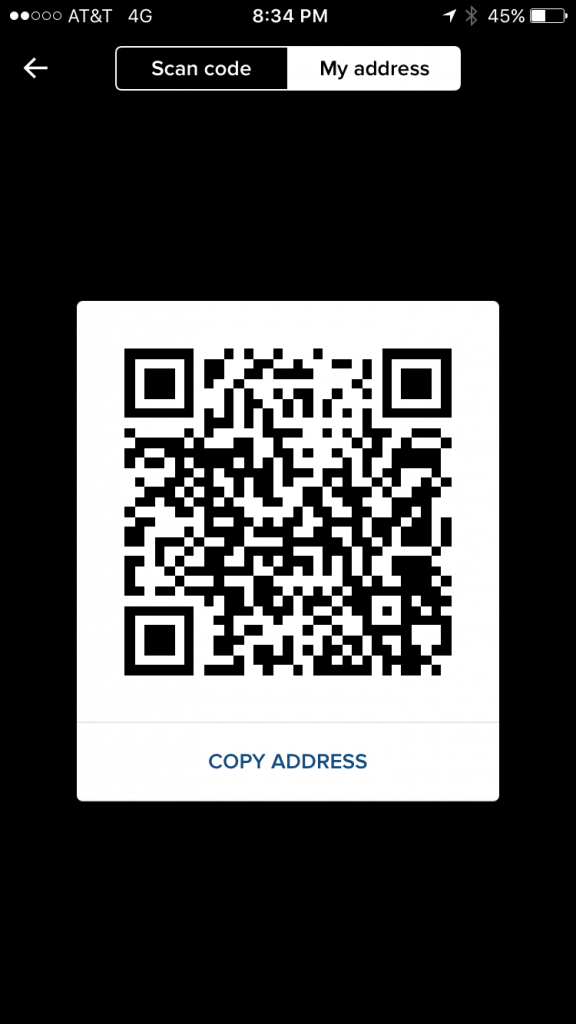
Tap the “COPY ADDRESS” button you see above. The “COPY ADDRESS” field will flash “COPIED”.
Or you can tap the “paper airplane” icon instead, and it will also take you to the Send or Request screen:
From there, just enter the amount you want to send or request and press the “SEND” button in the bottom left hand corner of the screen:

Next, enter your email or Blockchain address into the “[email protected]” field, you may also add a note to your transaction.
Finally, tap “Send” in the upper right hand corner and that’s it!
The bitcoins from Coinbase should be on their way to your Blockchain.
Blockchain Support
Blockchain has a detailed FAQ on their website that should help answer most users basic questions.
For all further inquiries, you can contact the support team directly here.


")


